
Quick Start Guide
Medit i900 Mobility
Medit i900 Mobility
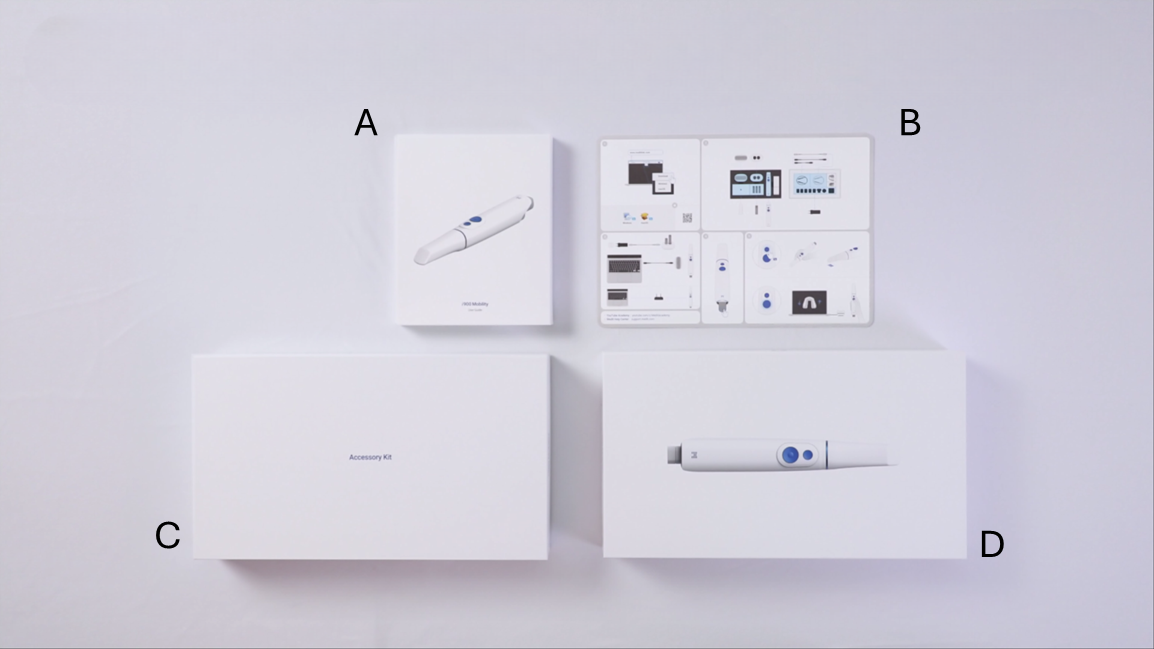
A. User Guide / B. Quick Guide / C. Accessory Package / D. Main Package
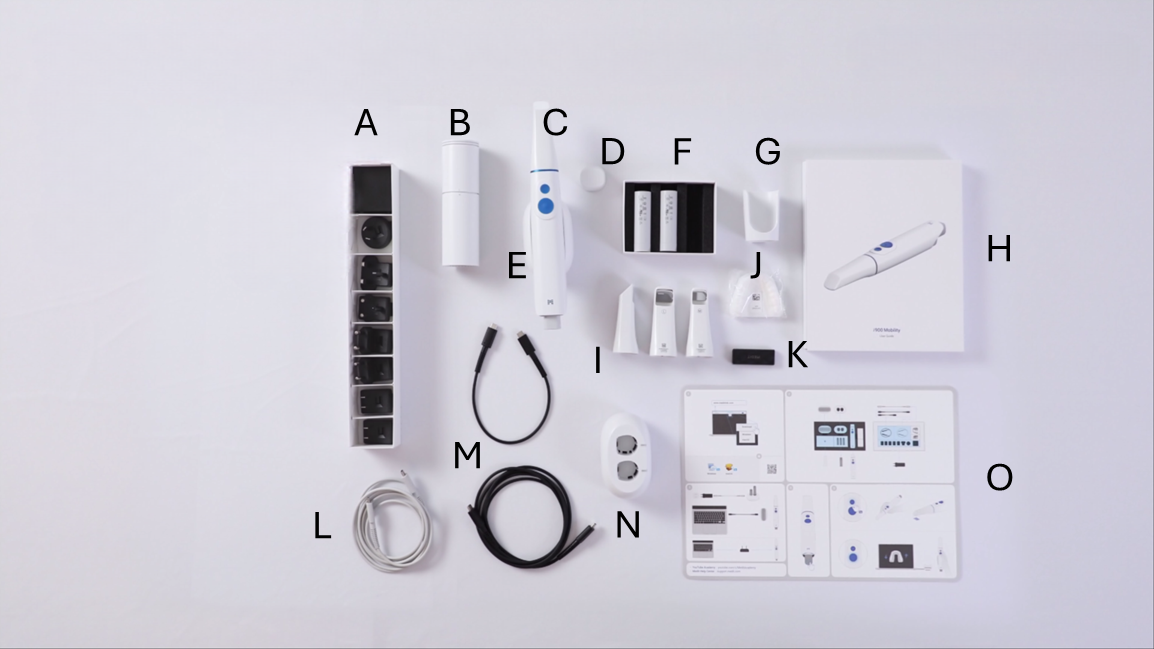
A. Power Adapter 7 Package / B. Calibration Tool / C. i900 Mobility Handpiece / D. i900 Mobility Handpiece Cover / E. Desktop Cradle (Wireless Hub) / F. Rechargeable Battery Package (3ea) / G. Wall Mount Holder / H. User Guide / I. Reusable Tip Package (L-2ea, M-2ea) / J. Practice Model / K. USB Flash Drive / L. Charging Cable / M. Power Delivery Cable Package (2m/30cm) / N. Battery Charger / O. Quick Guide
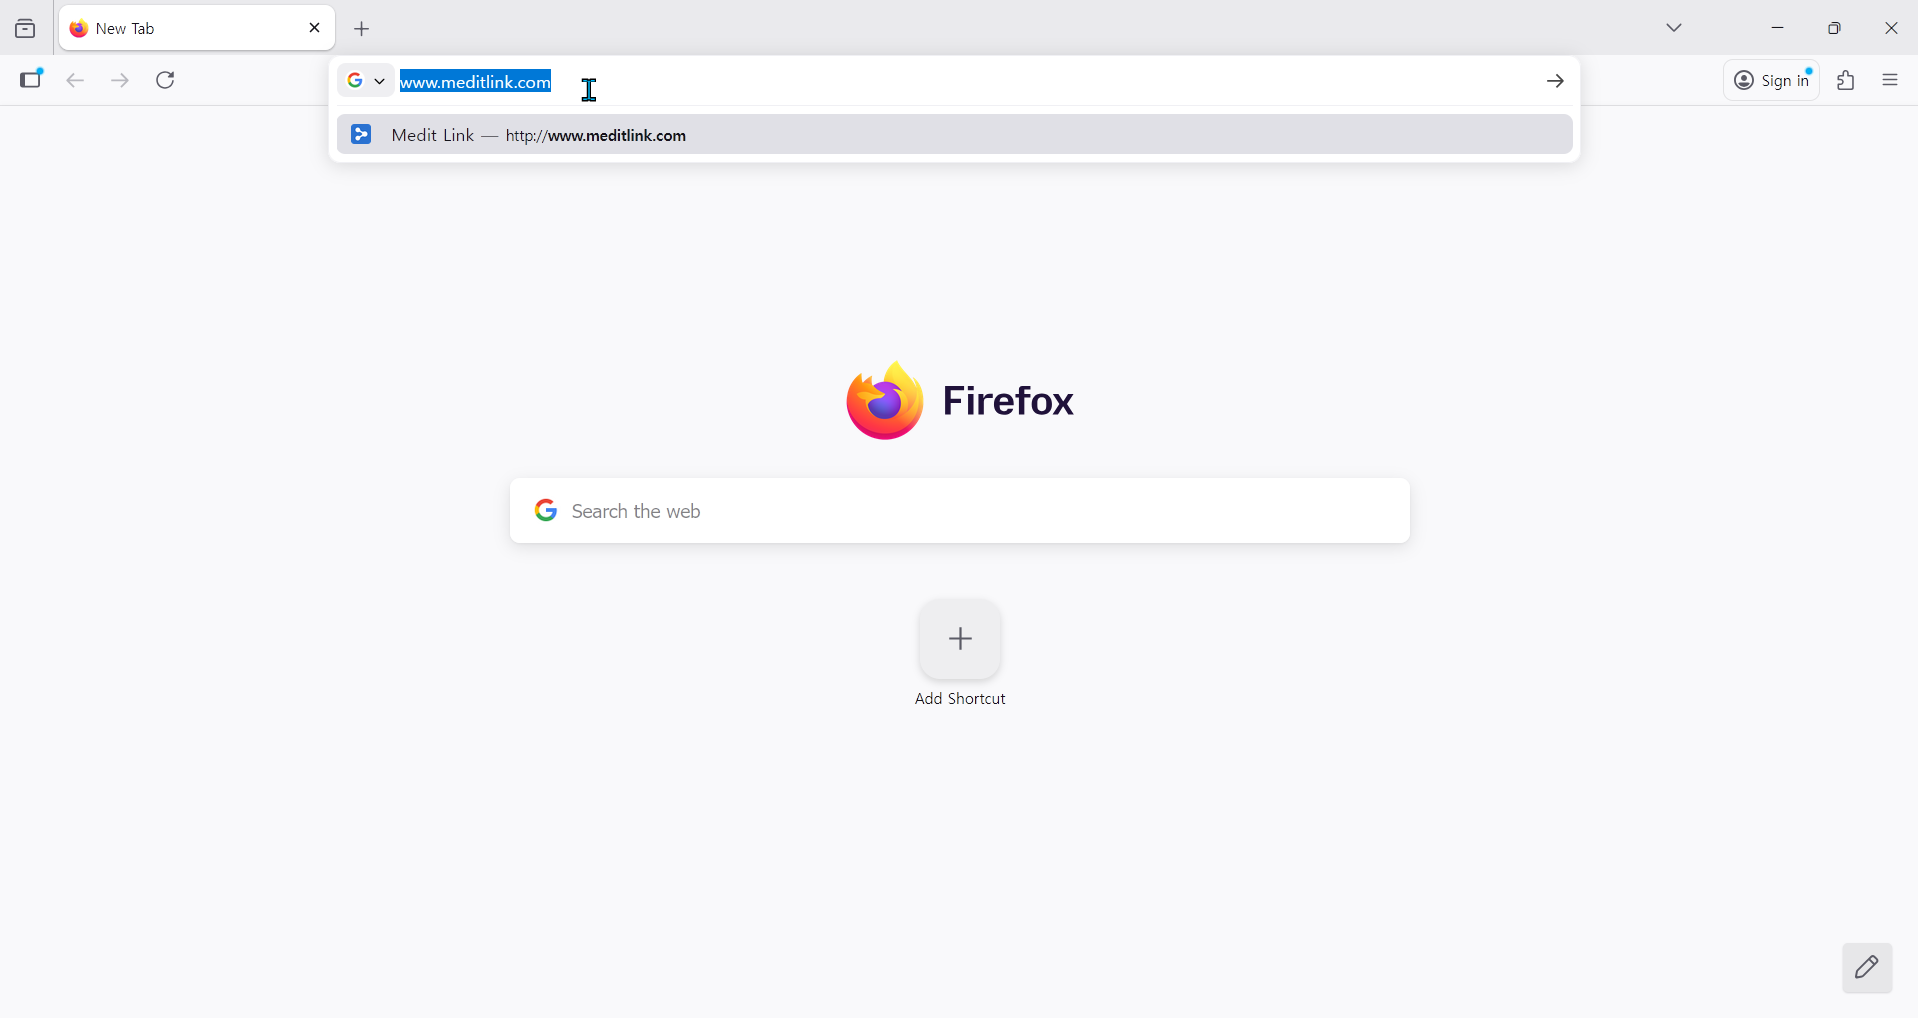
2-1. Open your web browser and go to www.meditlink.com.
2-2. Click the Login button in the top-right corner to begin the sign-up process.

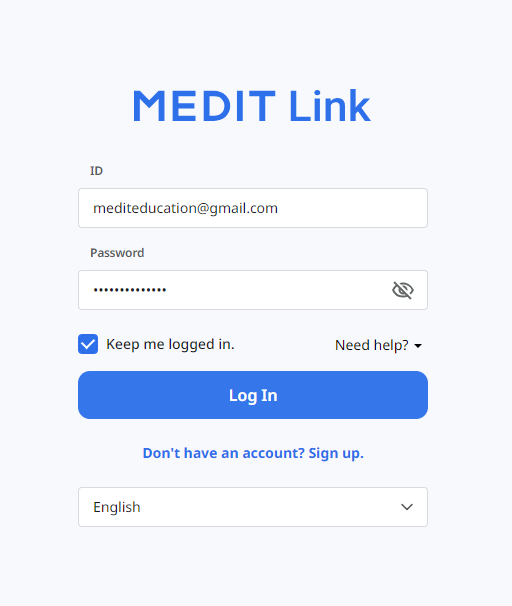
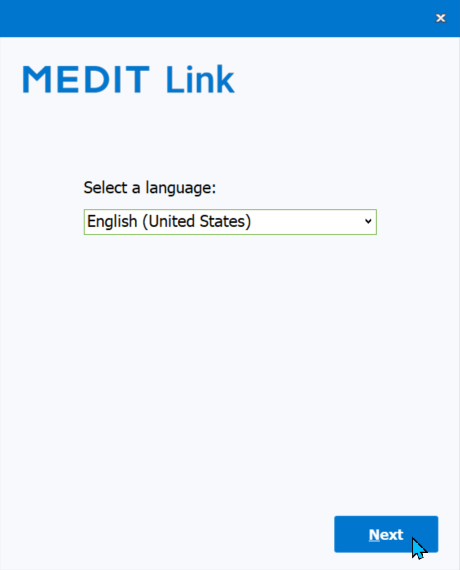
2-3. Select your preferred language, then click "Don't have an account? Sign up." to create a new account.
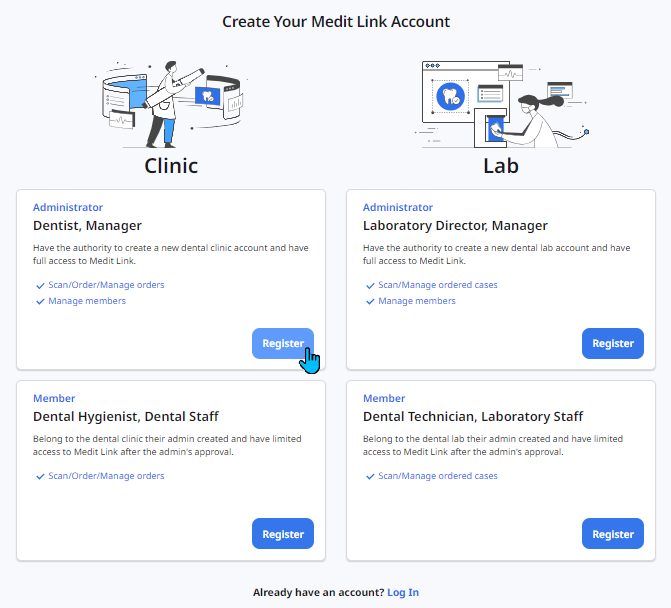
2-4. Choose your account type.
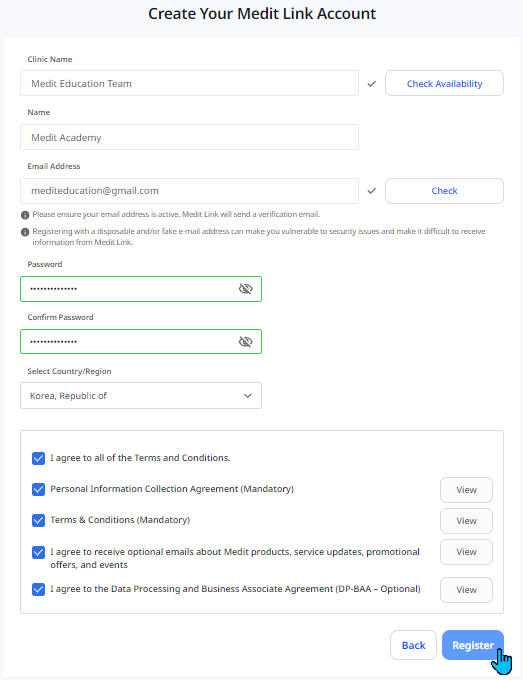
2-5. Enter your information and click Register at the bottom of the page.
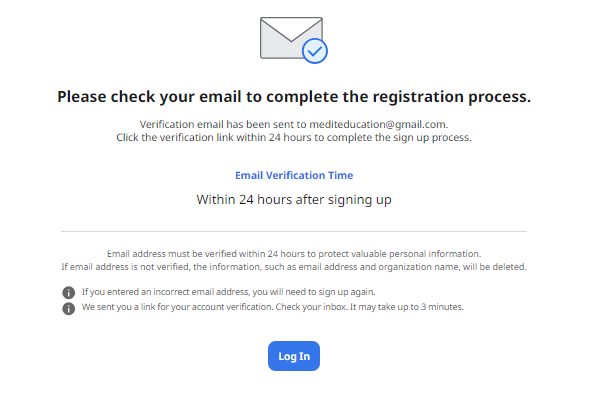
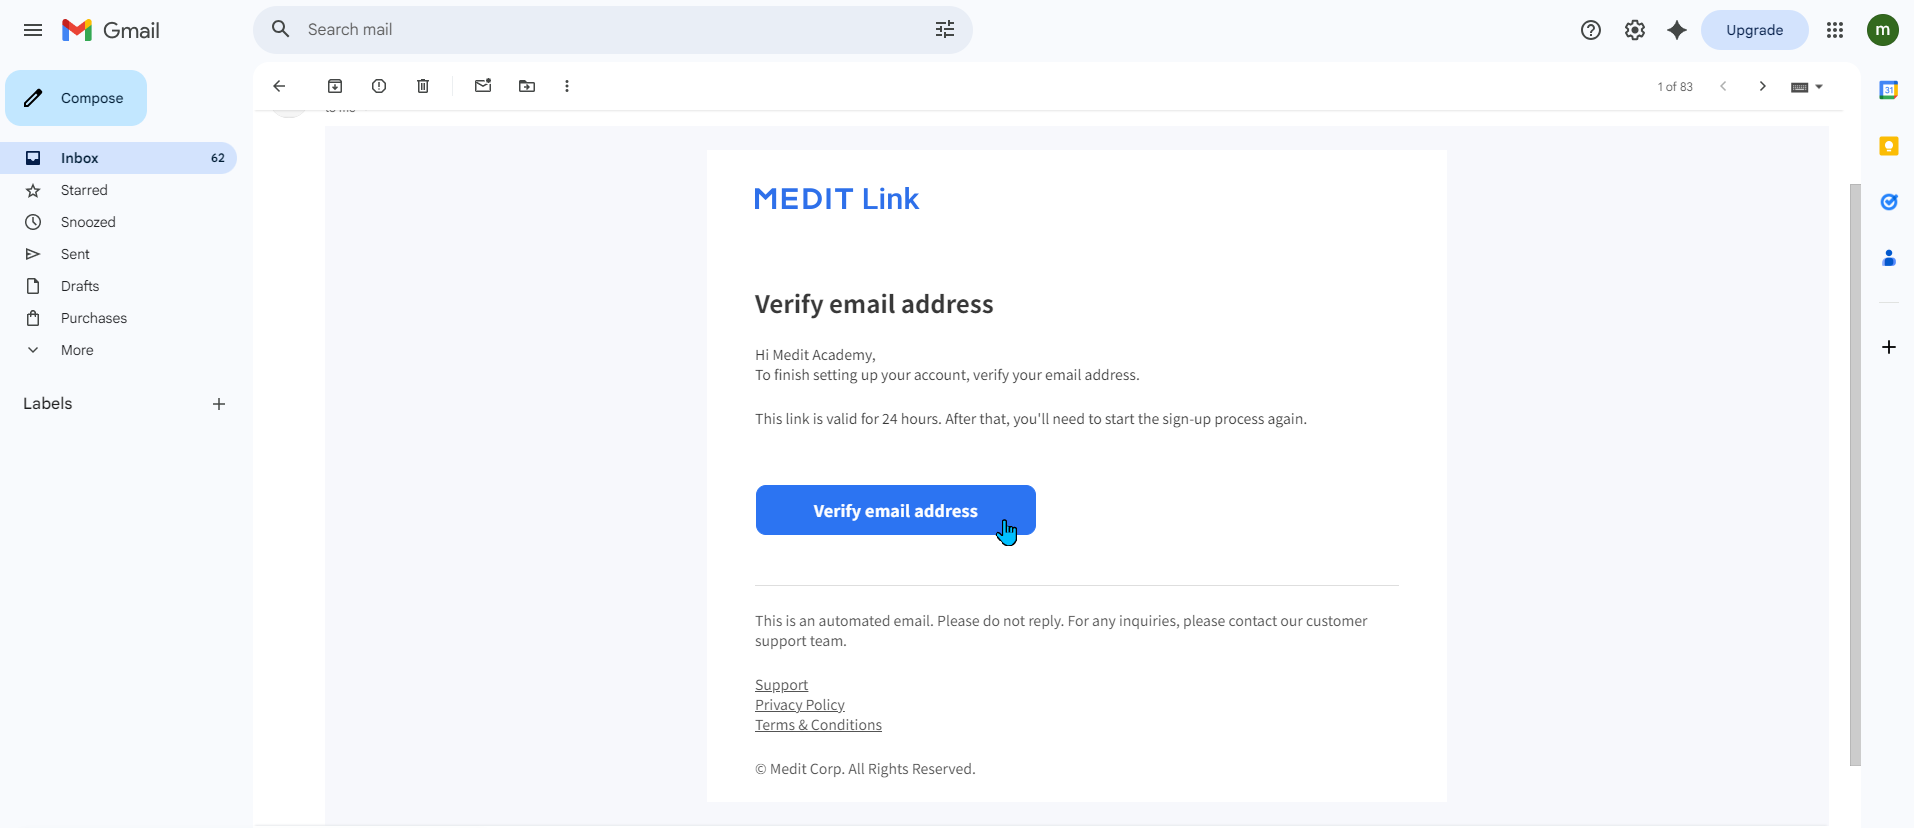
2-6. Open the verification email sent to your inbox and click the Verify button.
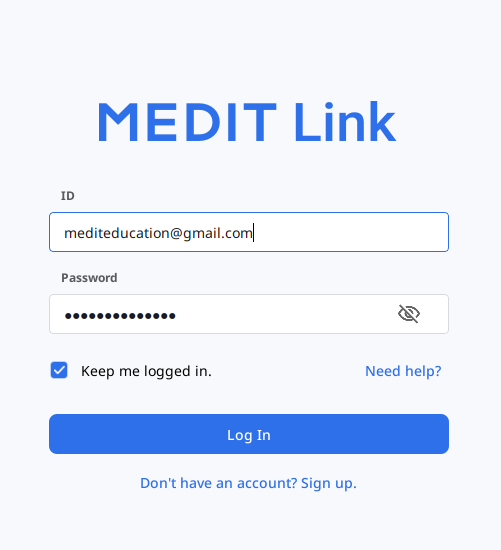
2-7. Return to the login page, enter your ID (full email address) and password, and click Log In to access the Medit Link website.
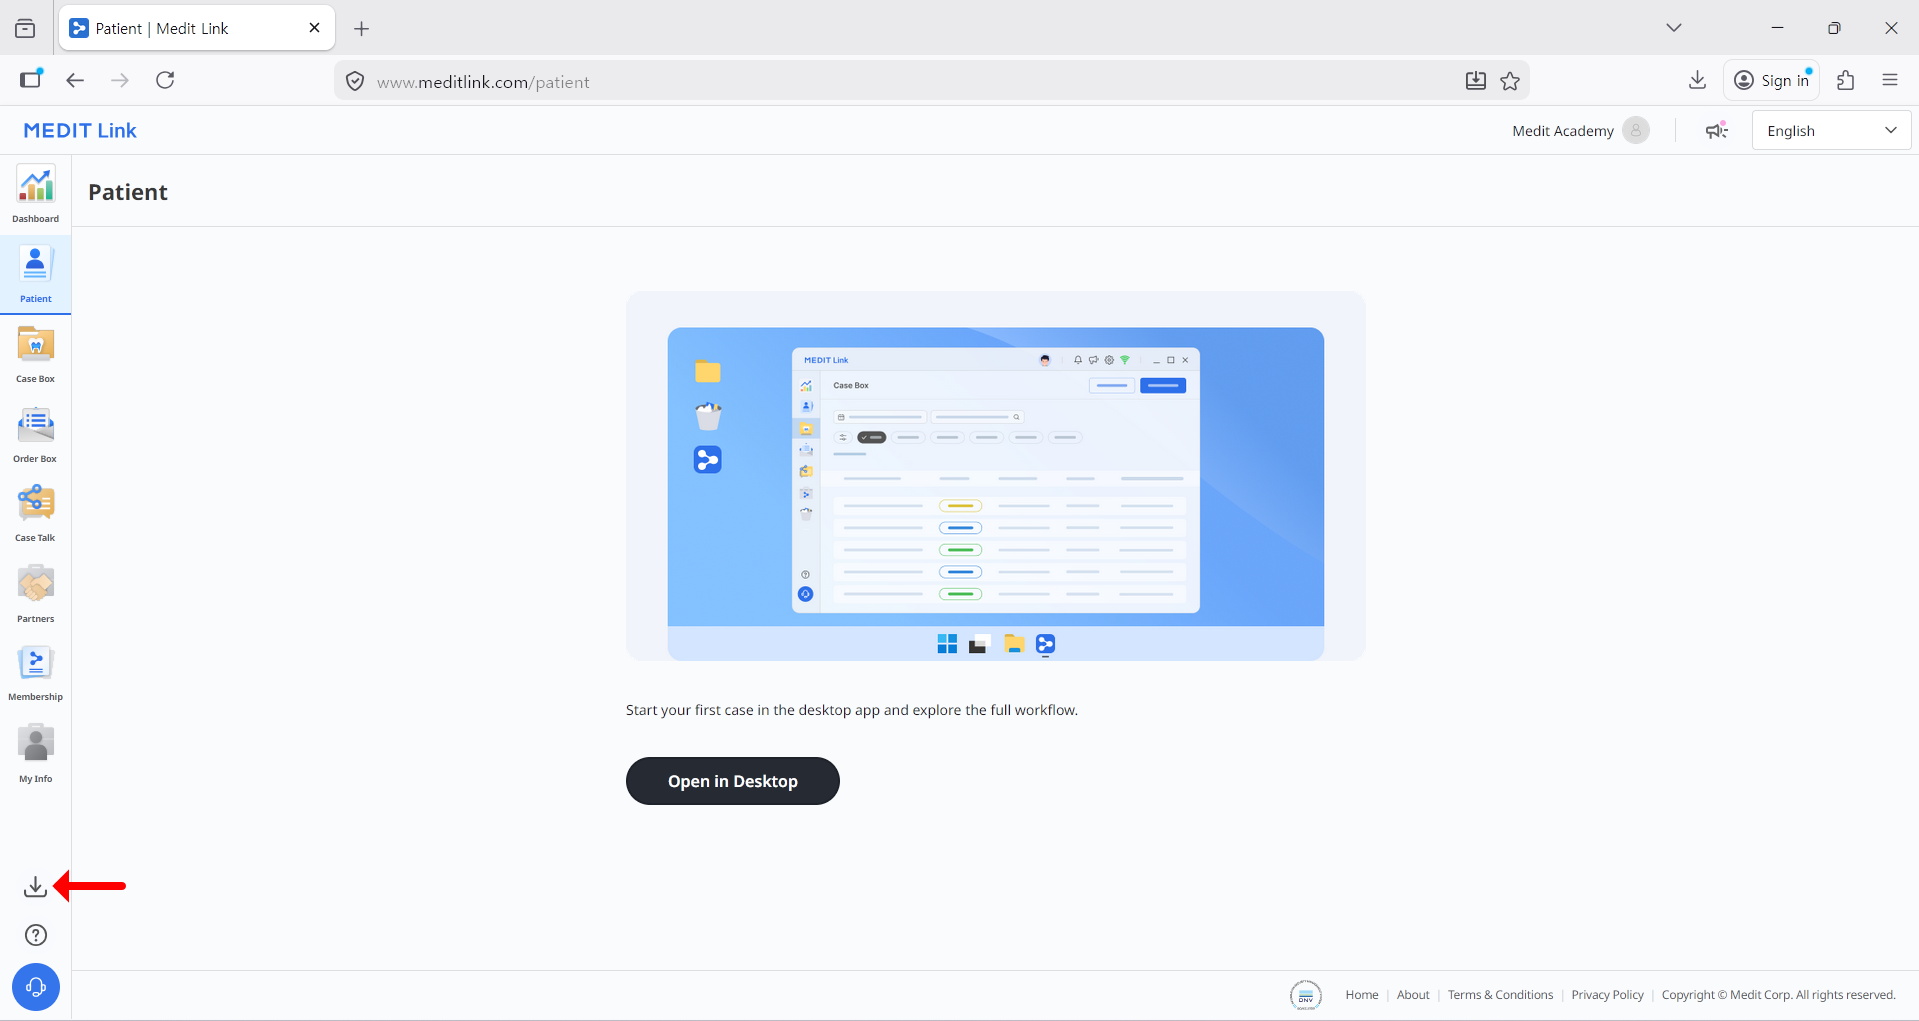
2-8. To install the Medit Link application, click the Download icon in the bottom-left corner.
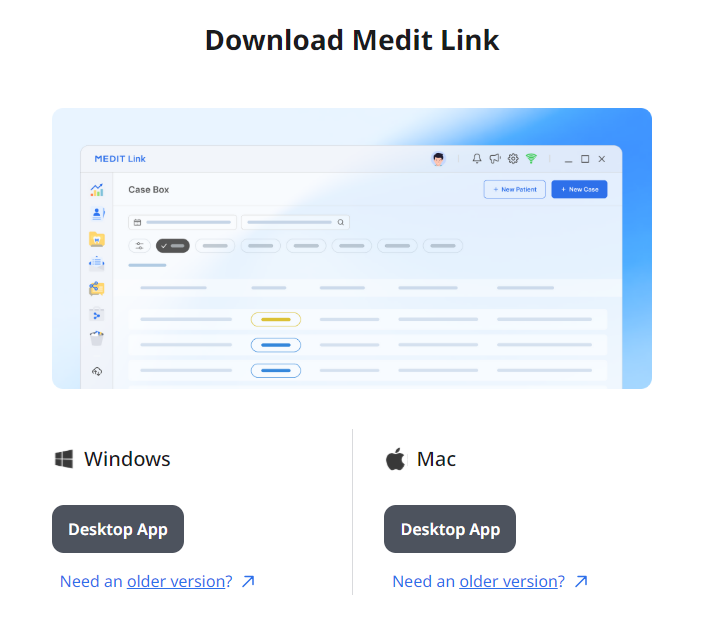
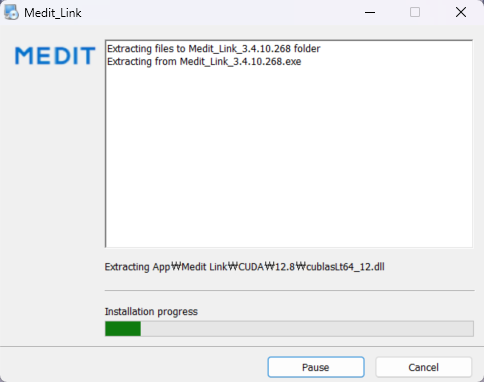
2-9. Select your operating system, download the installer, and double-click the file to begin installation.
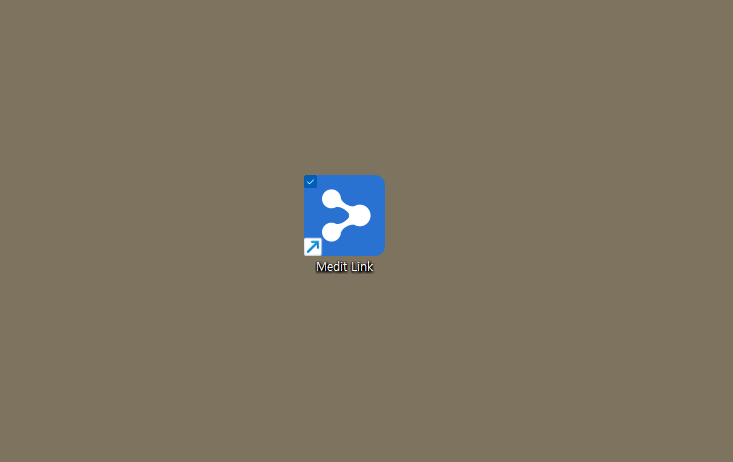
3-1. Launch the Medit Link application by clicking the Medit Link icon on your desktop.
3-2. Log in to the Medit Link application using the same ID and password you registered on the Medit Link website.
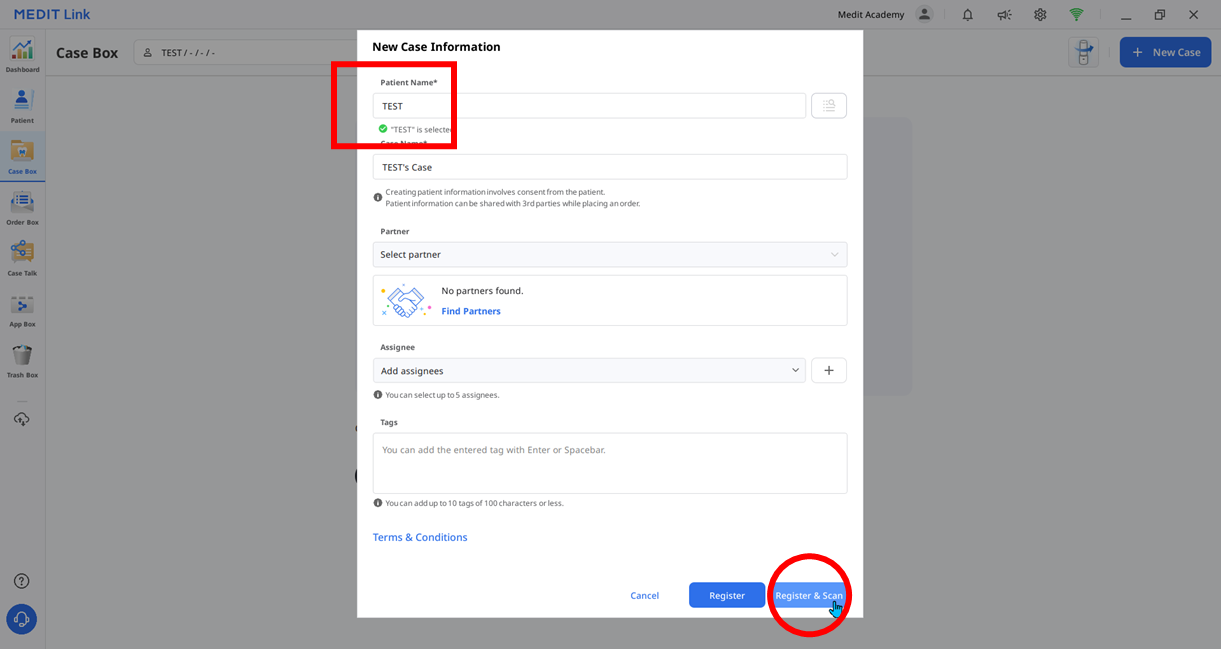
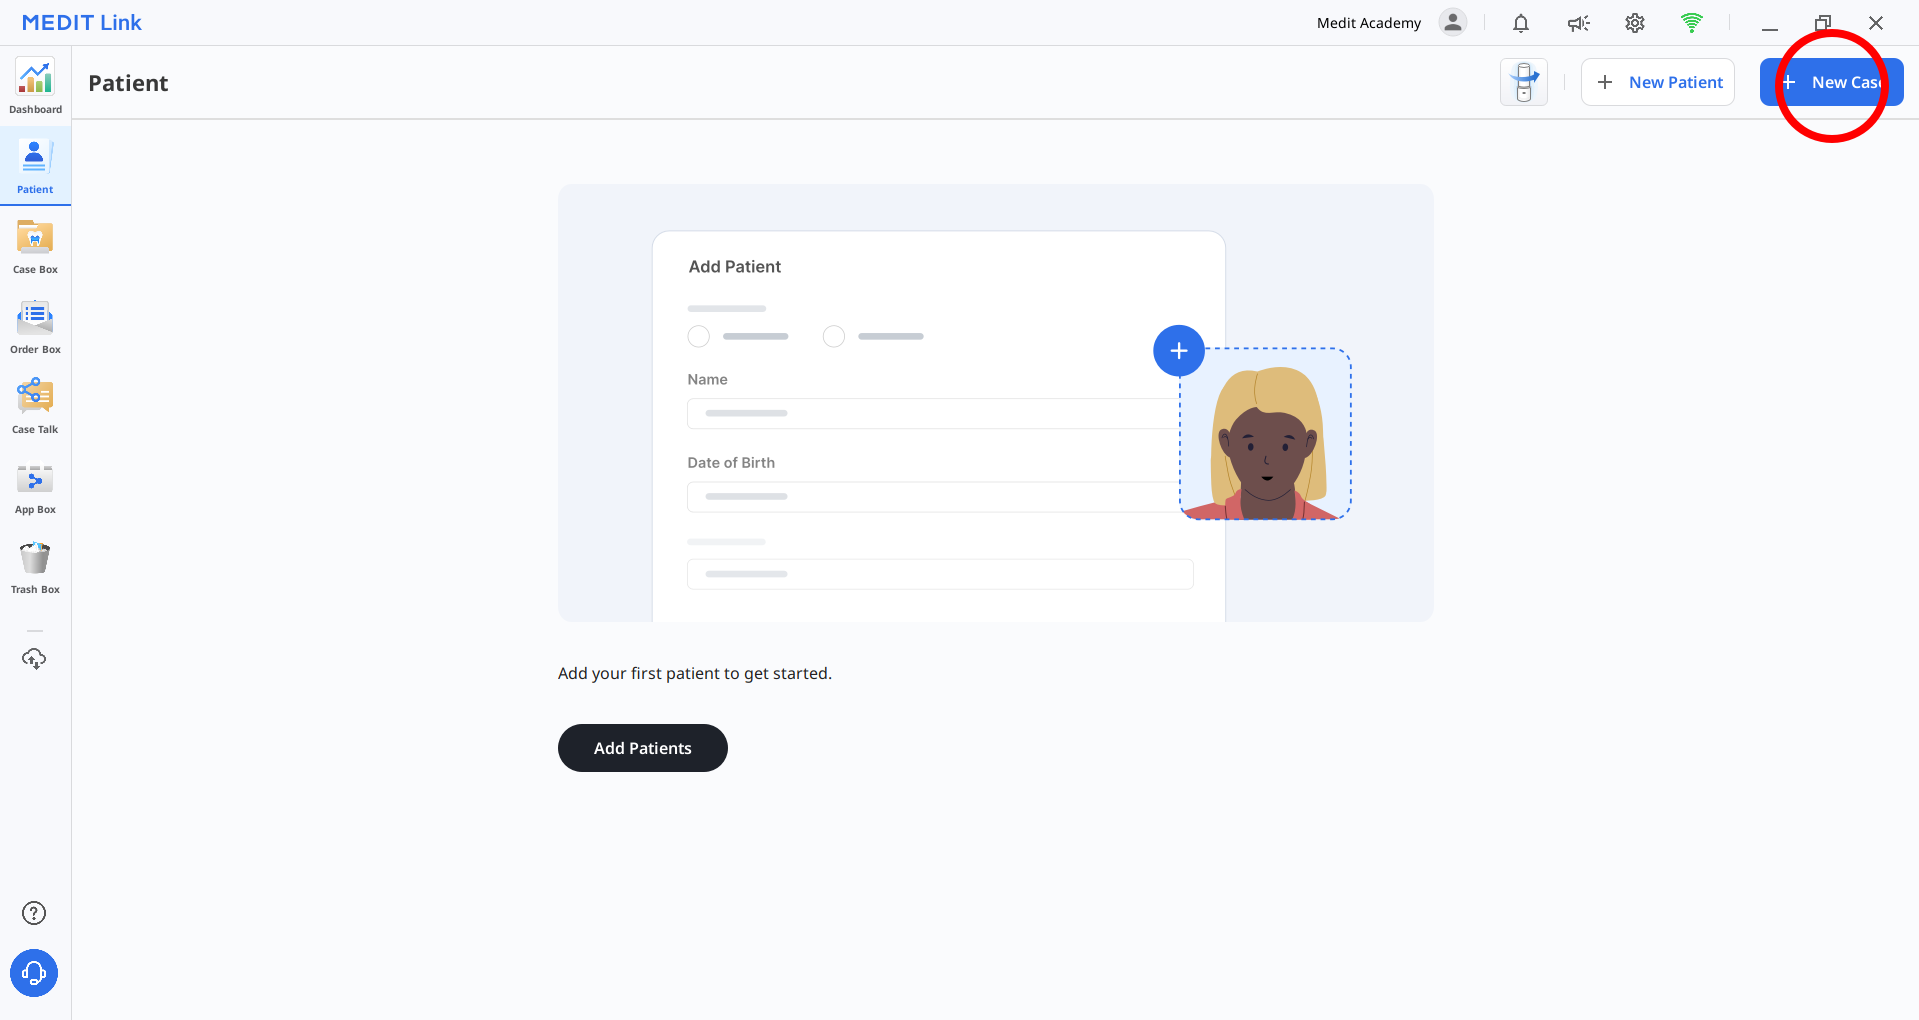
3-3. Click New Case in the upper-right corner, enter "TEST" in the Patient Name field, and then click the Register & Scan button at the bottom.
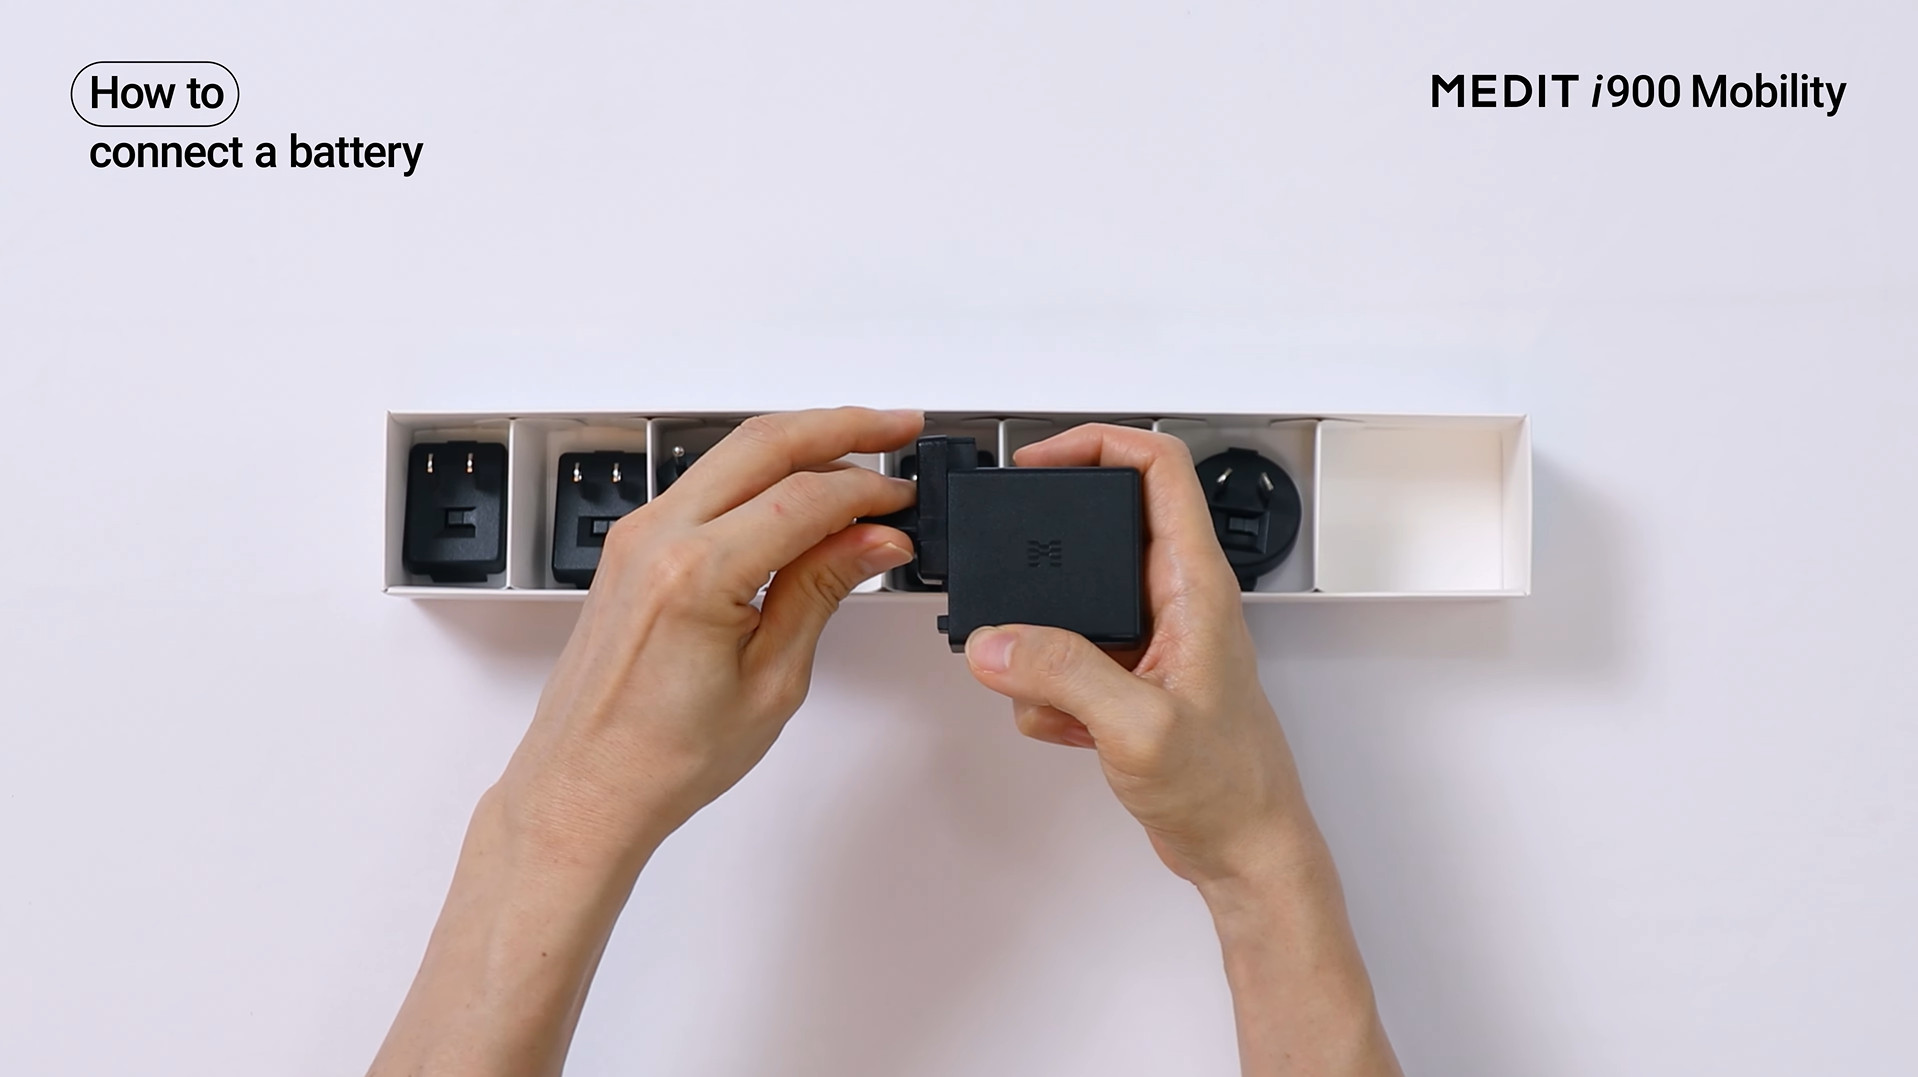
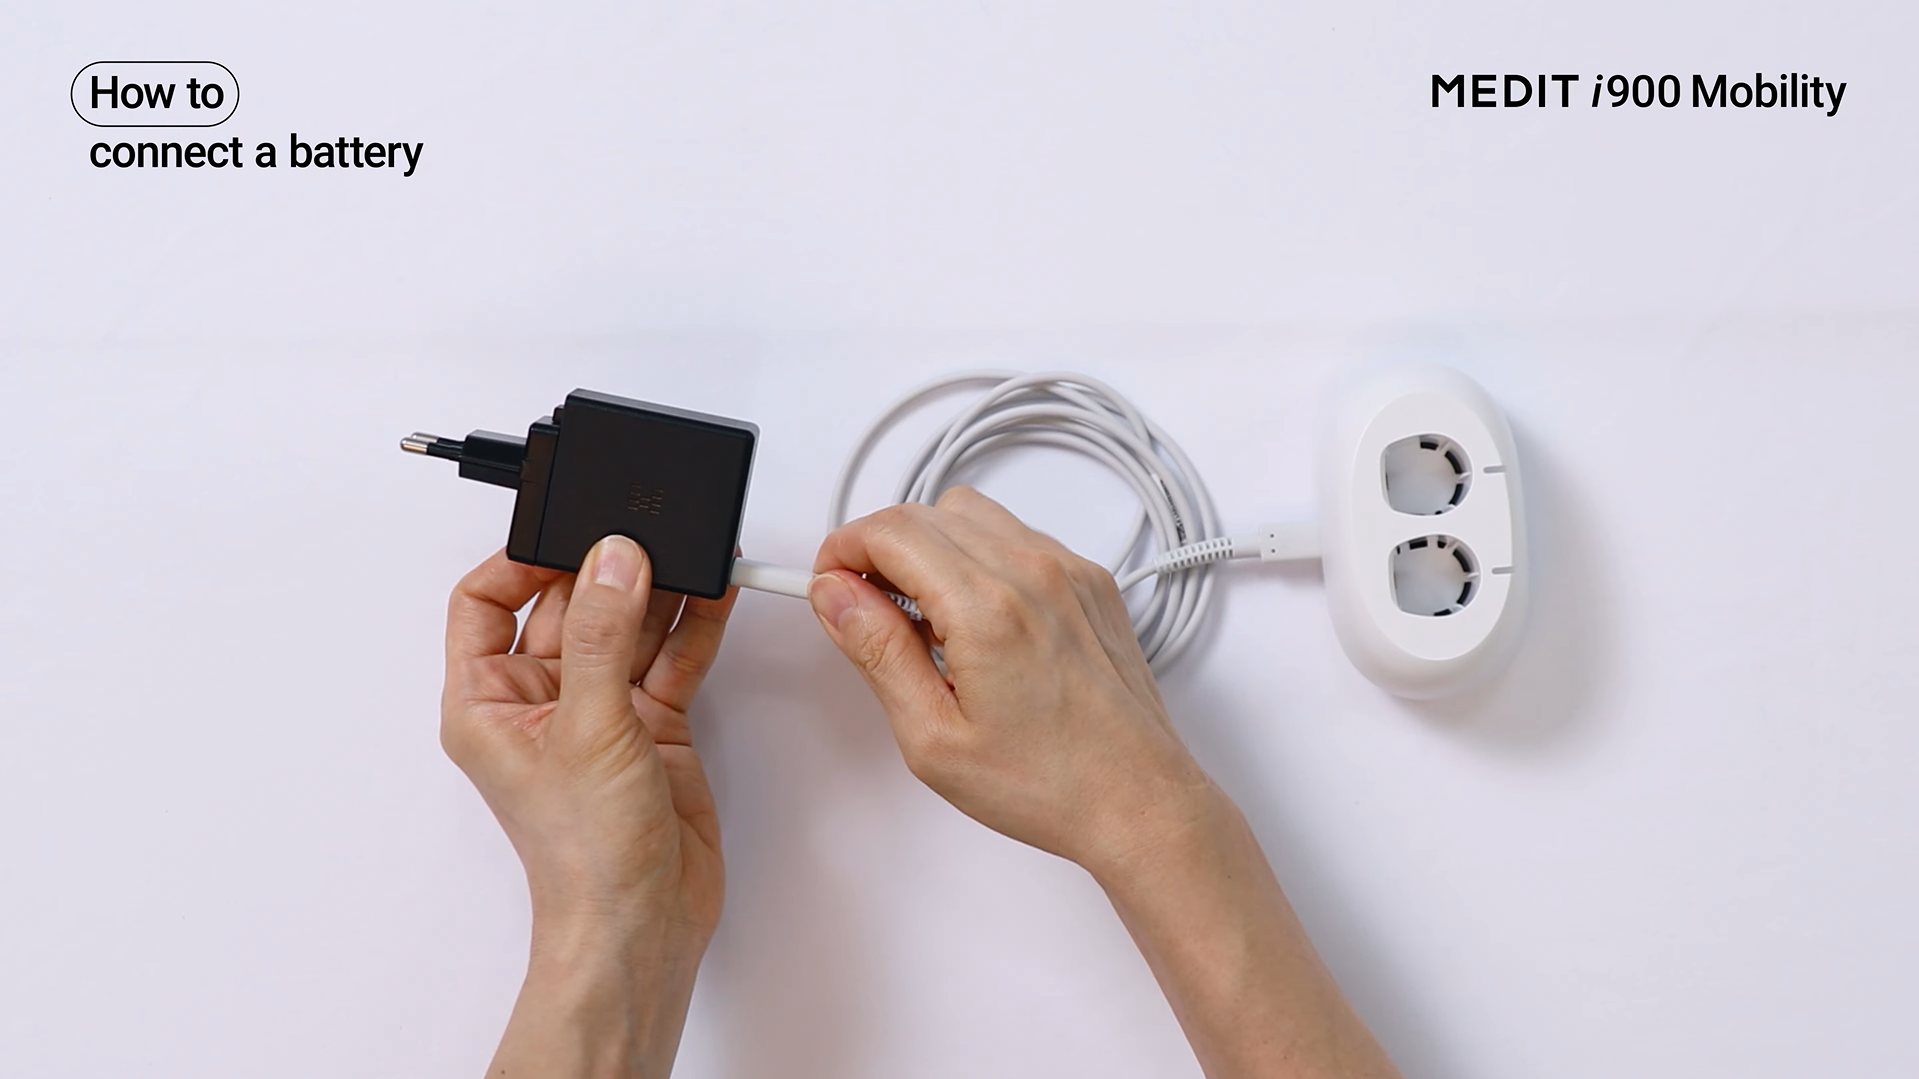
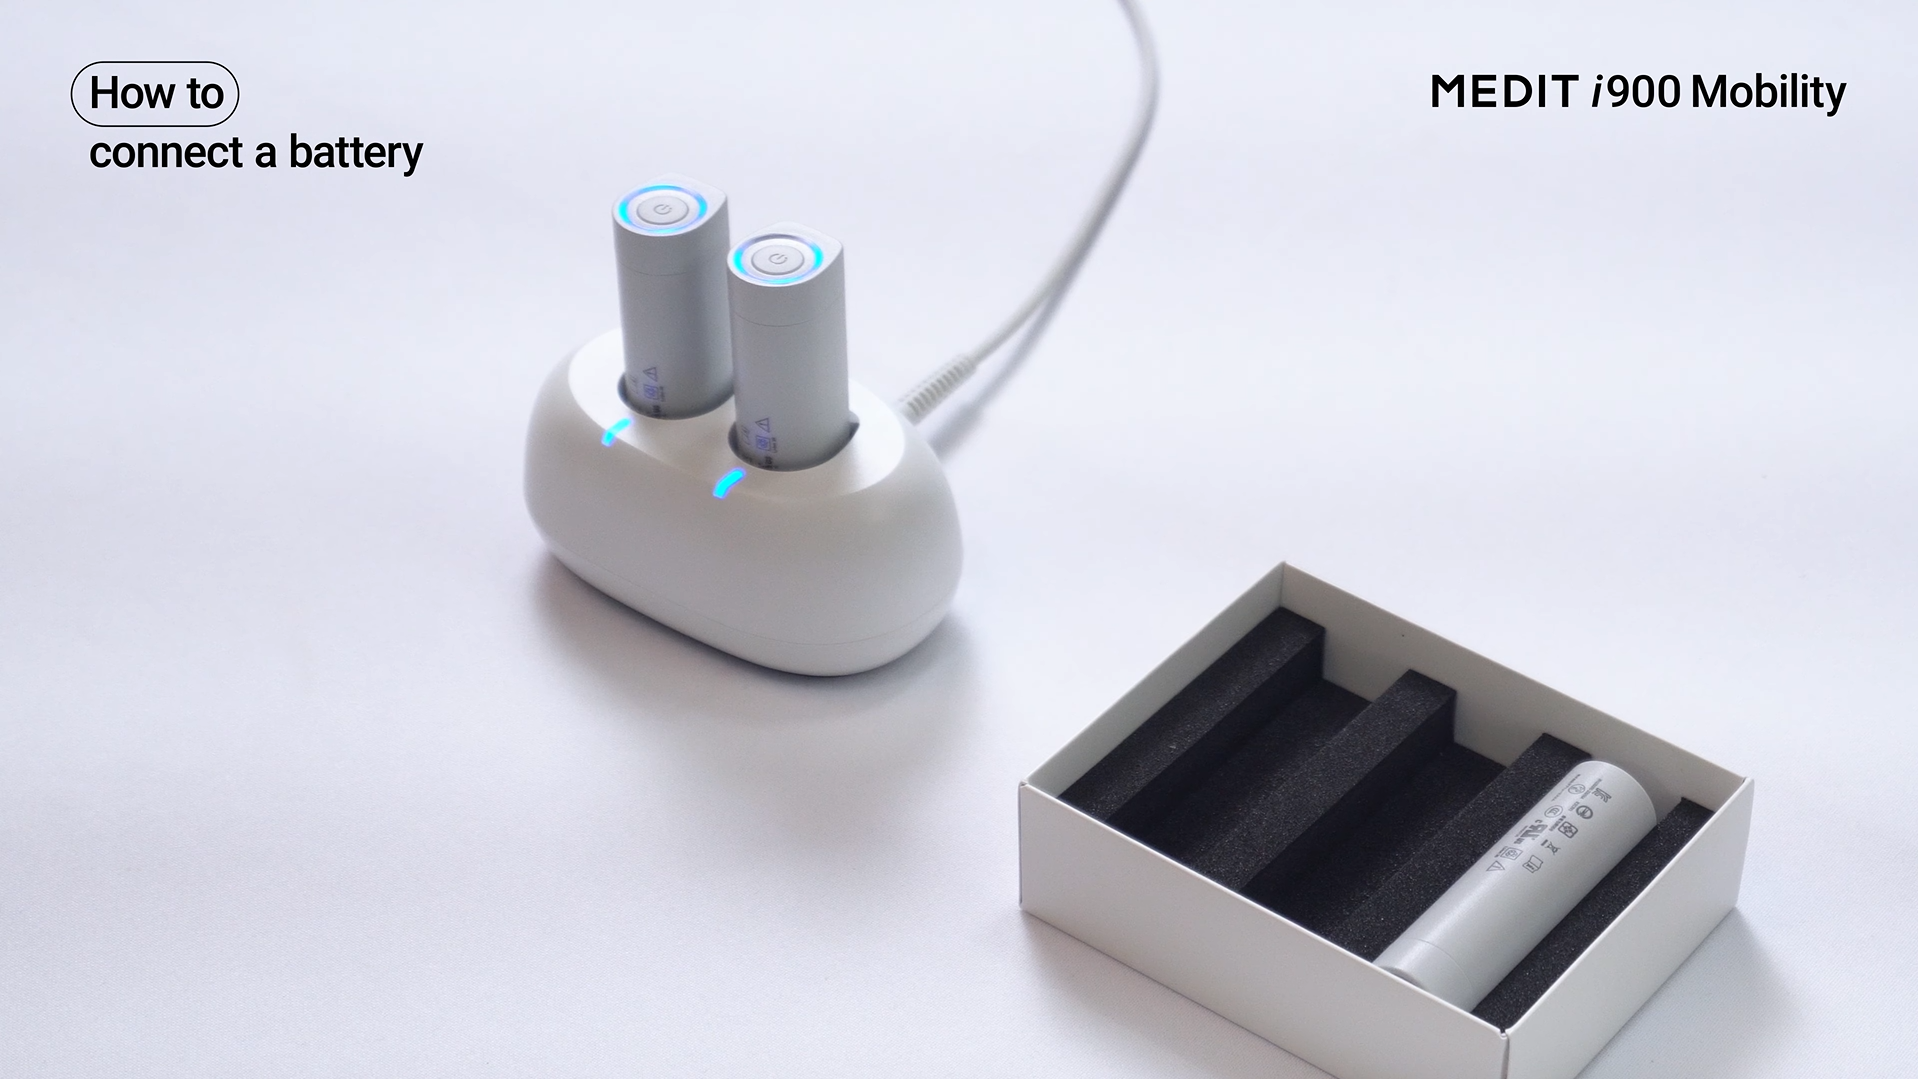
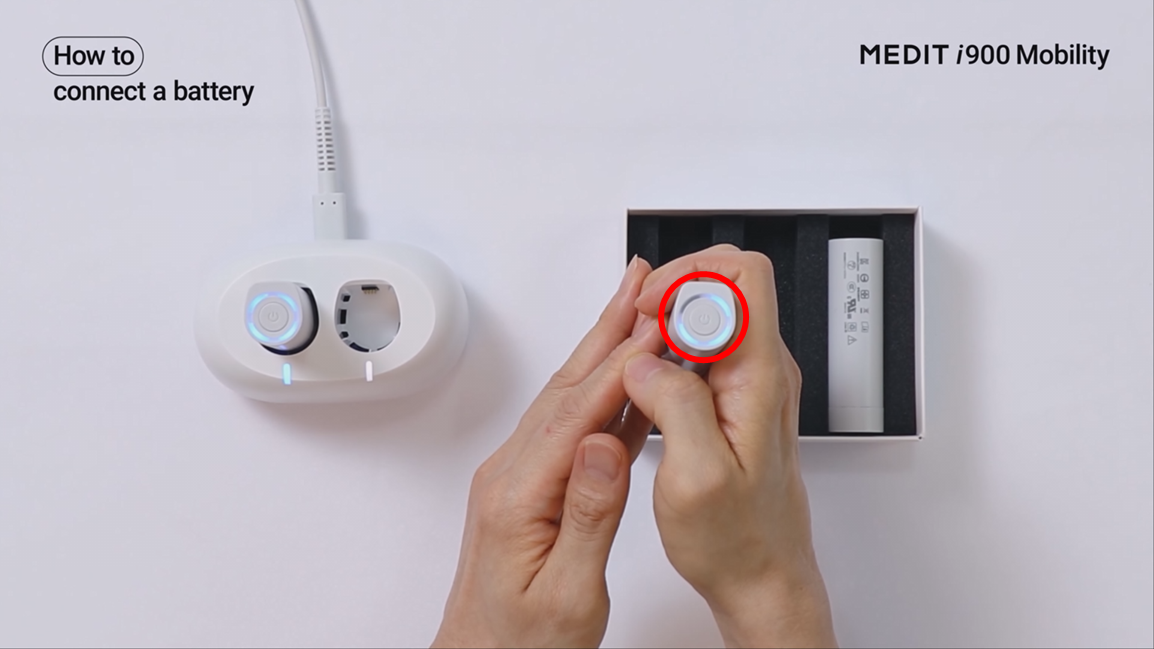
4-1. How to Set Up the Battery Charger
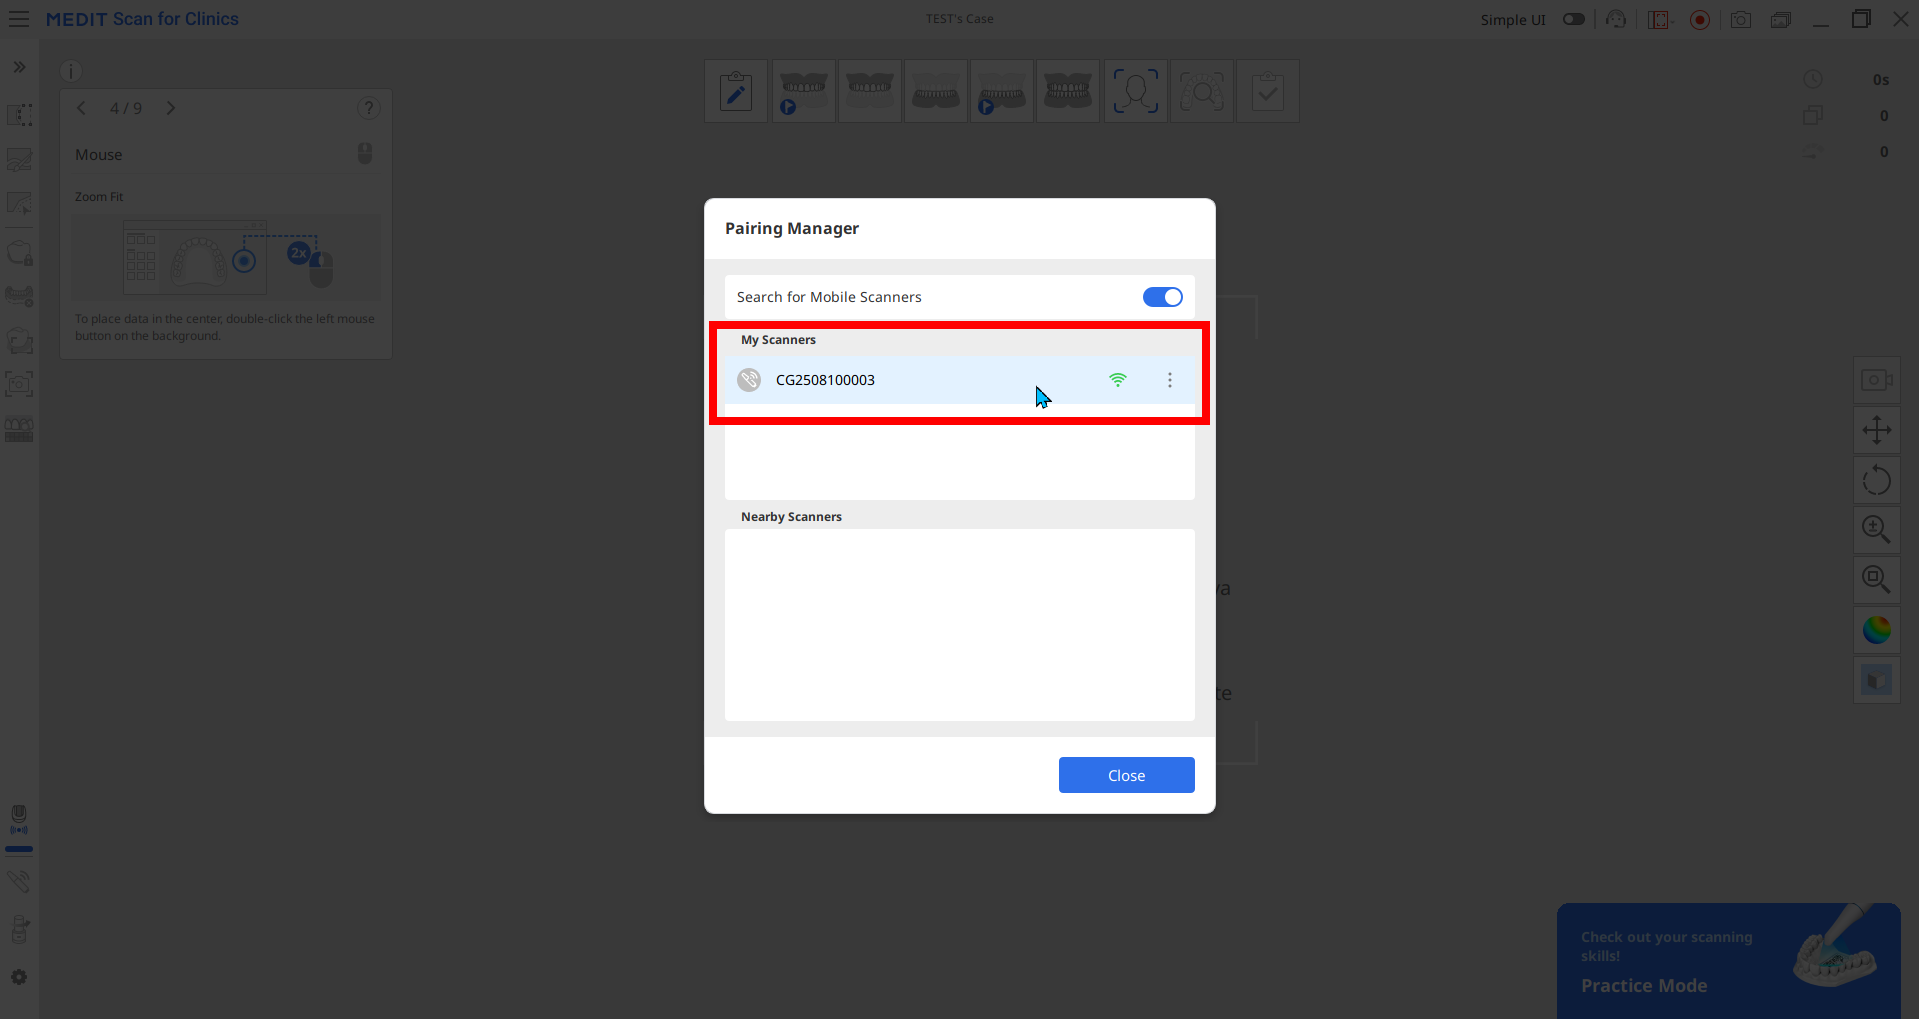
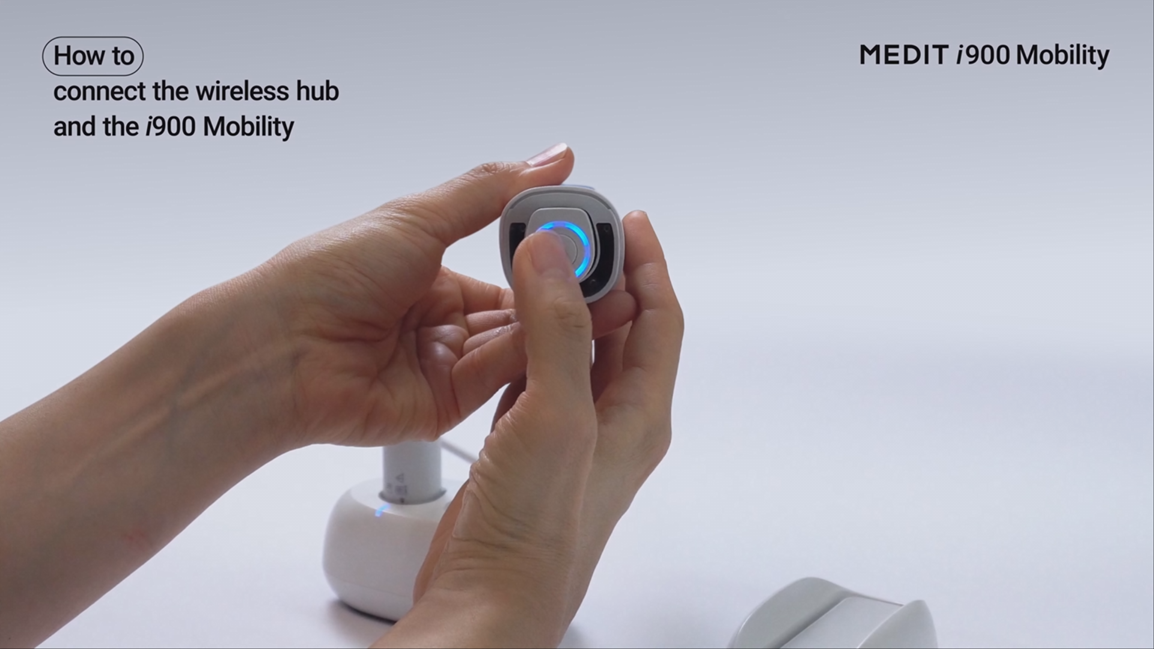
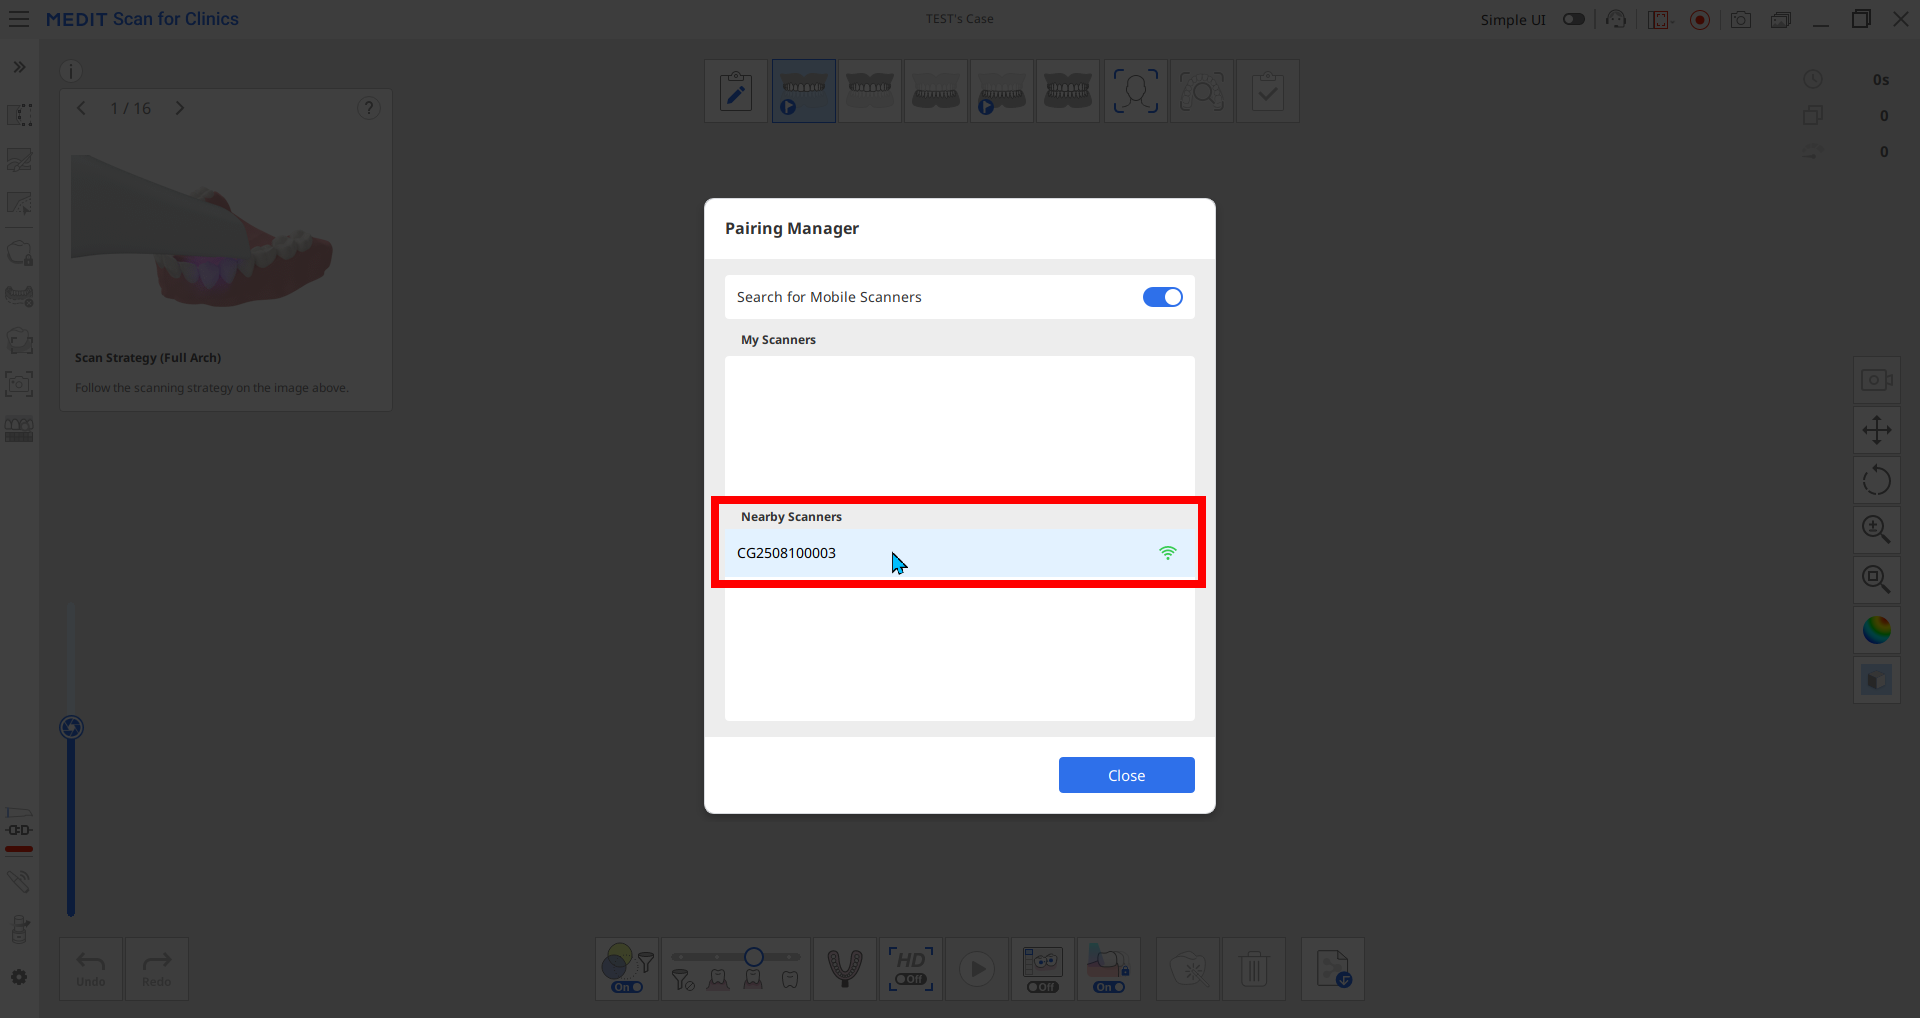
4-2. How to Set Up the PC and Medit i900 Mobility — Using the Wireless Hub (also functions as the Desktop Cradle)
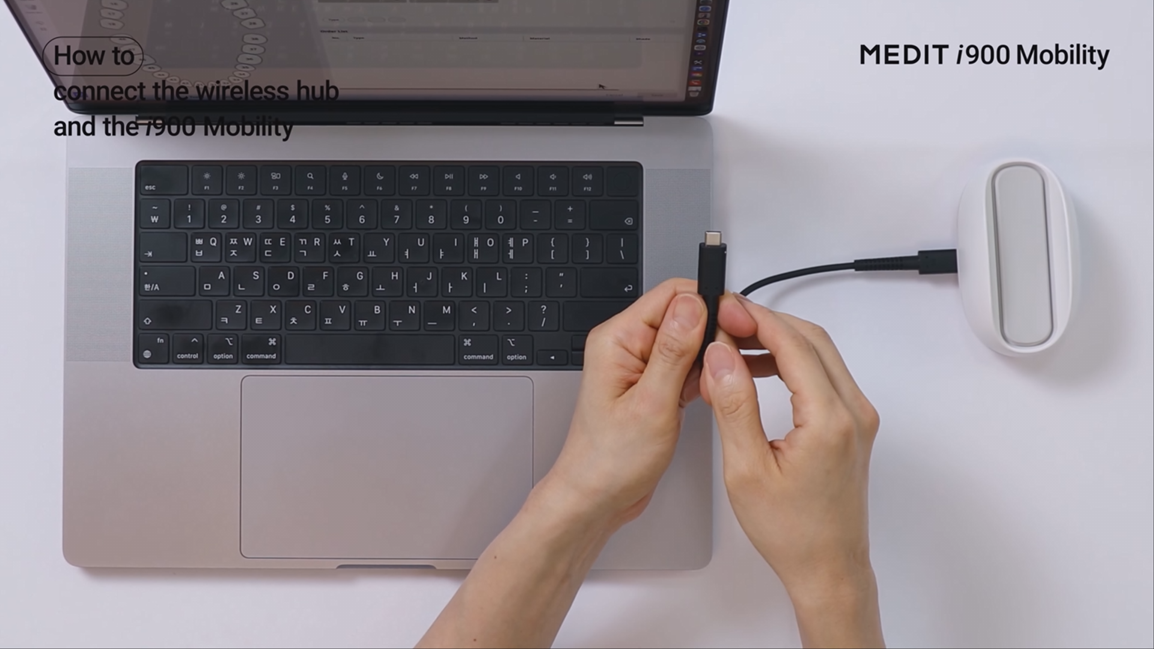


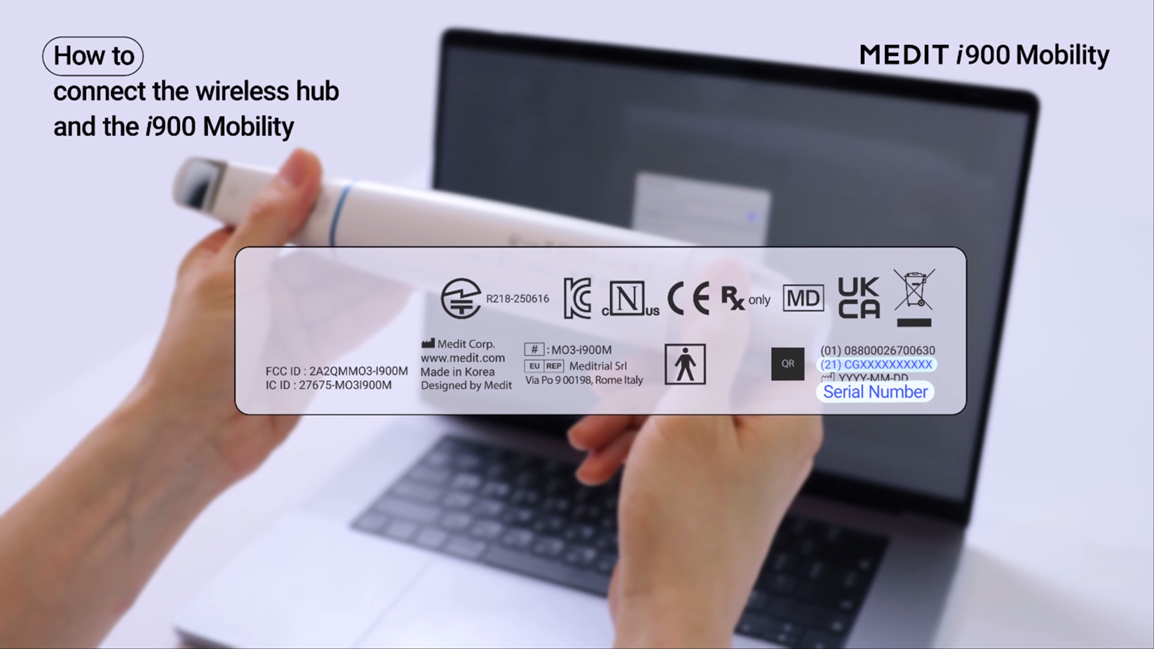
* To find the intraoral scanner's serial number, check the bottom of the i900 Mobility handpiece.

4-3. How to Set Up the PC and Medit i900 Mobility — Using a Wi-Fi Router (without the Wireless Hub)
|
* Please check your router specifications before connecting. Wi-Fi 6E is recommended. * Only password-protected Wi-Fi networks are supported. * Enterprise Wi-Fi networks may be restricted. |
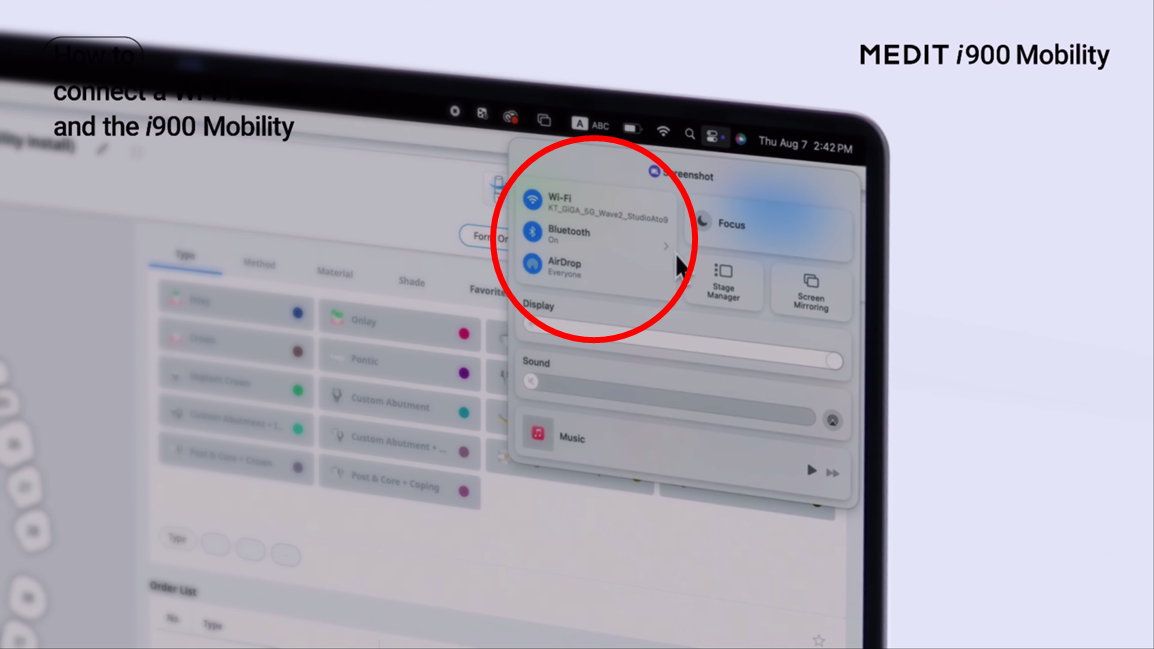


* To find the intraoral scanner's serial number, check the bottom of the i900 Mobility handpiece.

5-1. Once the intraoral scanner is connected to the PC, perform a calibration. Calibration is not required before every scan, but we recommend calibrating at least once every 90 days. Even within this interval, calibration is recommended in the following situations:
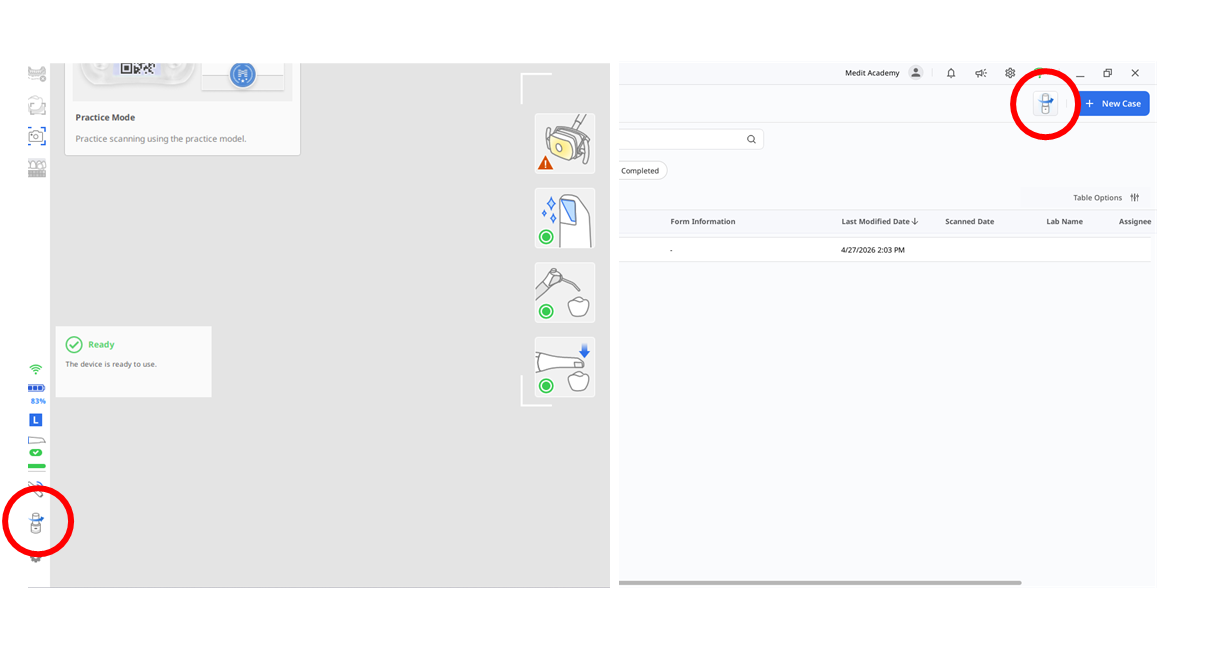
5-2. Click the Calibration icon located in the lower-left corner of the Medit Scan for Clinics screen or in the upper-right corner of Medit Link to start the calibration. 
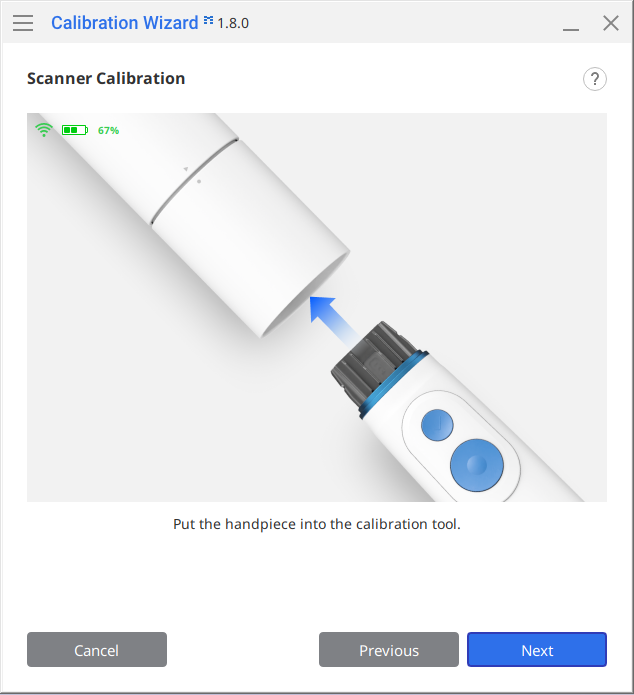
5-3. Remove the scanner tip, insert the calibration tool into the camera section of the handpiece, and then click Next to begin the calibration.
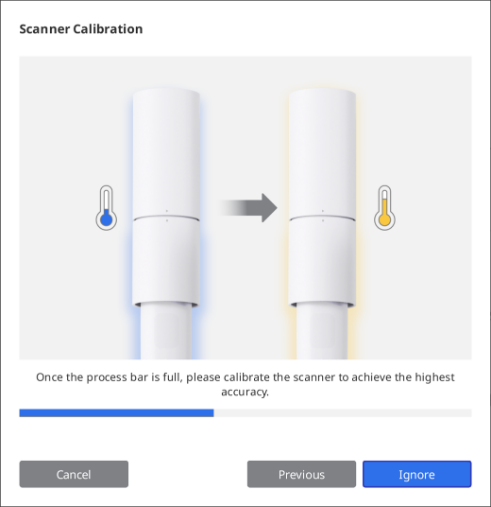
5-4. If the intraoral scanner is cold, allow it to warm up until it reaches a temperature similar to normal scanning conditions before proceeding.
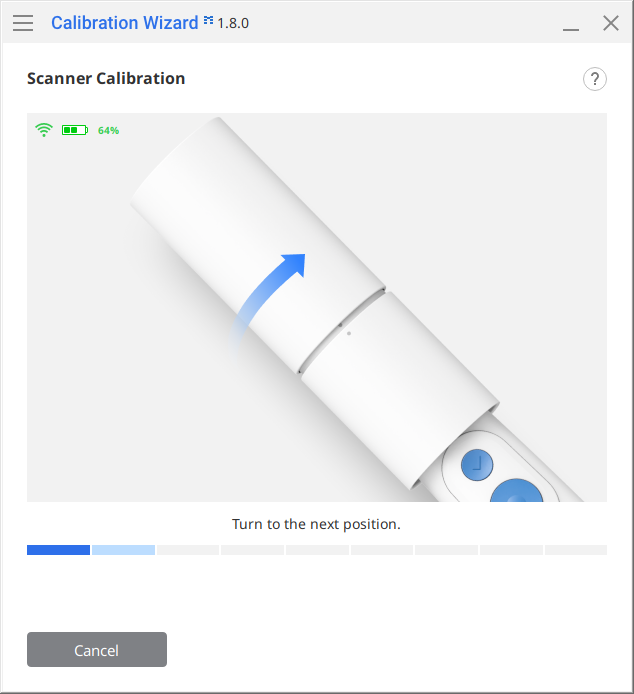
5-4. Follow the on-screen instructions to perform the calibration, clicking Next to move through each step.
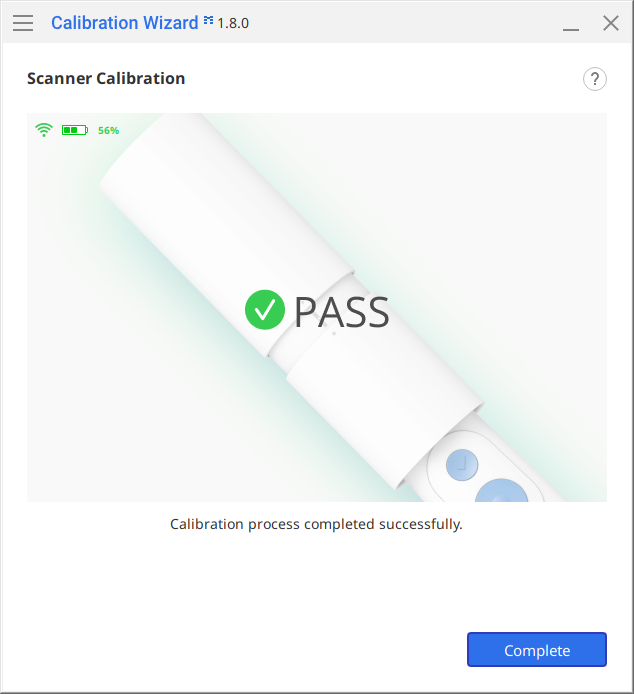
5-5. After the final step, the calibration results will be displayed.
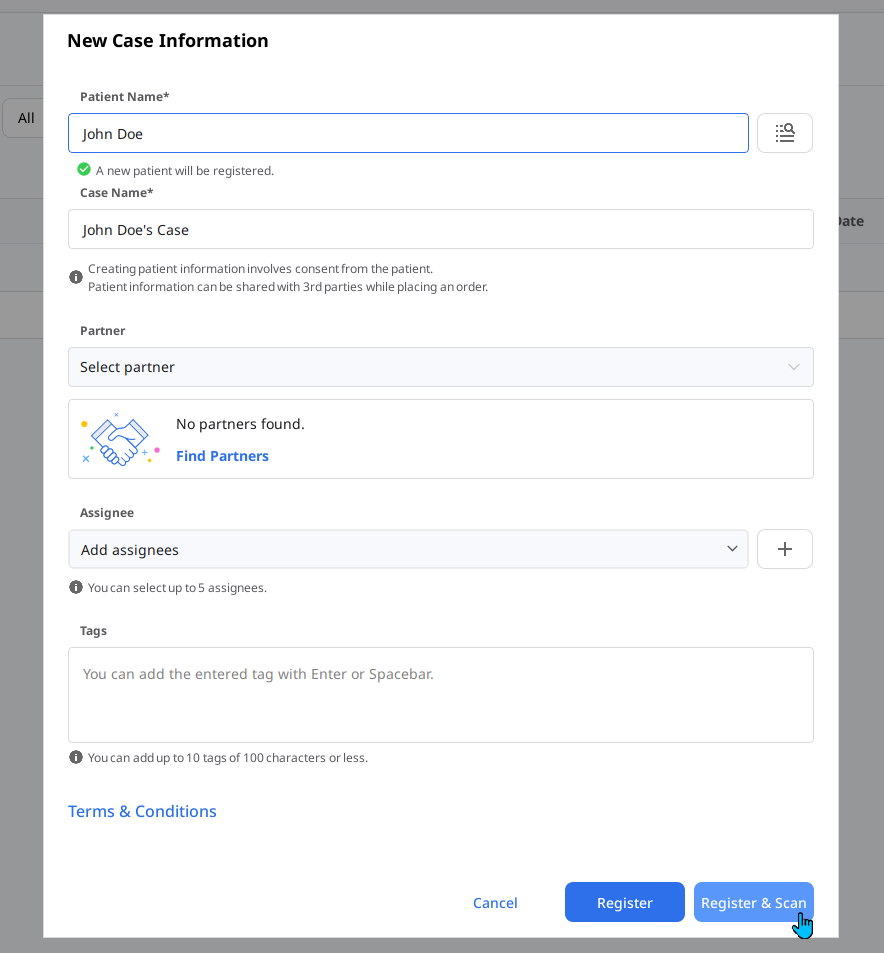
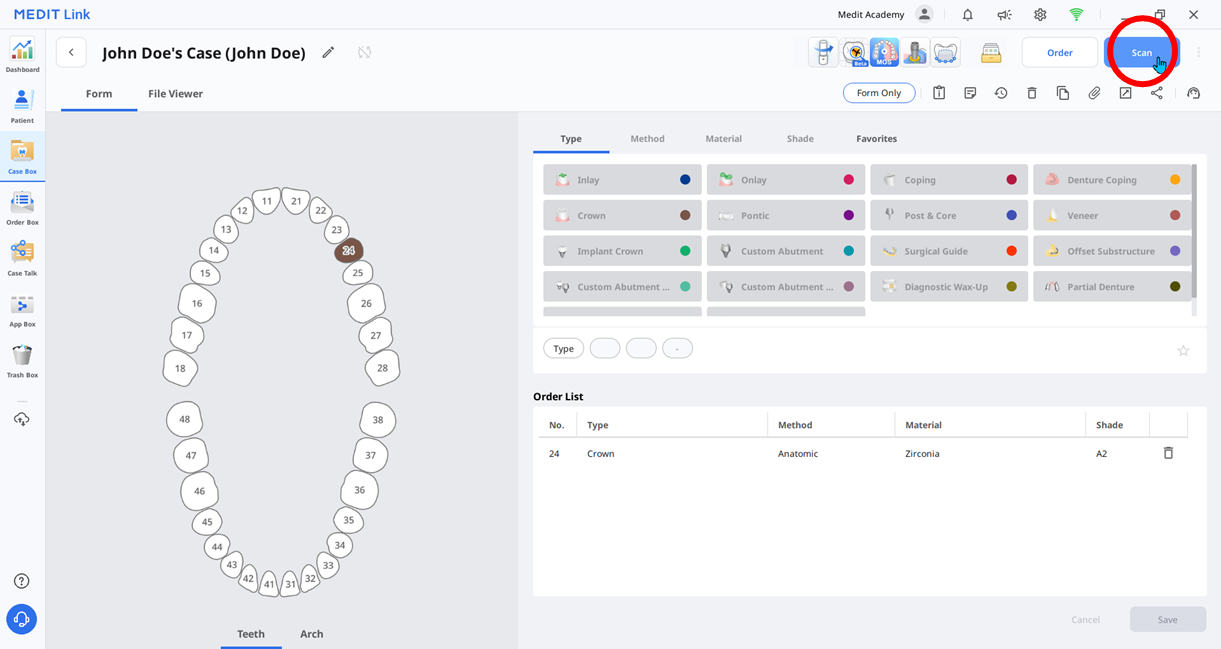
6-1. Click the New Case button in the upper-right corner of the Medit Link screen, enter the patient's information in the pop-up window, and then click the Register & Scan button.
6-2. In Form Info, click the tooth number and enter the Type, Method, Material, and Shade in order. To select an Arch, click the Arch tab below.
* Arch: Used for Denture, Partial Denture, Custom Tray, Orthodontic Appliance, and Model cases.
Teeth
Arch
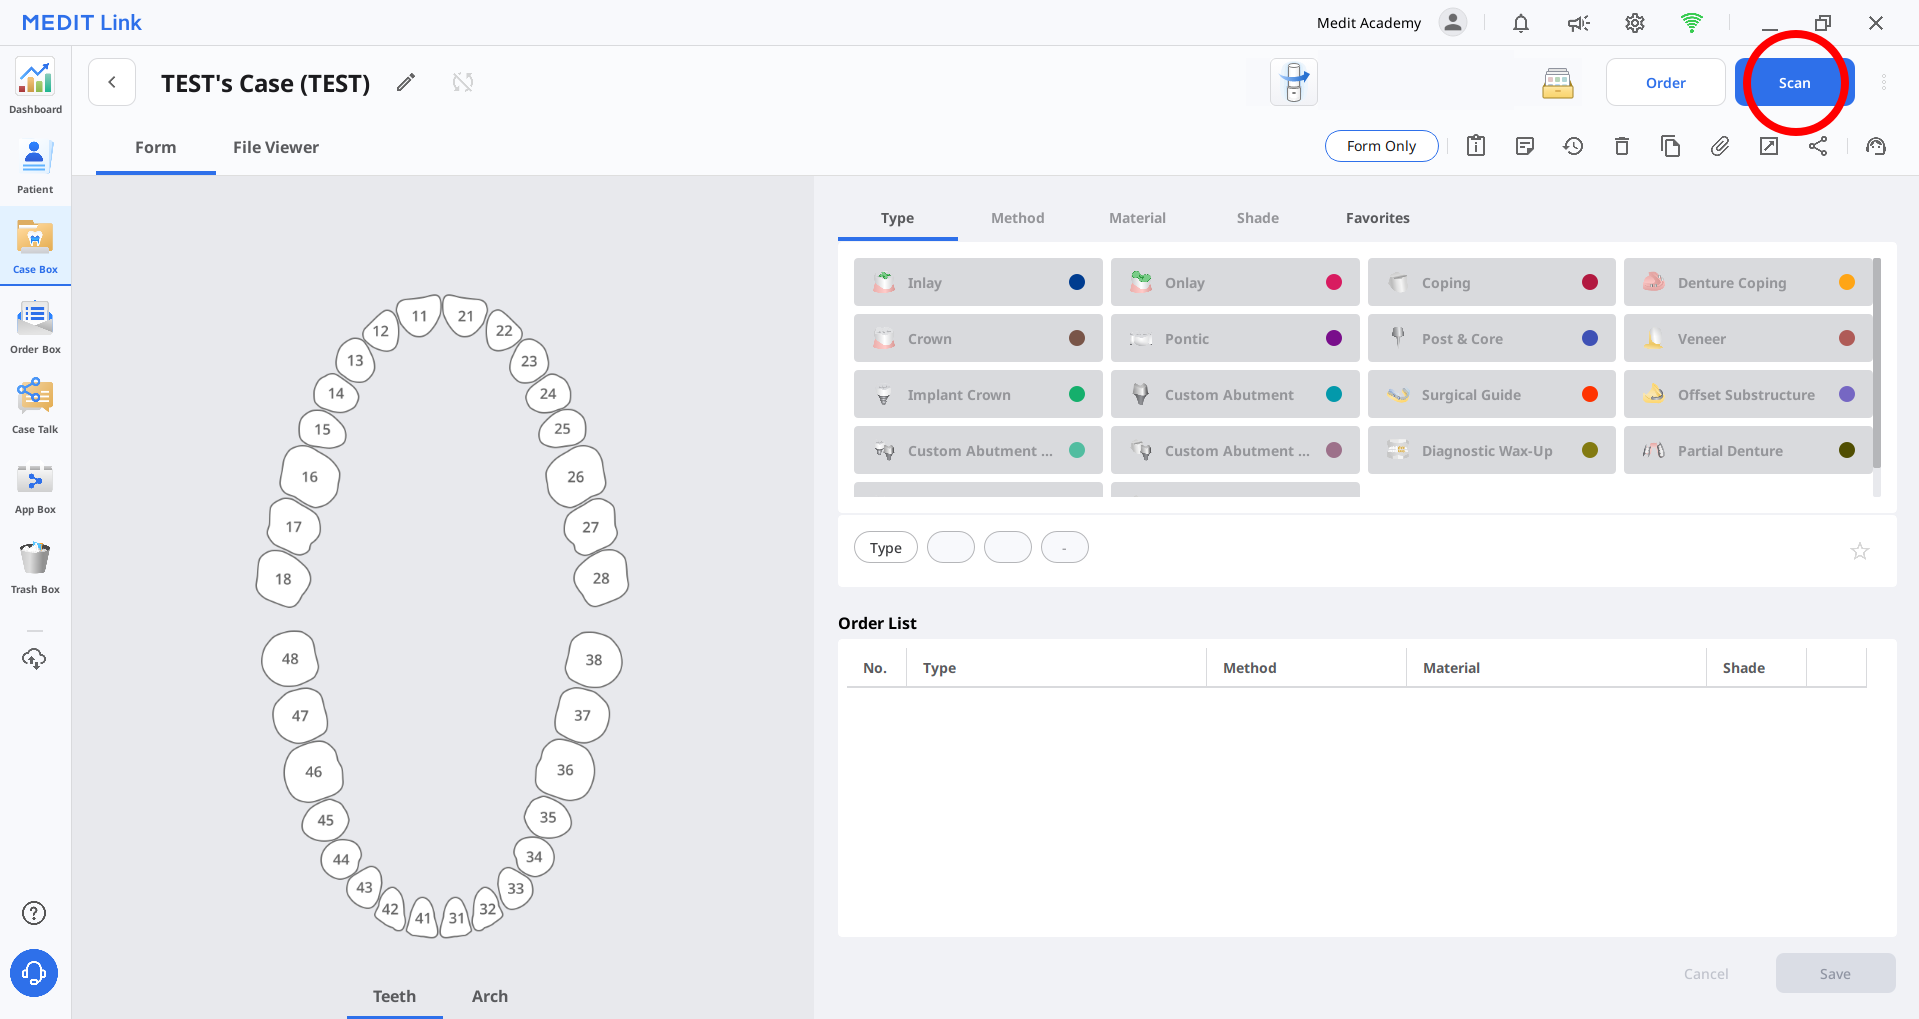
6-3. Click the Scan button in the upper-right corner to launch the scanning app, Medit Scan for Clinics.
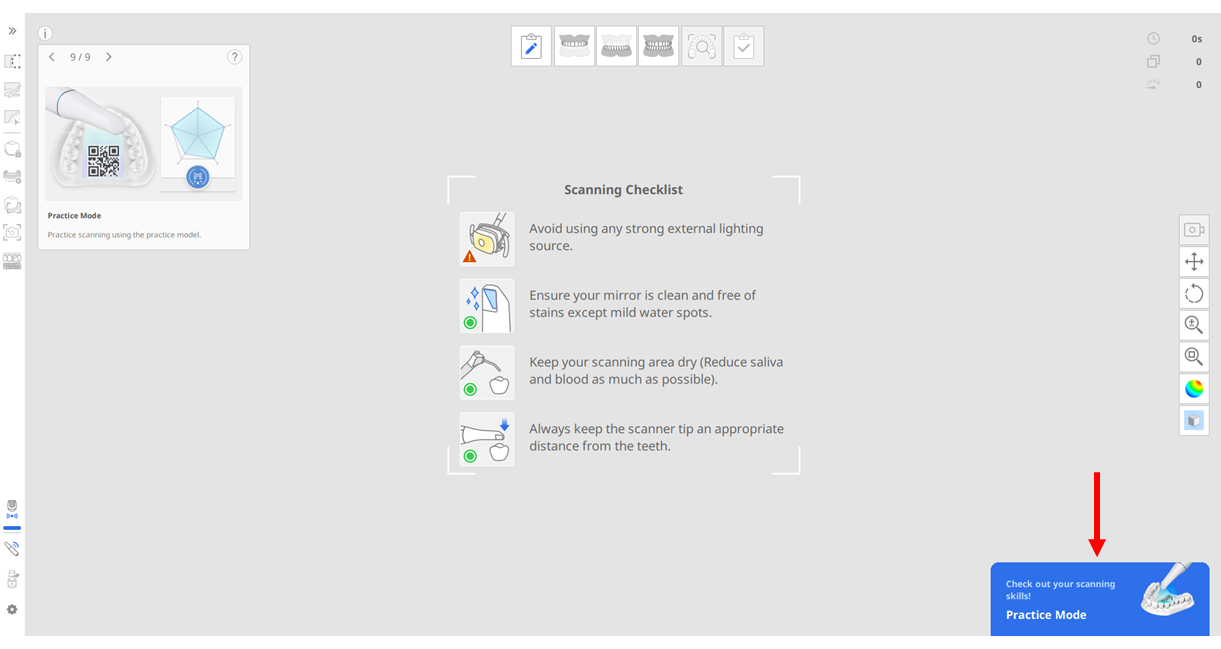
7-1. When Medit Scan for Clinics launches, a pop-up appears in the lower-right corner that takes you to Practice Mode. Click this pop-up.
* This pop-up appears only on an empty screen with no scan data. If scan data already exists, you must create a new case or delete the existing scan data to see the pop-up.
7-2. Using the intraoral scanner, scan the QR code printed on the Practice Model included in the accessory package to enter the serial number.
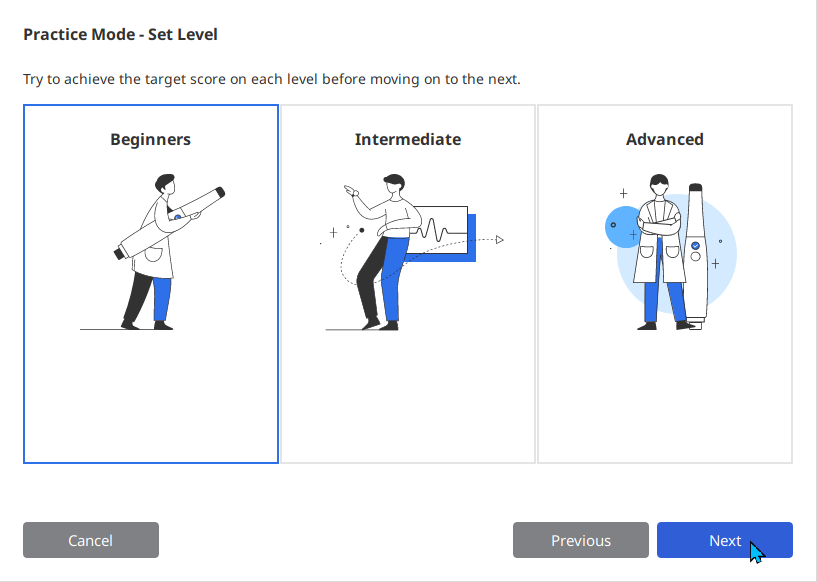
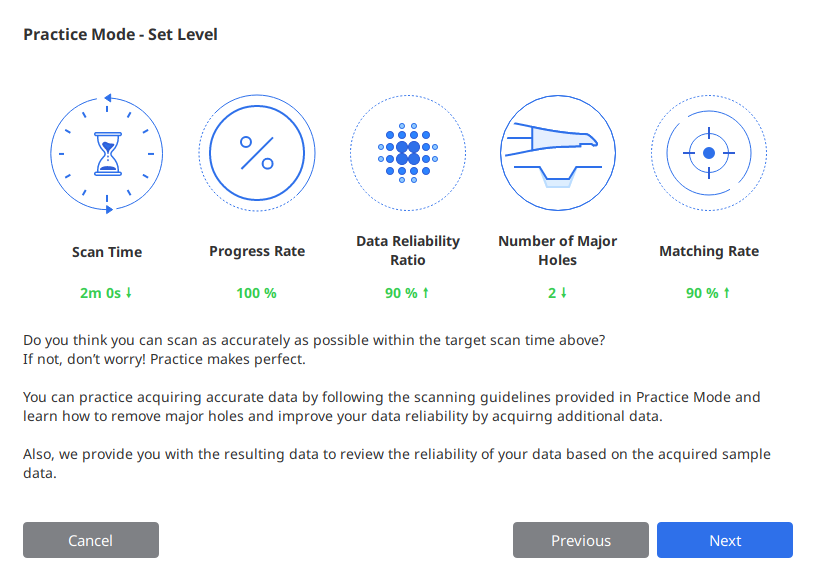
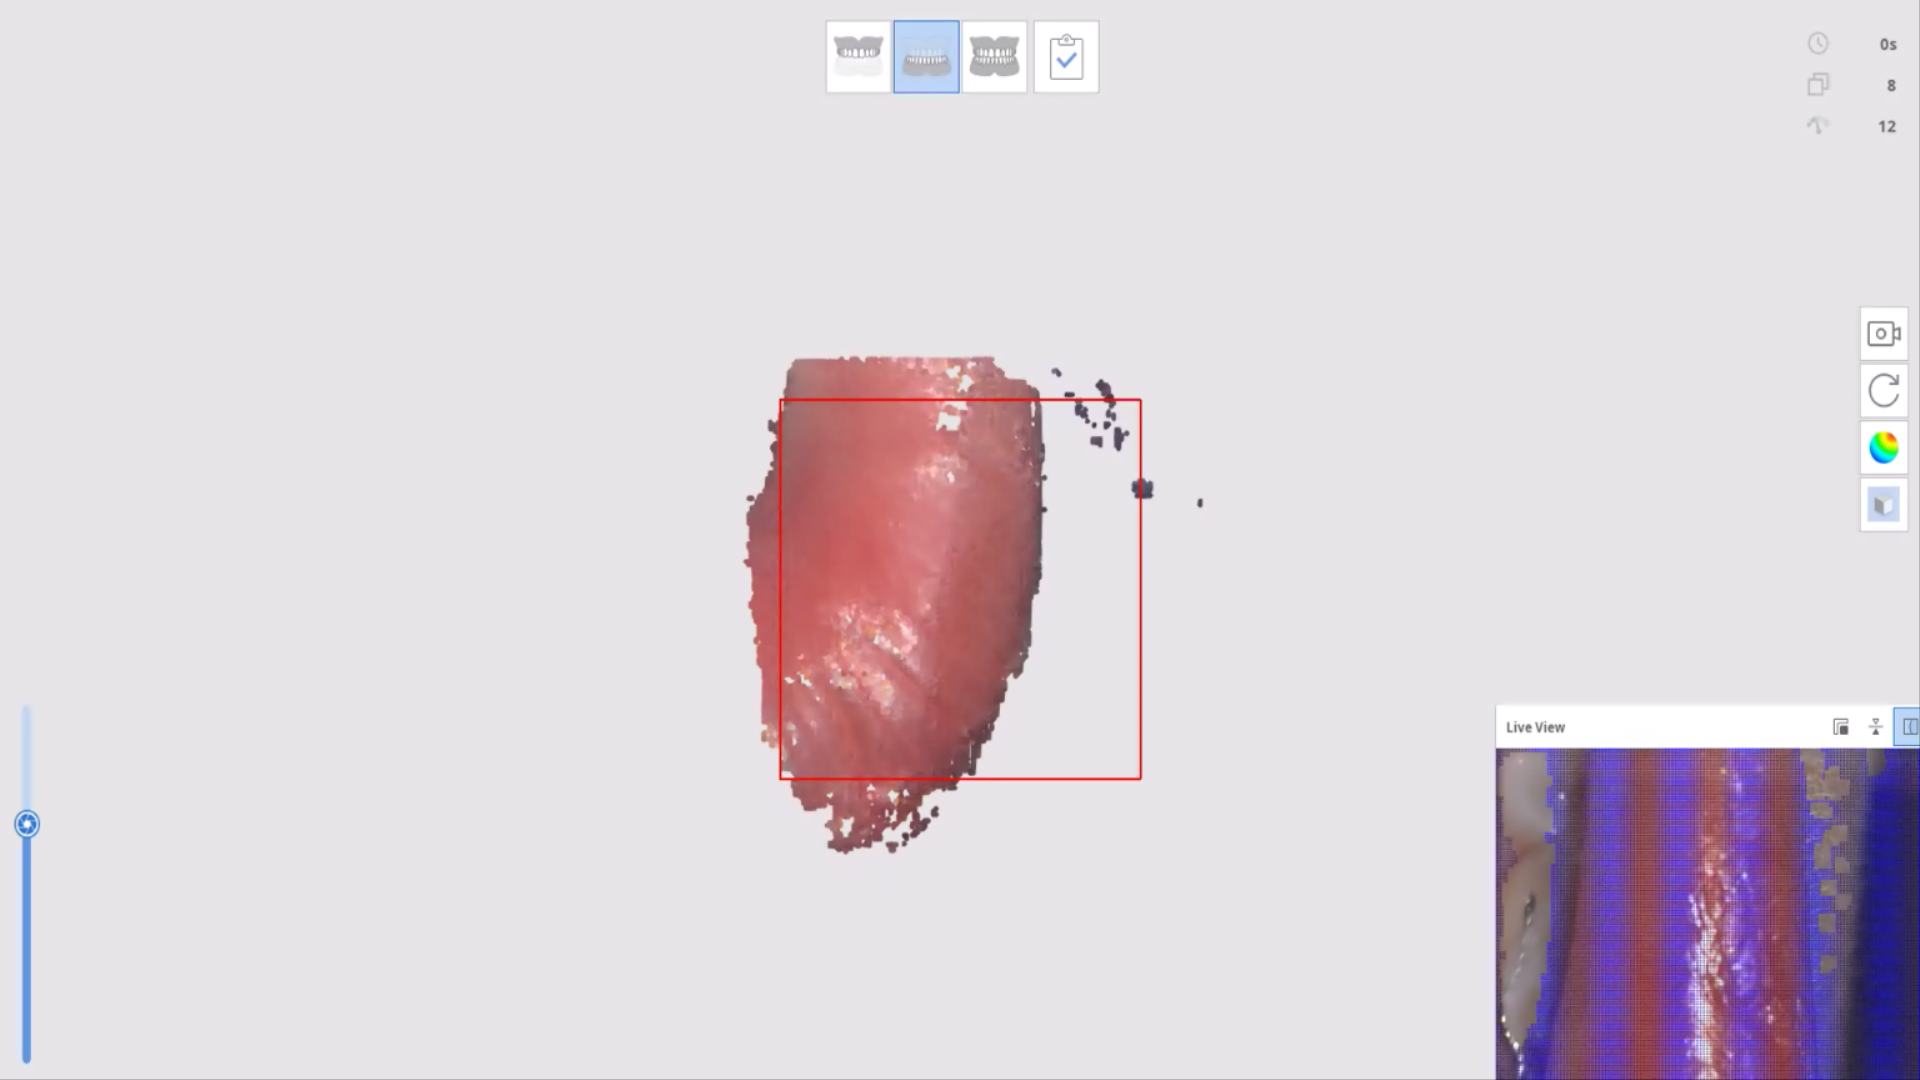
7-3. Select the desired level.
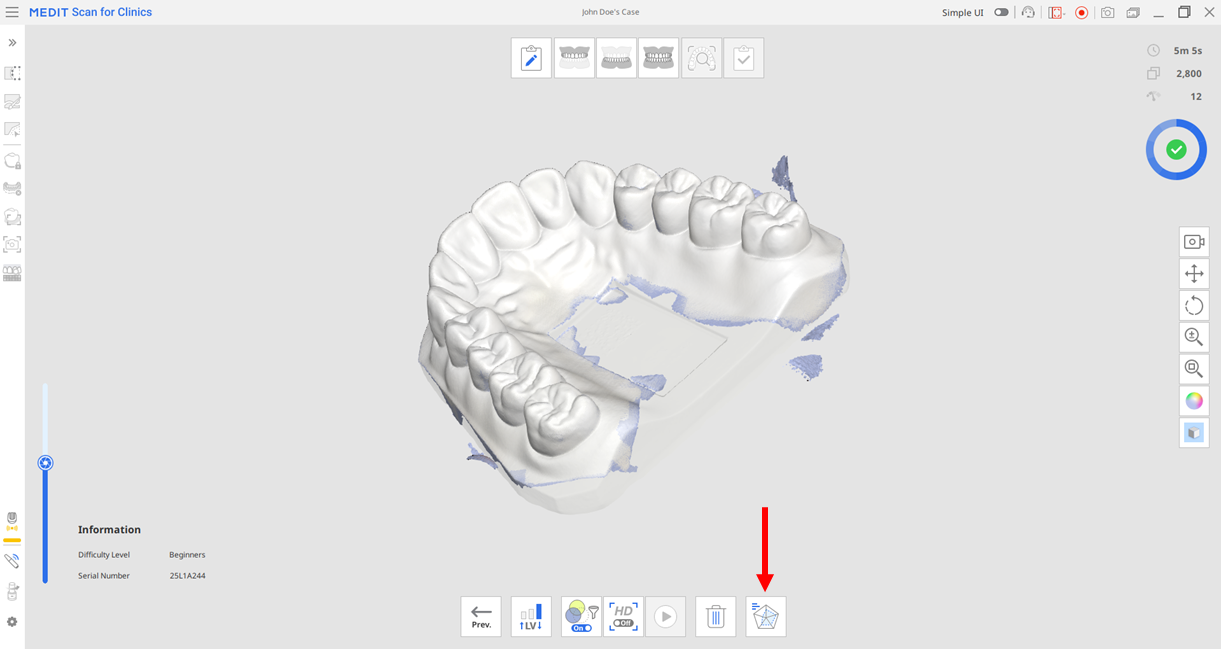
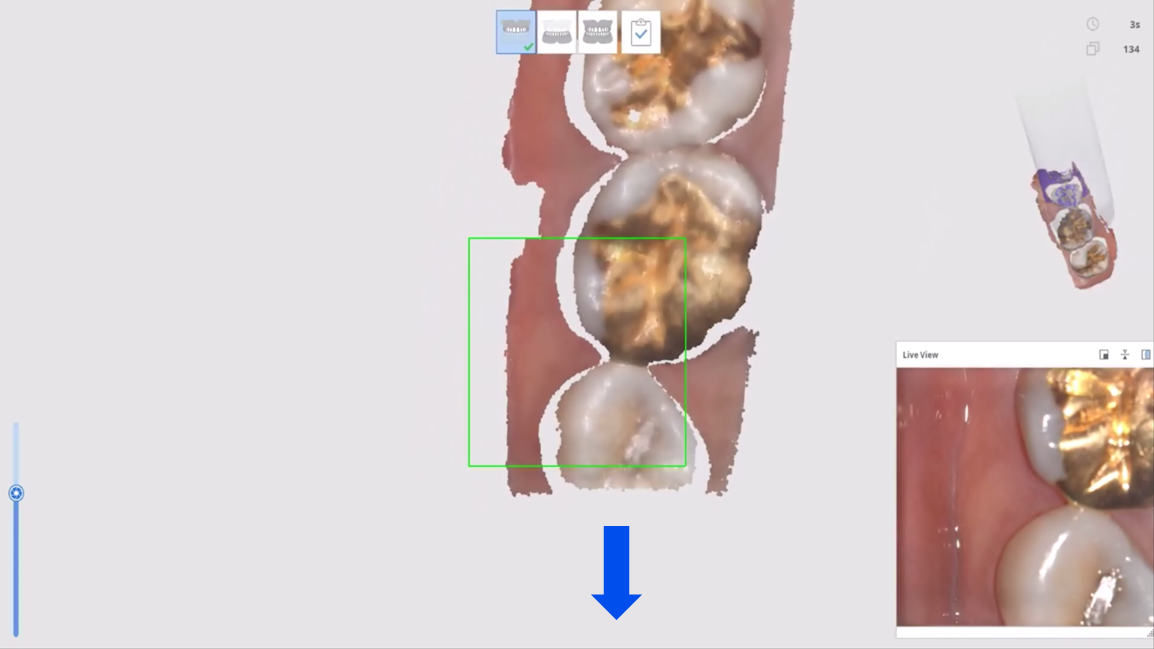
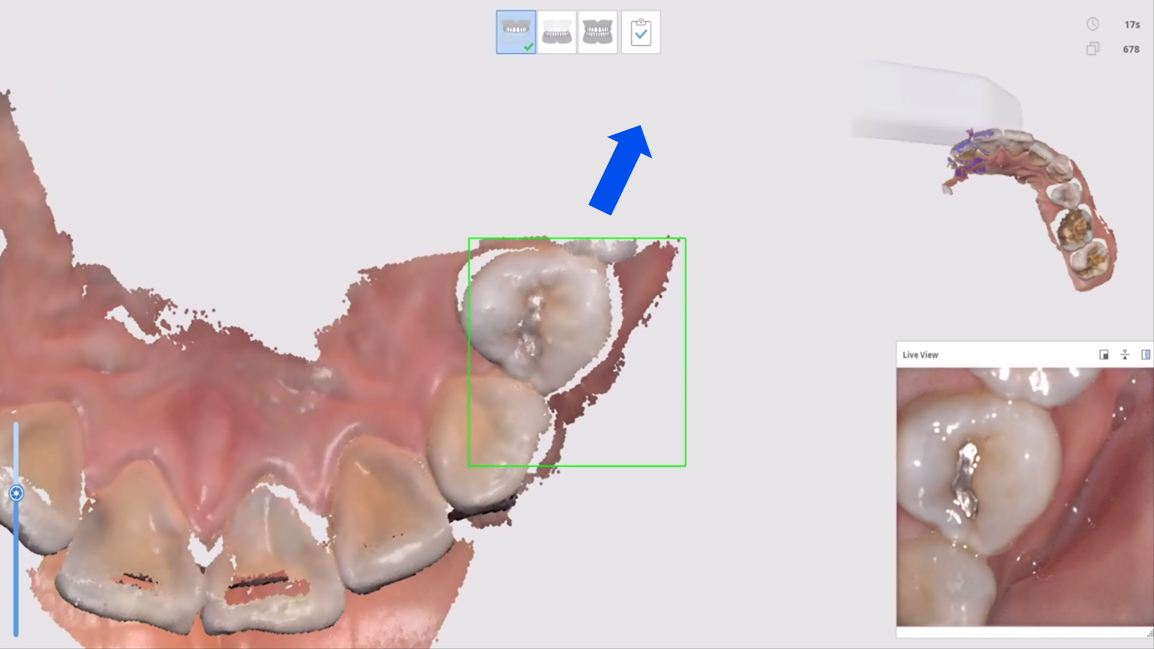
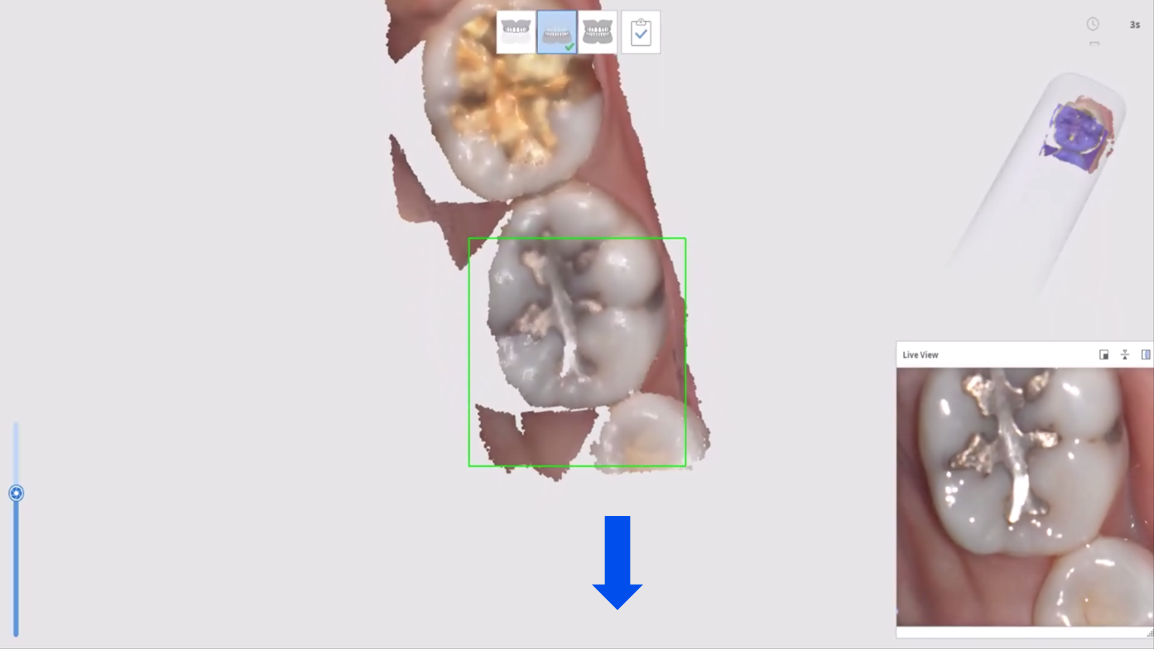
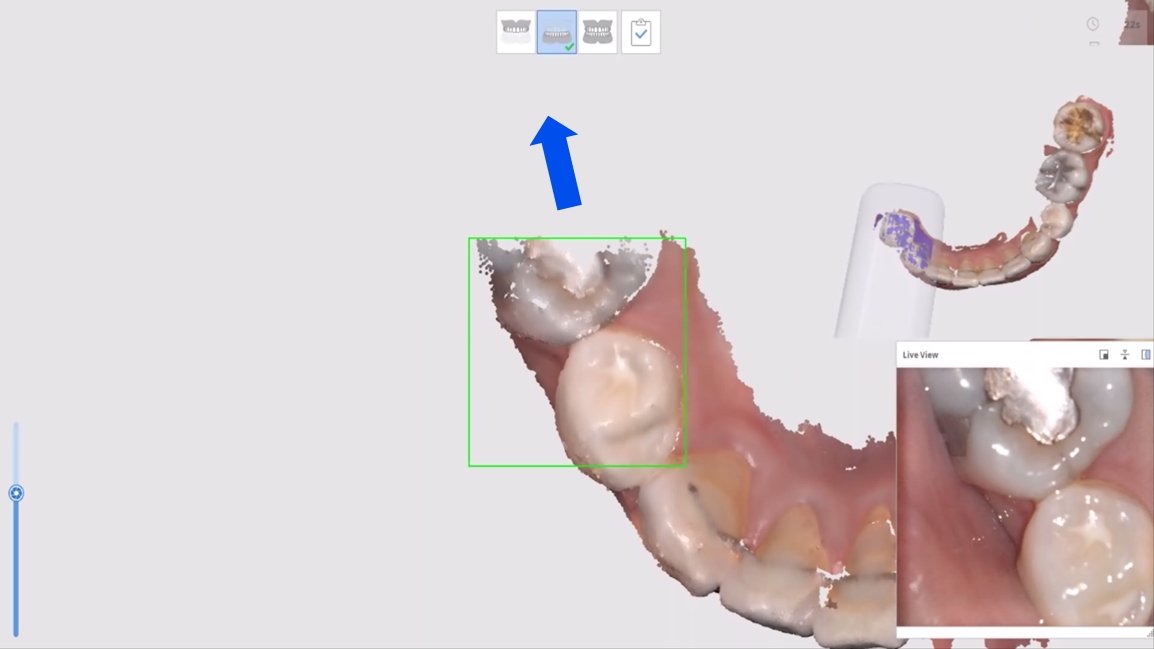
7-4. Scan the area indicated by the arrows. Once enough scan data is acquired, the blue arrows will turn green.
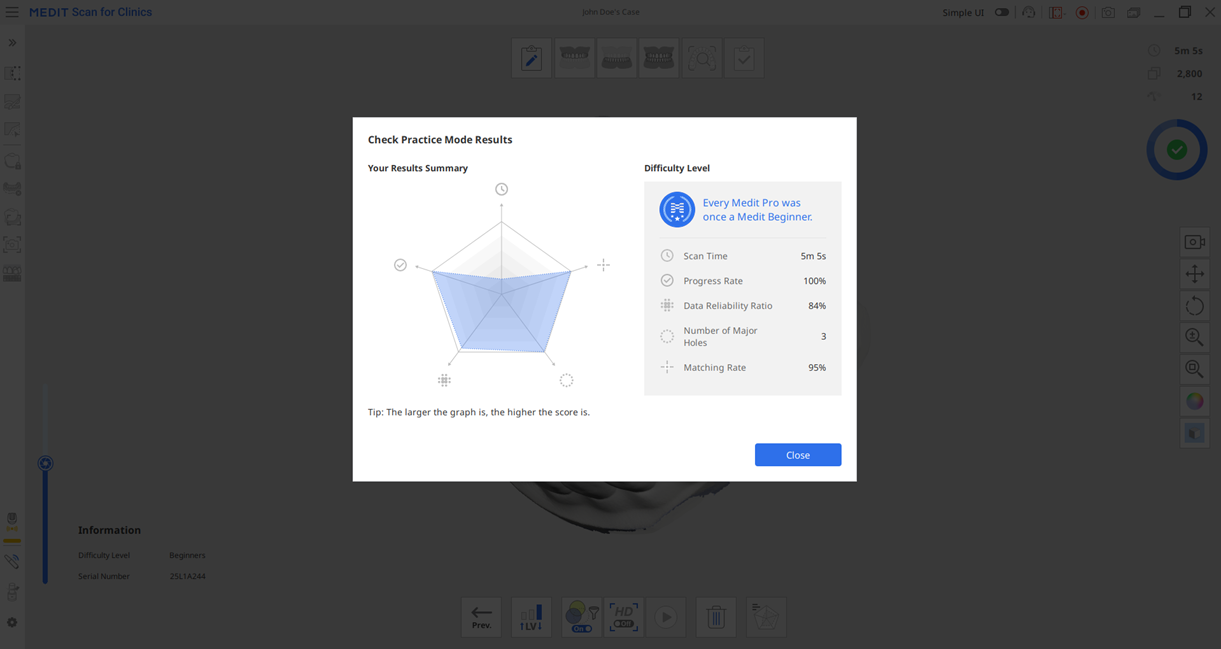
7-5. When scanning is complete, click the Check Practice Mode Results button at the bottom to calculate the results. Results are not saved.
The AirMouse feature lets you control your PC using the intraoral scanner handpiece instead of a mouse. Since no mouse is required, it offers faster operation and helps prevent contamination.
8-1. Double-click the scan button to activate the AirMouse feature. You can also change the activation method in Settings.
8-2. When AirMouse is activated, a mouse icon appears on the screen. You can hold the intraoral scanner handpiece like a remote control and operate it freely, just like a mouse.
8-3. Click the "Move" icon, then on the scan data screen, hold down the scan button and move the handpiece to reposition the scan data.
8-4. Click the "Rotate" icon, then hold down the scan button and move the handpiece left and right to rotate the scan data.
8-5. Click the "Zoom In/Out" icon, then hold down the scan button and move the handpiece up and down to zoom in or out of the scan data.
8-6. Various Main Toolbar functions, including Trimming, can also be used with the AirMouse feature.
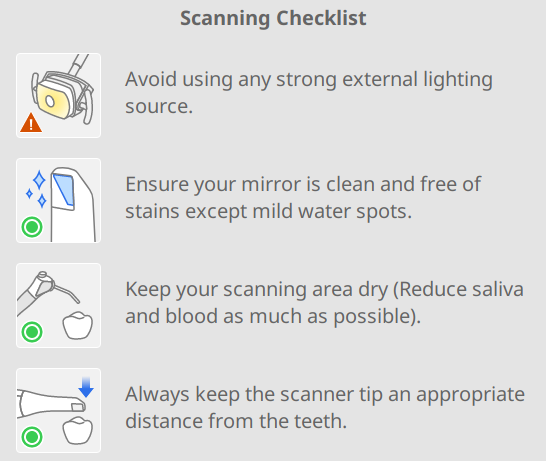
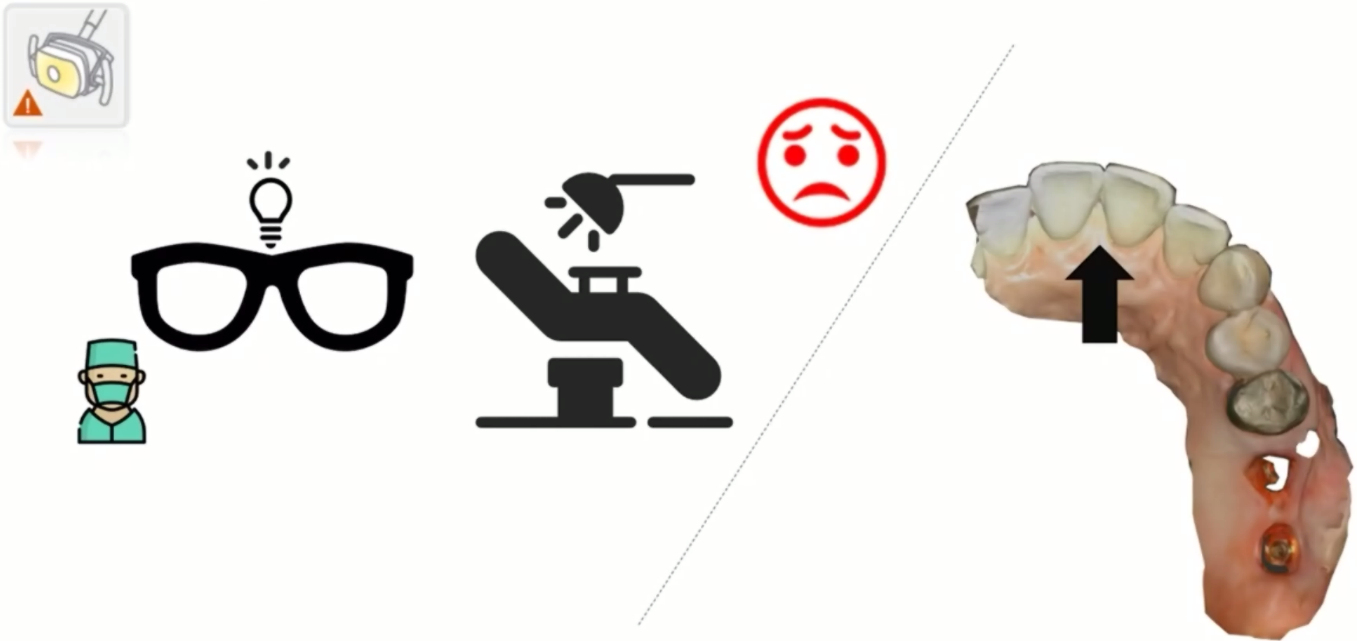
9-1. Avoid using any strong external lighting source.
Strong external lighting can cause reflections and distort scan data. Keep the ambient lighting soft and controlled.
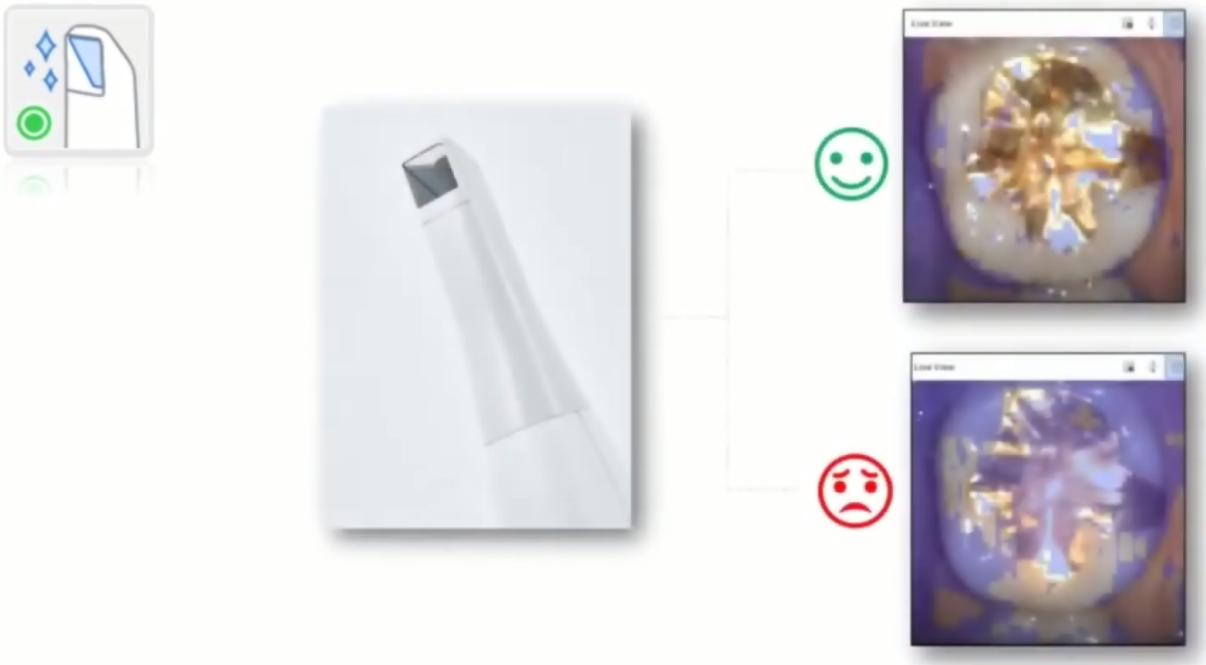
9-2. Ensure your mirror is clean and free of stains except mild water spots.
Debris on the scanner tip mirror can affect data capture. Please make sure it is clean before scanning.
9-3. Keep your scanning area dry (Reduce saliva and blood as much as possible).
Saliva and blood in the scanning area can cause reflections and lead to inaccuracies. Please dry the area before scanning.
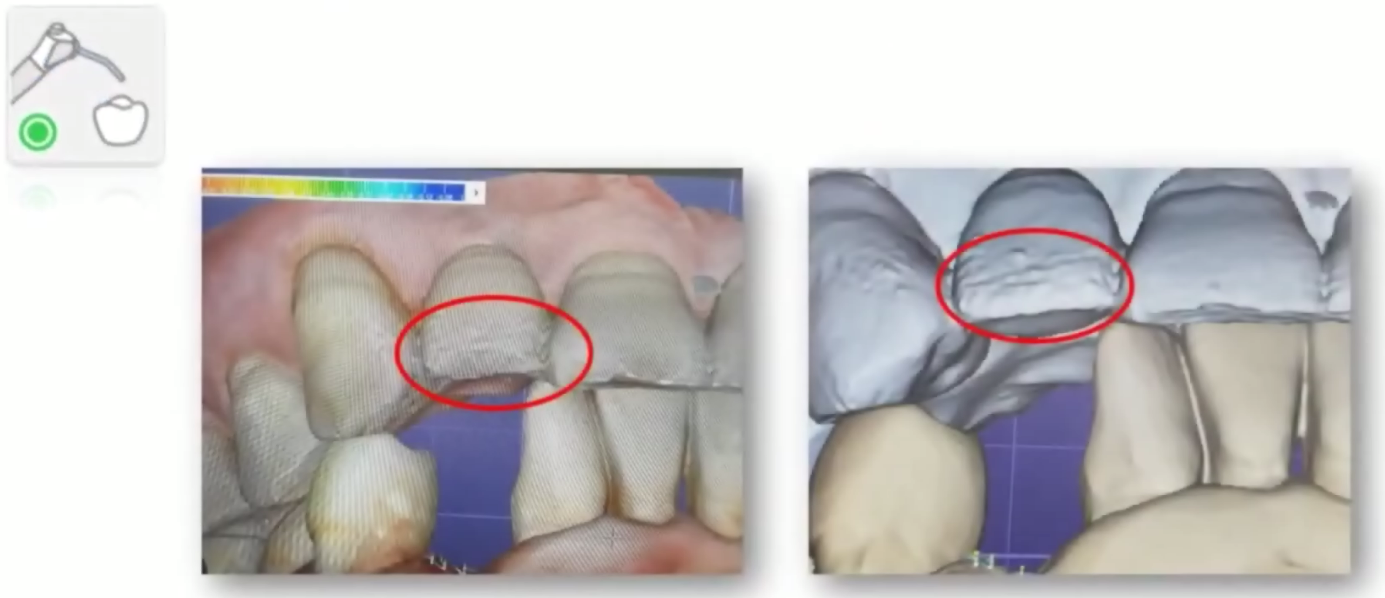
9-4. Always keep the scanner tip an appropriate distance from the teeth.
If the scanner tip is too close or too far, data may not be captured properly. Maintain a consistent and appropriate distance.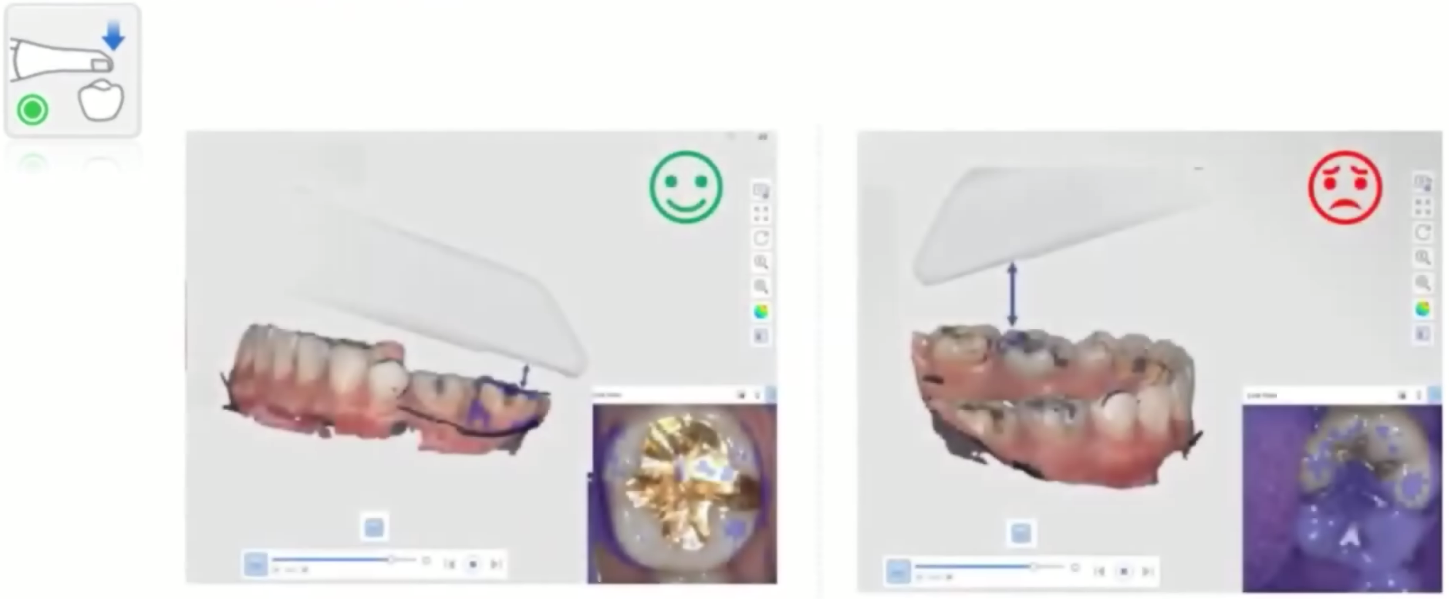
10-1. Position the intraoral scanner tip on the occlusal surface of the maxillary posterior teeth and press the Scan button to start scanning.
*Please note that if you insert the intraoral scanner into the oral cavity after pressing the Scan button, unwanted areas may be captured and interfere with subsequent scanning.
10-2. Once scanning has started properly from the occlusal surface of the posterior tooth, continue scanning toward the incisal edge of the anterior teeth.
10-3. Since the incisal edge of the anterior teeth is narrow, scan in a zigzag pattern to capture more data, including the incisal edge along with portions of the labial and lingual surfaces.
10-4. After completing the anterior scan, continue scanning to the occlusal surface of the posterior tooth on the opposite side.
10-5. Tilt the intraoral scanner toward the lingual side and scan the entire lingual area of the arch sequentially.
For best results, position the scanner so that the ratio of occlusal surface : lingual surface : gingiva appears as 1 : 1 : 1 in the Live View.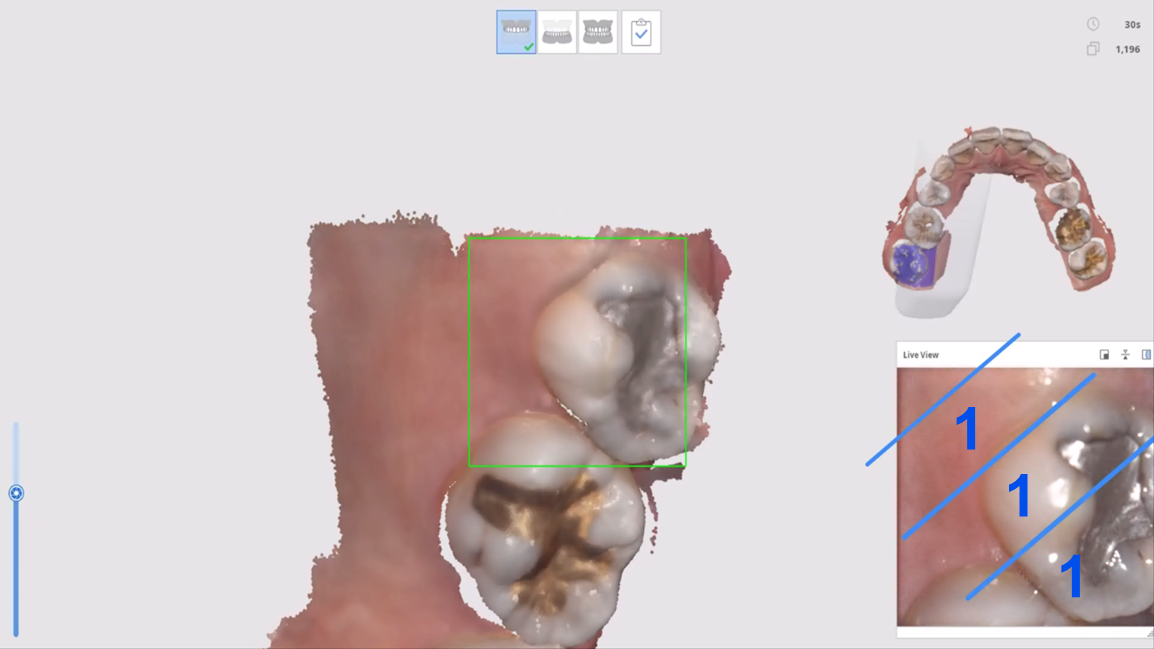
10-6. Apply the same method when scanning the buccal area. Position the scanner so that the ratio of occlusal surface : buccal surface : gingiva appears as 1 : 1 : 1 in the Live View, then sequentially scan the entire buccal (or labial) area of the arch.
10-7. It is not possible to capture every area thoroughly in a single scan pass. Rotate the scan data to identify any insufficiently scanned areas and fill them in with additional scanning.
*When scanning missing areas, do not place the intraoral scanner tip directly on the area to be filled. Instead, recognize the position from a surrounding area first, then move to the area that needs to be filled.

11-1. Position the intraoral scanner tip on the occlusal surface of the mandibular posterior teeth and press the Scan button to start scanning.
*Please note that if you insert the intraoral scanner into the oral cavity after pressing the Scan button, unwanted areas may be captured and interfere with subsequent scanning.
11-2. Once scanning has started properly from the occlusal surface of the posterior tooth, continue scanning toward the incisal edge of the anterior teeth.
11-3. Since the incisal edge of the anterior teeth is narrow, scan in a zigzag pattern to capture more data, including the incisal edge along with portions of the labial and lingual surfaces.
11-4. After completing the anterior scan, continue scanning to the occlusal surface of the posterior tooth on the opposite side.
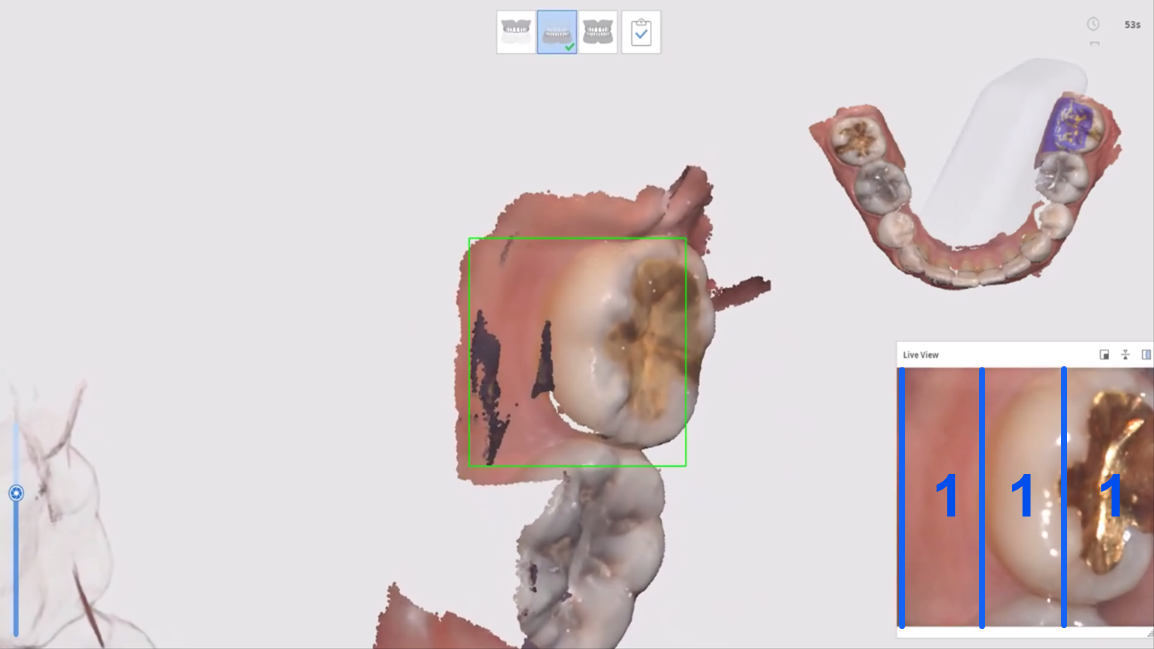
11-5. Tilt the intraoral scanner toward the buccal side and scan the entire buccal (or labial) area of the arch sequentially.
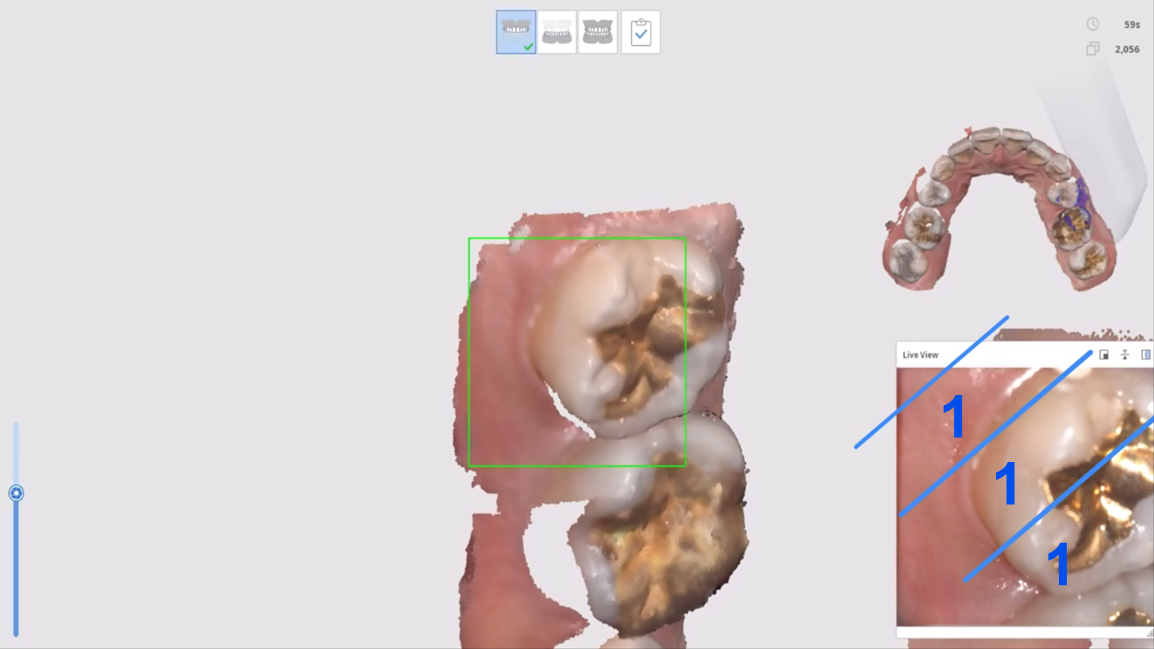
For best results, position the scanner so that the ratio of occlusal surface : buccal surface : gingiva appears as 1 : 1 : 1 in the Live View.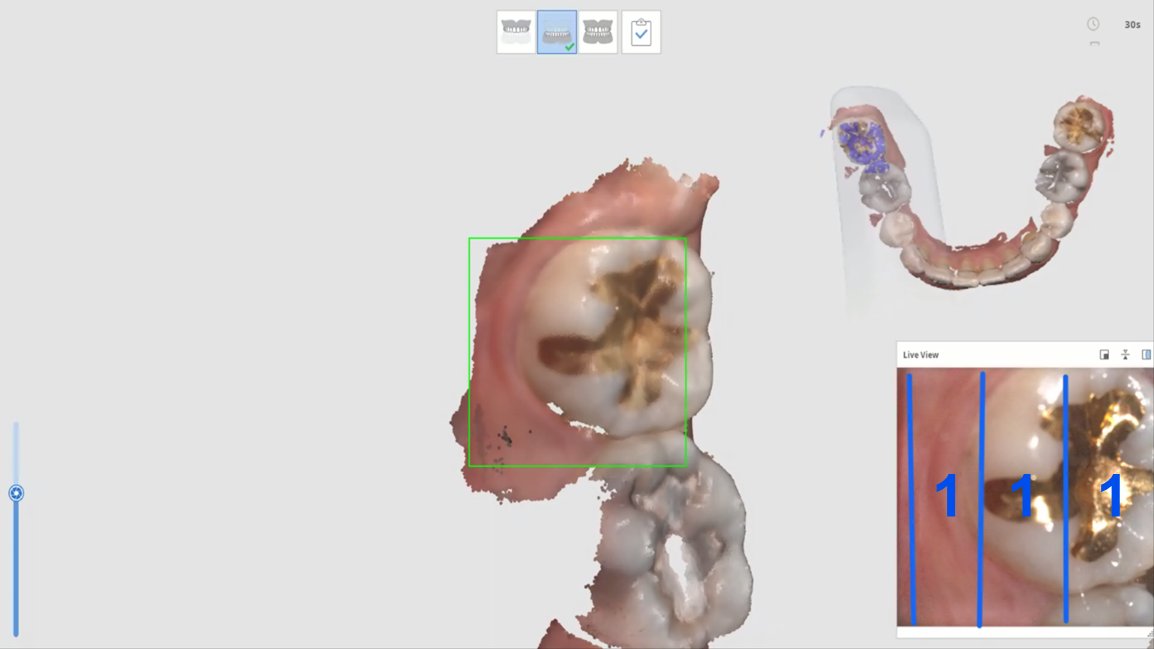
11-6. Apply the same method when scanning the lingual area. Position the scanner so that the ratio of occlusal surface : lingual surface : gingiva appears as 1 : 1 : 1 in the Live View, then sequentially scan the entire lingual area of the arch.
11-7. It is not possible to capture every area thoroughly in a single scan pass. Rotate the scan data to identify any insufficiently scanned areas and fill them in with additional scanning.
*When scanning missing areas, do not place the intraoral scanner tip directly on the area to be filled. Instead, recognize the position from a surrounding area first, then move to the area that needs to be filled.
* The patient should be seated upright in the dental chair to obtain a proper Centric Occlusion (CO).
* Before scanning the bite, both the maxillary and mandibular scan data must already be acquired, with sufficient buccal data captured. If the buccal scan data has any holes or missing areas, errors may occur during occlusion alignment.
* Check whether any unnecessary soft tissue that may interfere with occlusion has been scanned, and if so, remove it in advance using the Trimming tool.

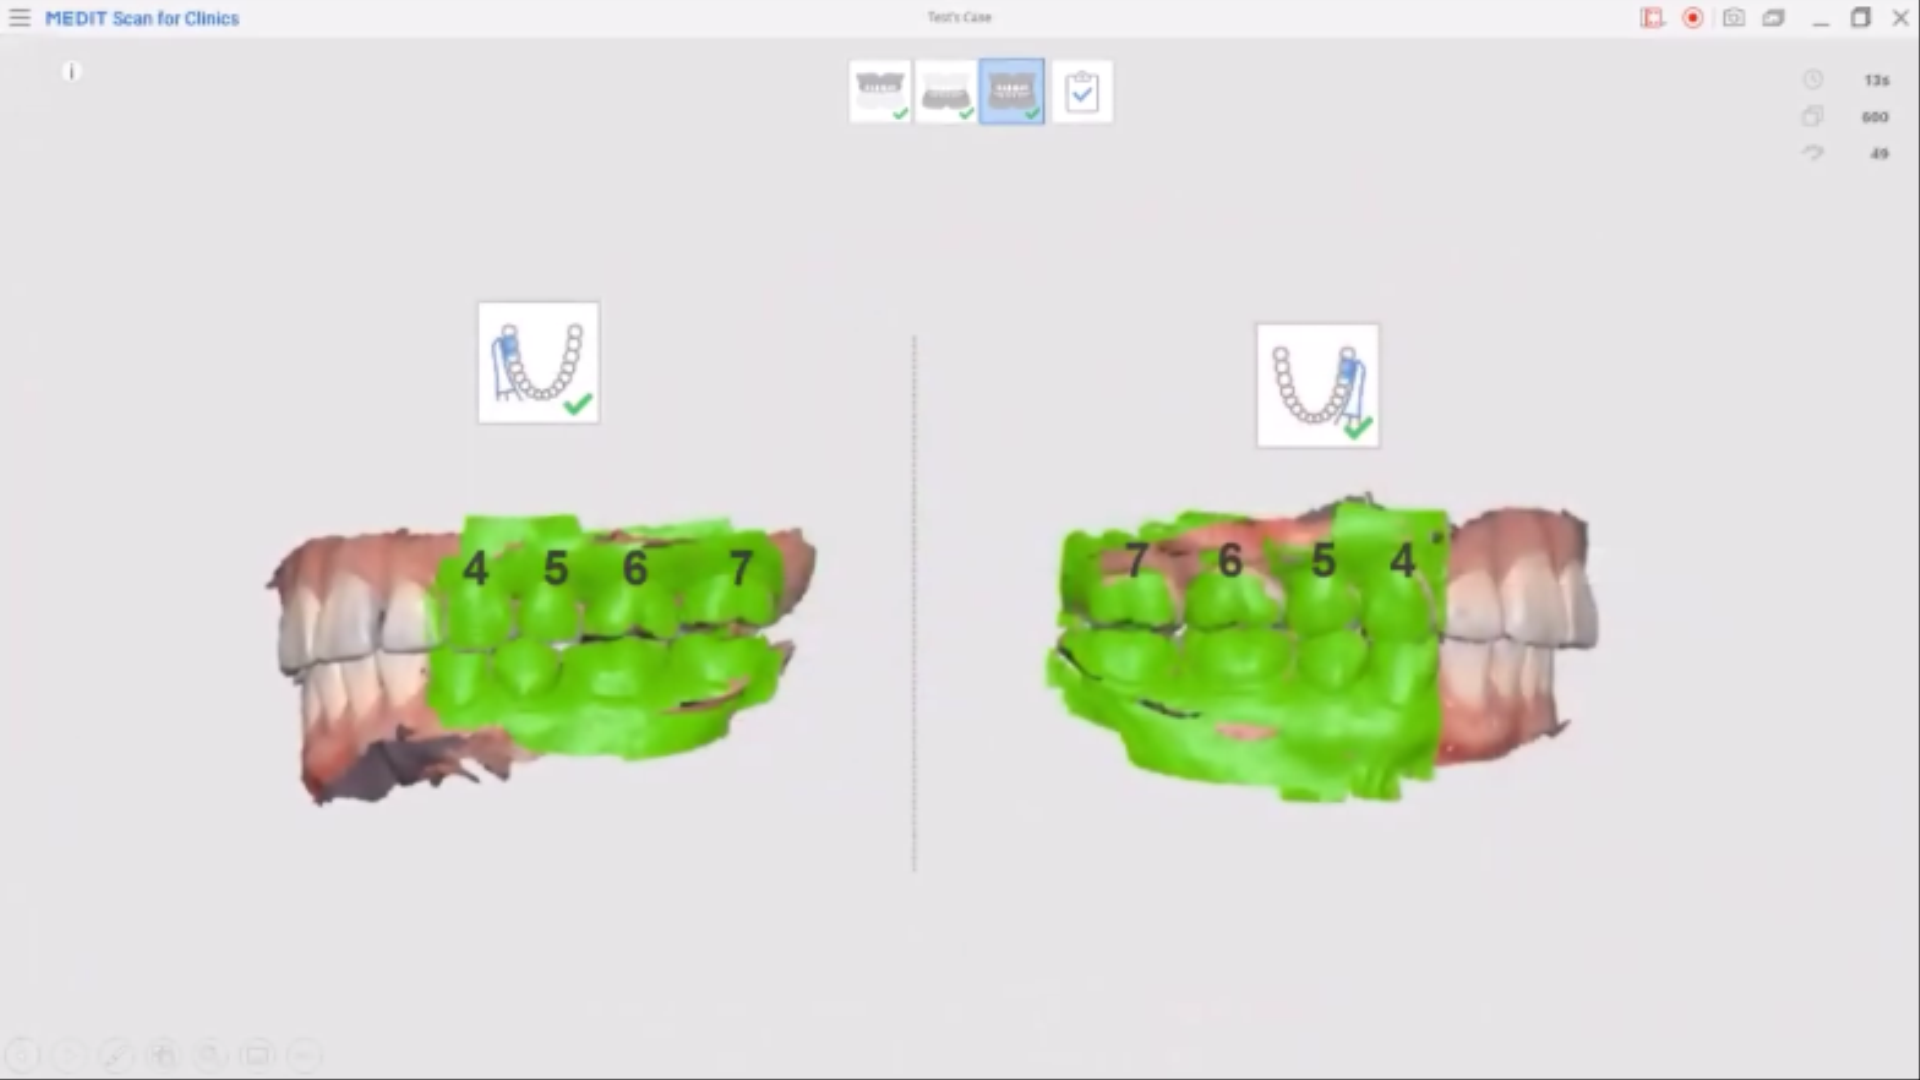
12-1. For full arch scans, two bite scans are recommended; for quadrant scans, one bite scan is sufficient. When taking two bite scans, it does not matter which side is scanned first.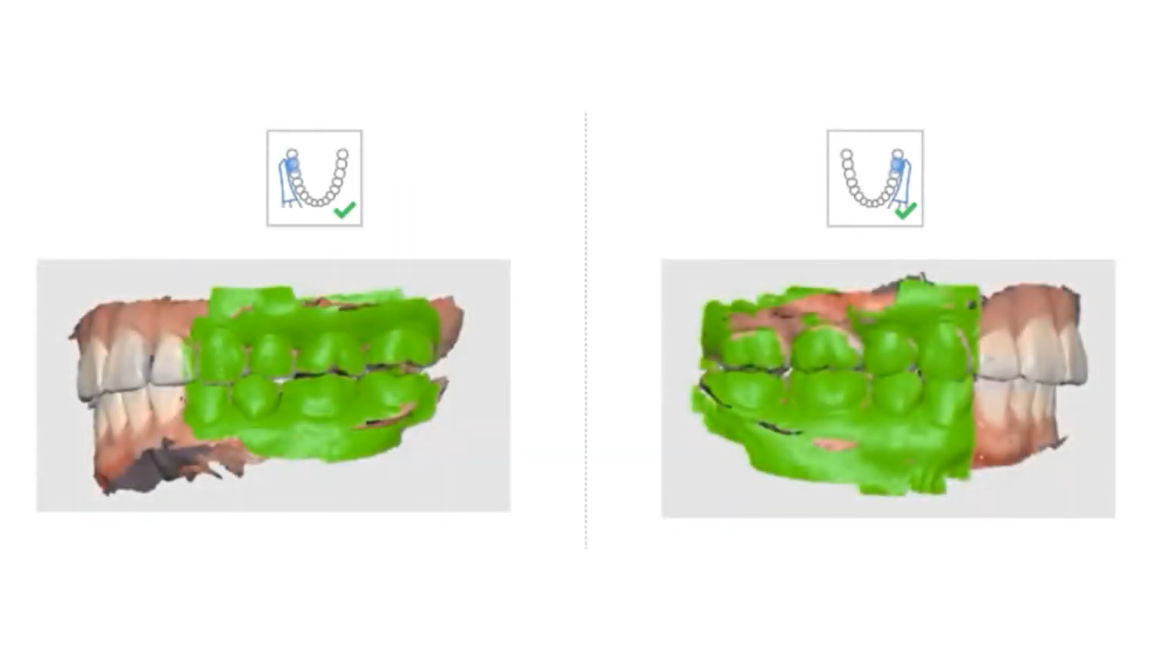
12-2. With the patient's mouth open, insert the intraoral scanner tip into the oral cavity first, then have the patient close into occlusion.
*If the intraoral scanner tip is inserted from the buccal side while the mouth is closed, the lips and gums may be scratched and injured by the scanner.

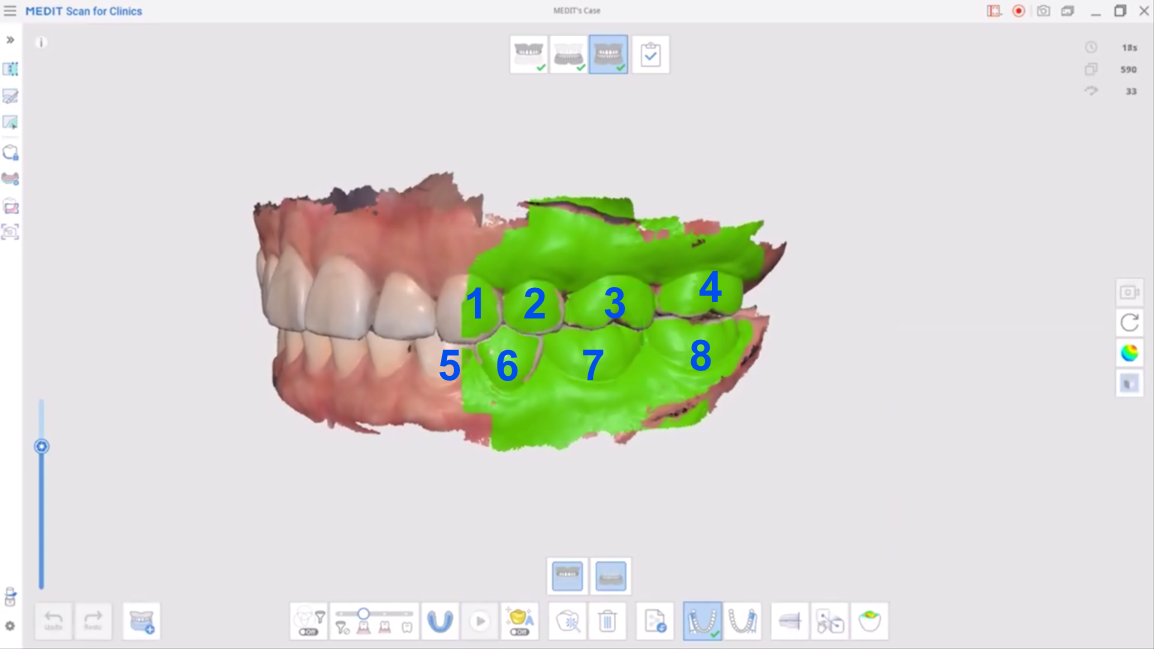
12-3. It is recommended to start scanning with the intraoral scanner tip positioned on the buccal side of the most posterior tooth, and to continue scanning until 6–8 teeth in both the maxillary and mandibular arches have been captured, even if automatic occlusion alignment is successful.
12-4. When taking the second bite scan, scanning an area similar to the first bite scan helps with alignment.
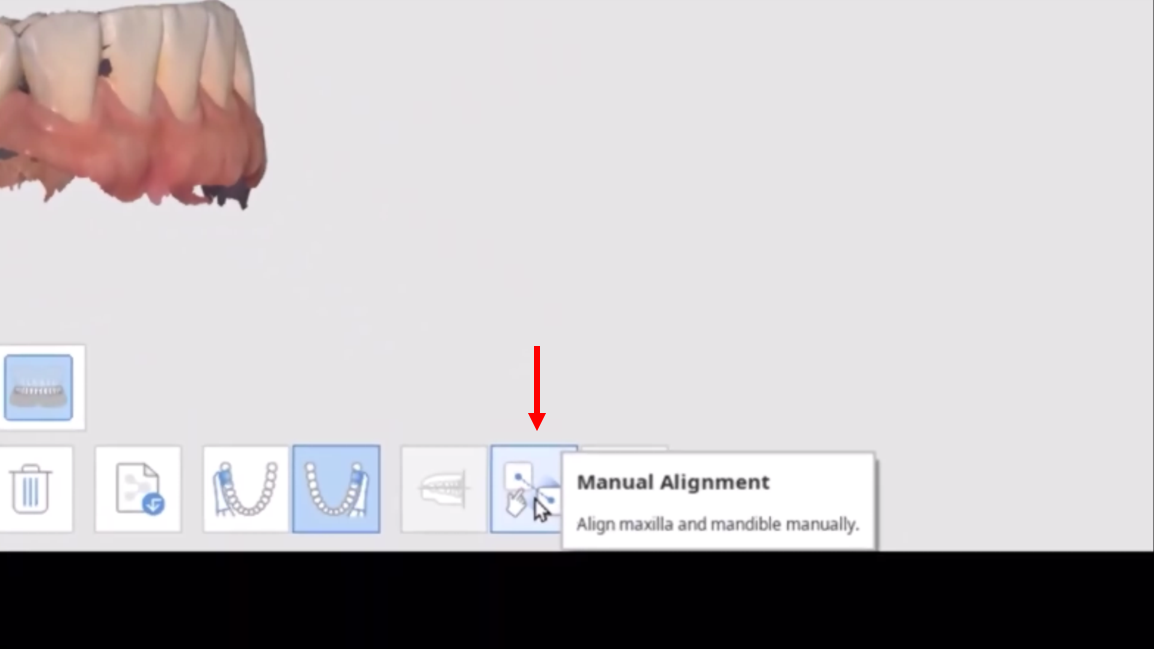
12-5. If automatic occlusion alignment fails, you can align the data manually using the Manual Alignment feature. As shown in the image, alignment is performed by clicking three points at the same locations on both the bite scan data and the scan data you want to align with.
While scanning the oral cavity, soft tissues such as the tongue, cheeks, and lips, as well as the operator's hands, may sometimes be captured along with the scan data. These unnecessary areas can affect automatic alignment or cause occlusion errors, so it is recommended to remove them before completing your work. You can remove unnecessary areas using the Trimming Tool in Medit Scan for Clinics.
13-1. Polyline Trimming
This tool removes unnecessary data by drawing a polygon around it. Left-click with the mouse to create the points of the polygon, then right-click on the final point to complete the polygon and remove the enclosed area.
13-2. Brush Trimming
You can freely paint over unnecessary areas with a brush to remove them.
13-3. Quick Trimming
If an unnecessary area is separated from the main scan data, you can remove it with a single click.
13-4. If you accidentally remove a necessary area, you can use the Undo function at the bottom-left of the screen to return to the previous state.
Once all scanning is complete, you can finish your work by clicking the Complete icon at the top-right of the Medit Scan for Clinics screen.
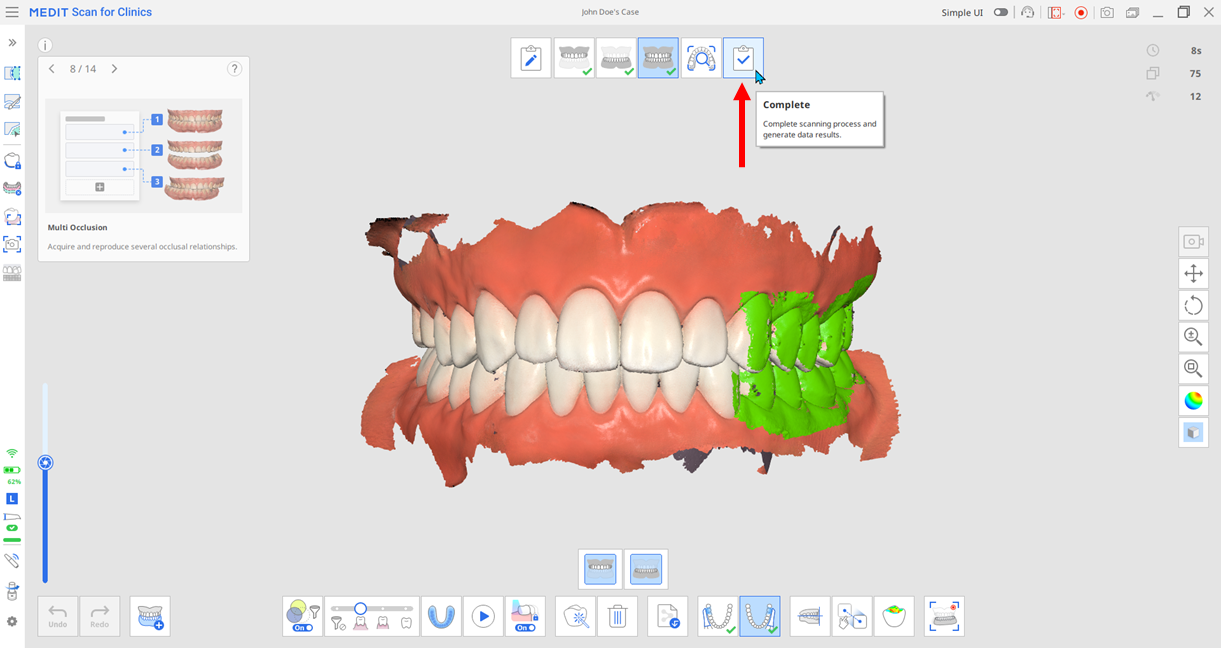
Clicking the icon brings up a pop-up where you can choose from three processing options. Post-processing will proceed according to the selected option.
*Post-processing: Removes improperly captured regions, noise, and overlapping or distorted artifacts, and refines the scan data into a clean, accurate 3D digital model suitable for clinical use.
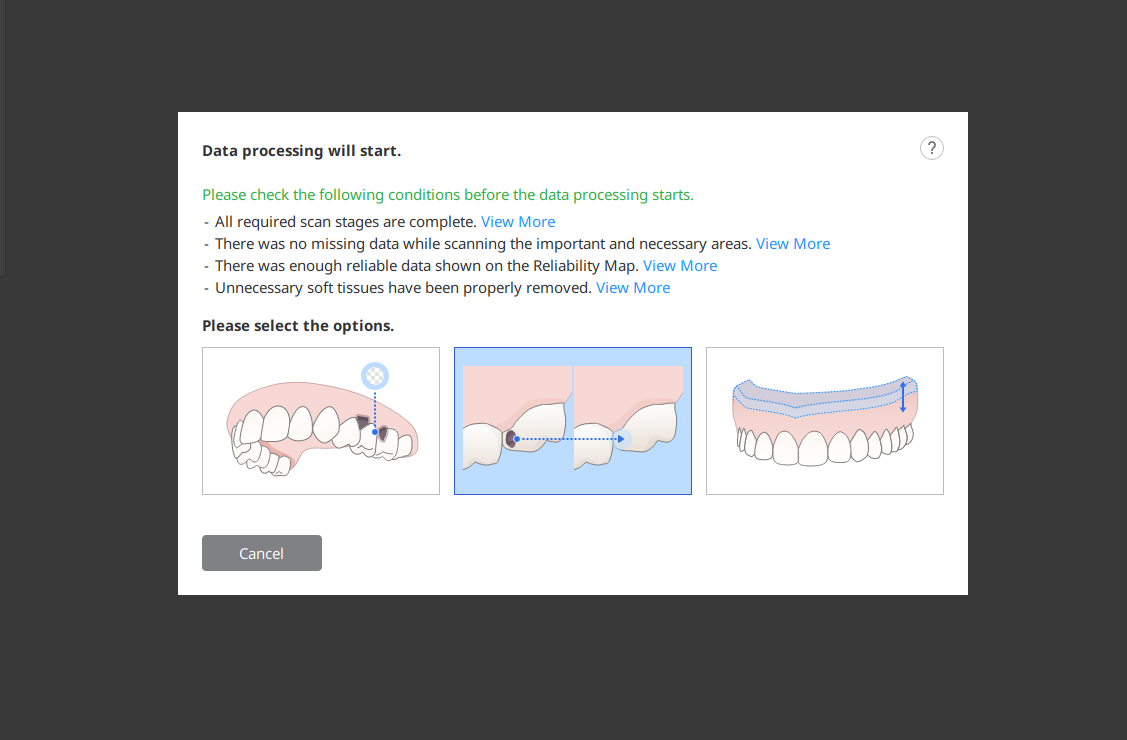
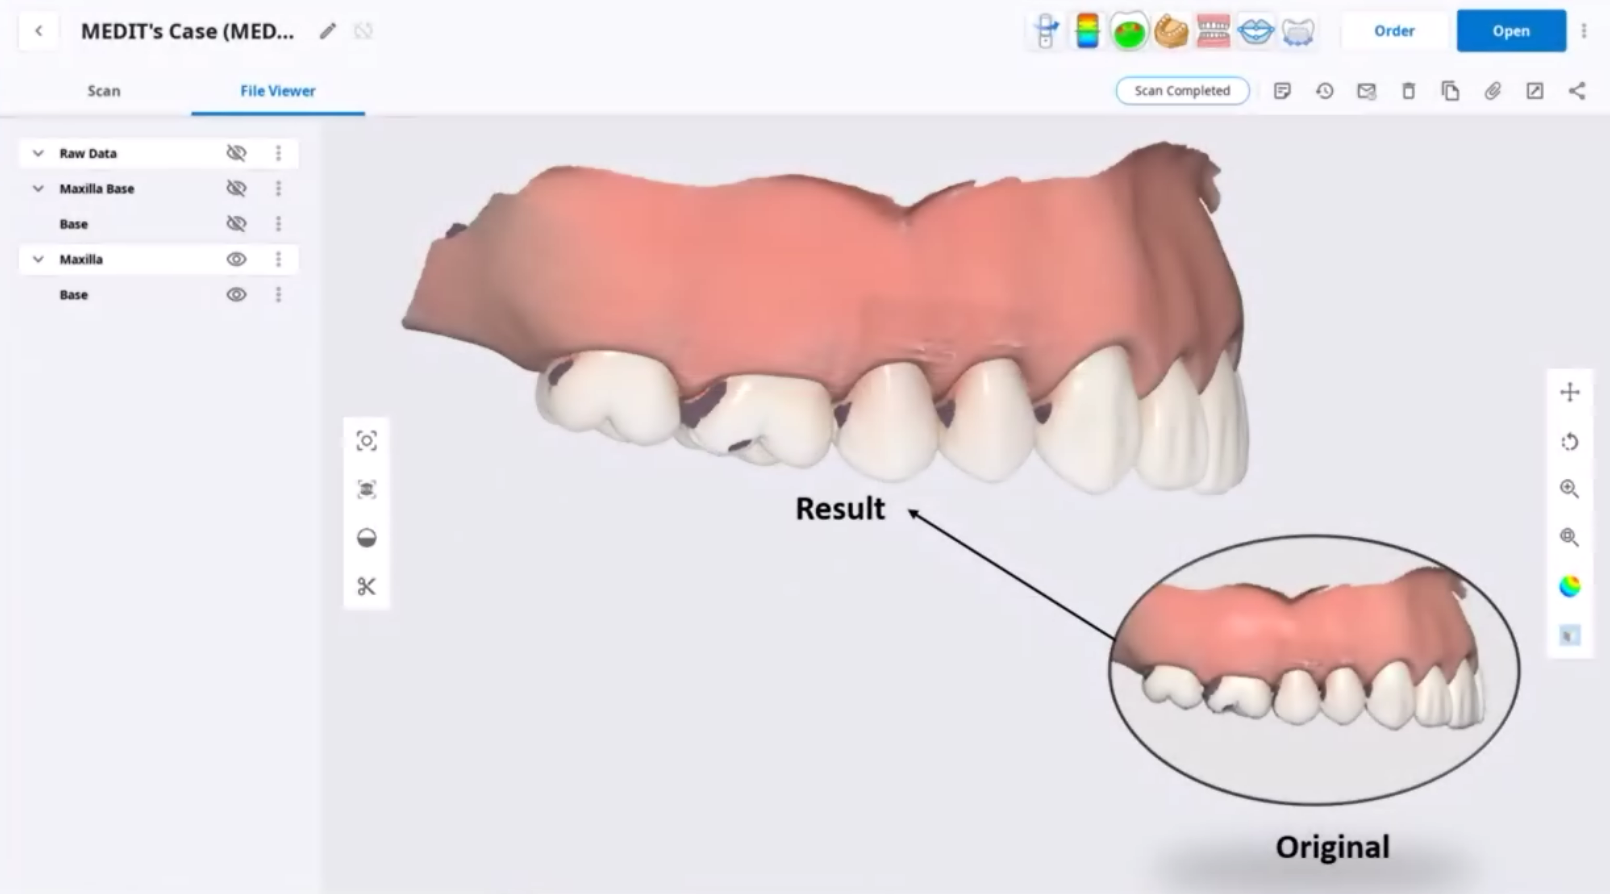
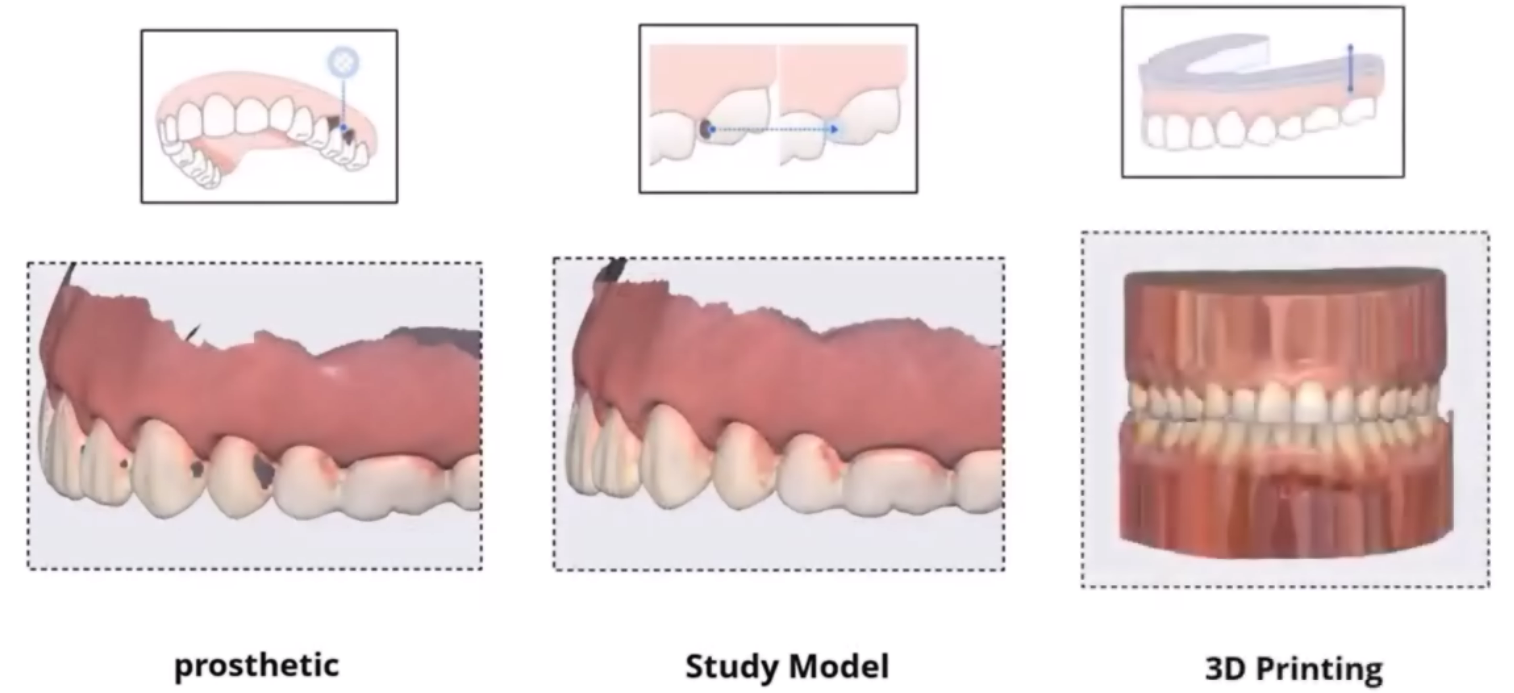
14-1. Process Data (As It Is)
This option post-processes the scan data exactly as captured, without any refinement or editing.
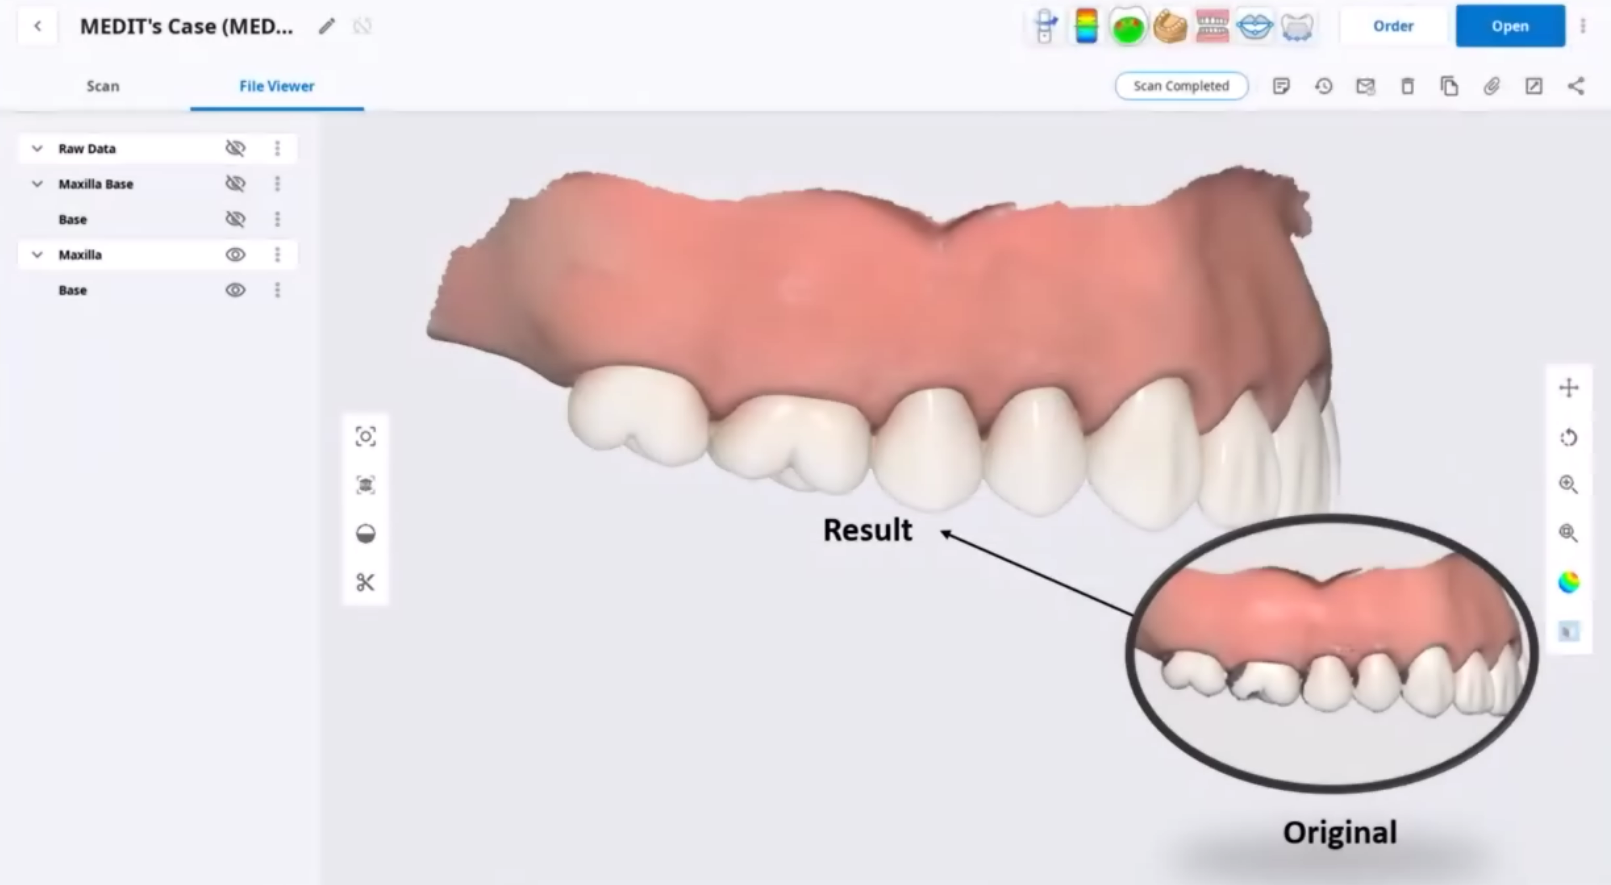
14-2. Fill Major Holes
This option post-processes the data by filling empty areas based on a reliability map, extending the trustworthy data around the holes to close them.
14-3. Create 3D Printable Model
This option post-processes the data by directly generating a base to create 3D model data, eliminating the need to work in the Model Builder app.
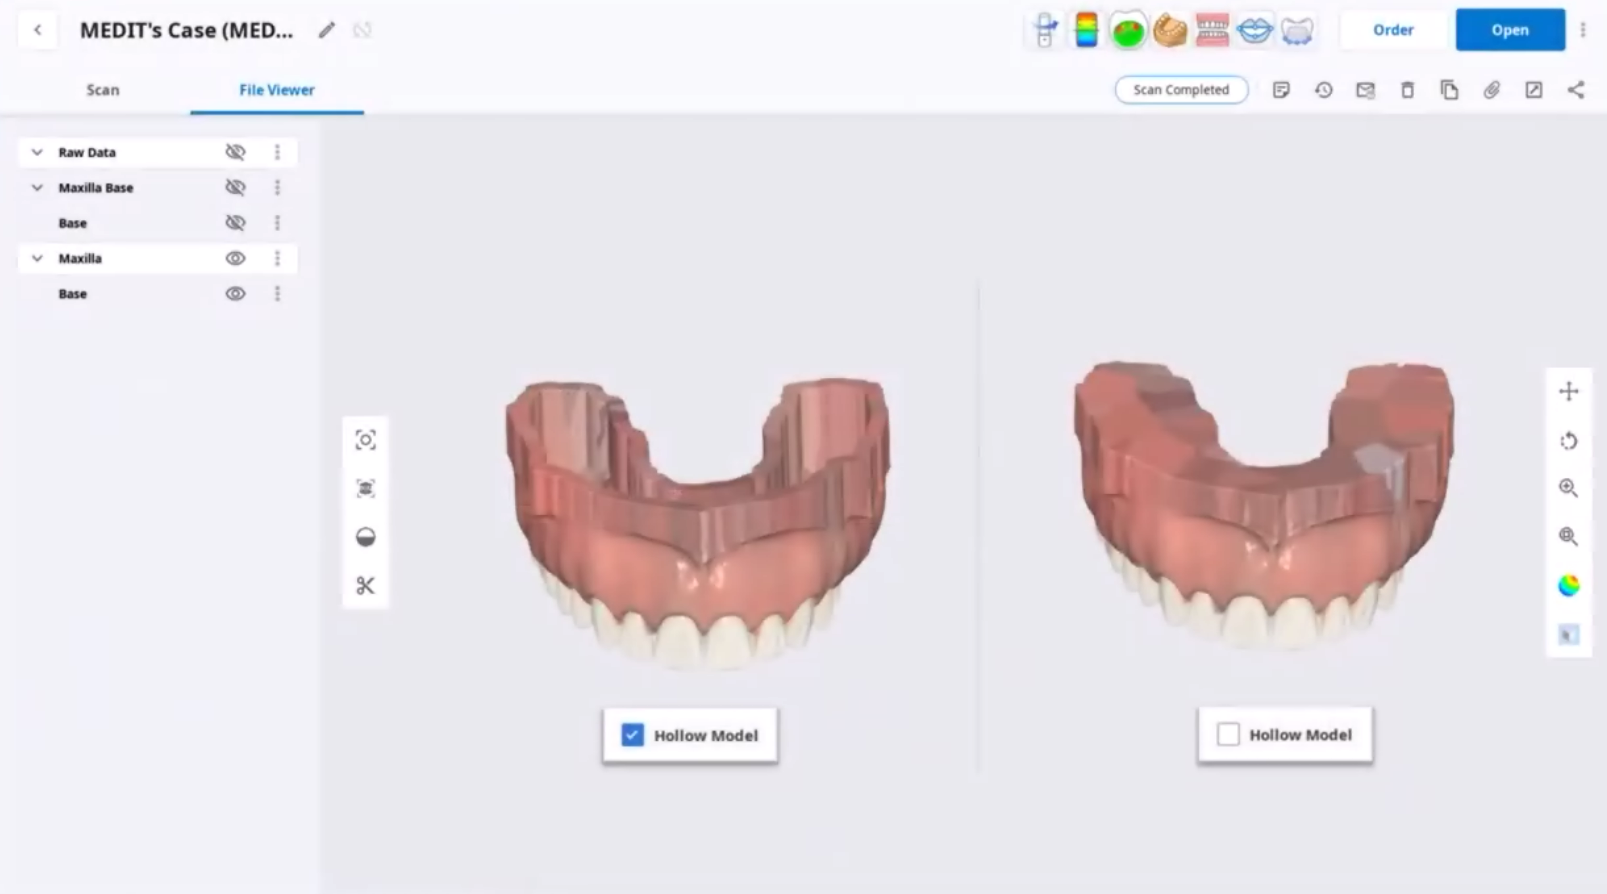
14-4. For prosthetic restoration cases or cases where even slight modifications are not permitted, select the "Process Data (As It Is)" option. For orthodontic cases or cases involving diagnostic and study models, select the "Fill Major Holes" option. For cases that require a 3D printable model, select the "Create 3D Printable Model" option.
To send a case to the lab, you must first establish a partnership with the target lab. Once the partnership is established, the lab's account will be added to your partner list, and you can send cases until the partnership is terminated.
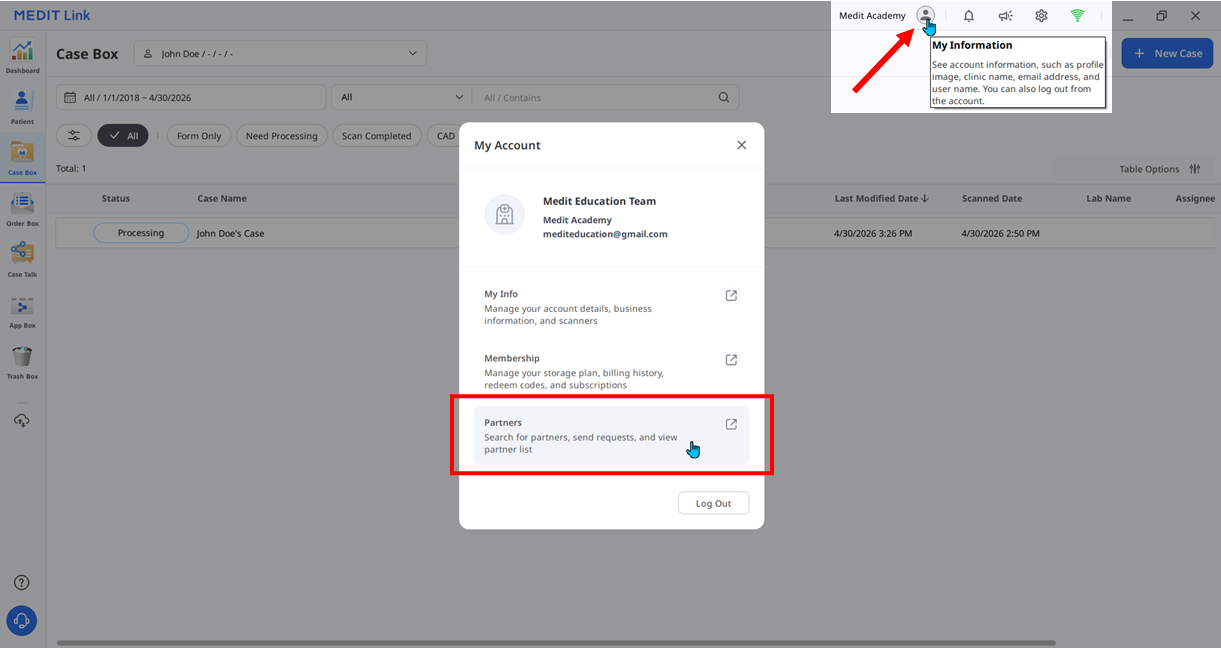
15-1. Click the profile icon (My Information) at the top of Medit Link, then click the "Partners" shortcut to go to the Partners tab on the Medit Link Website.
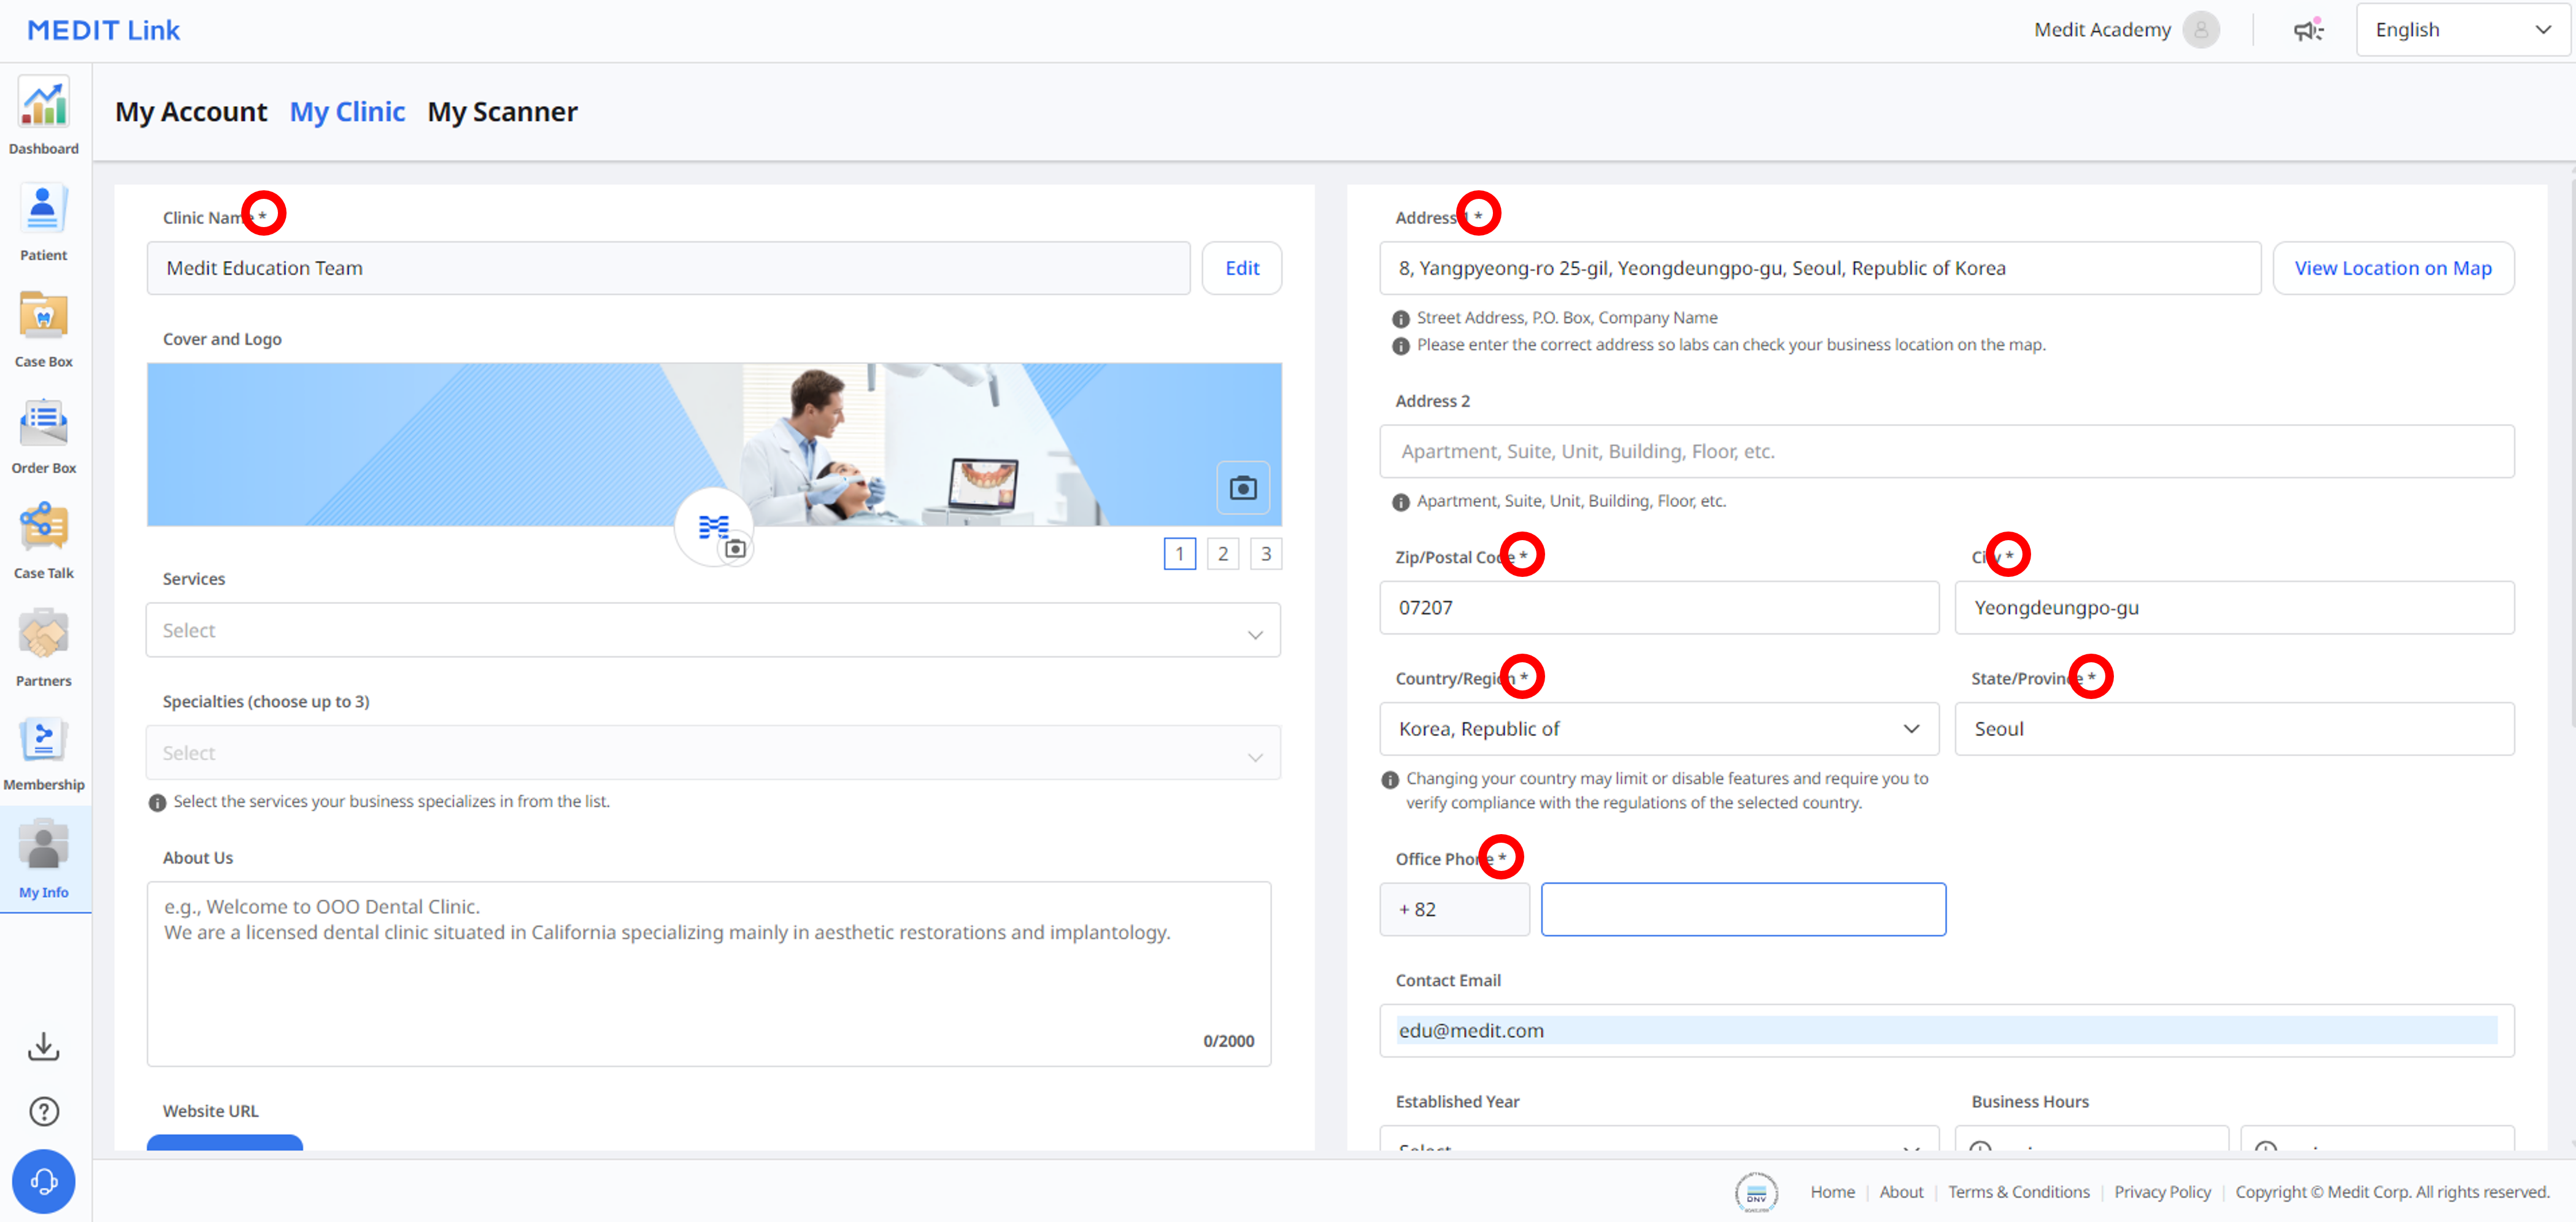
*If you have not yet entered your clinic information, you must enter it first. (Please fill in at least all required fields.)
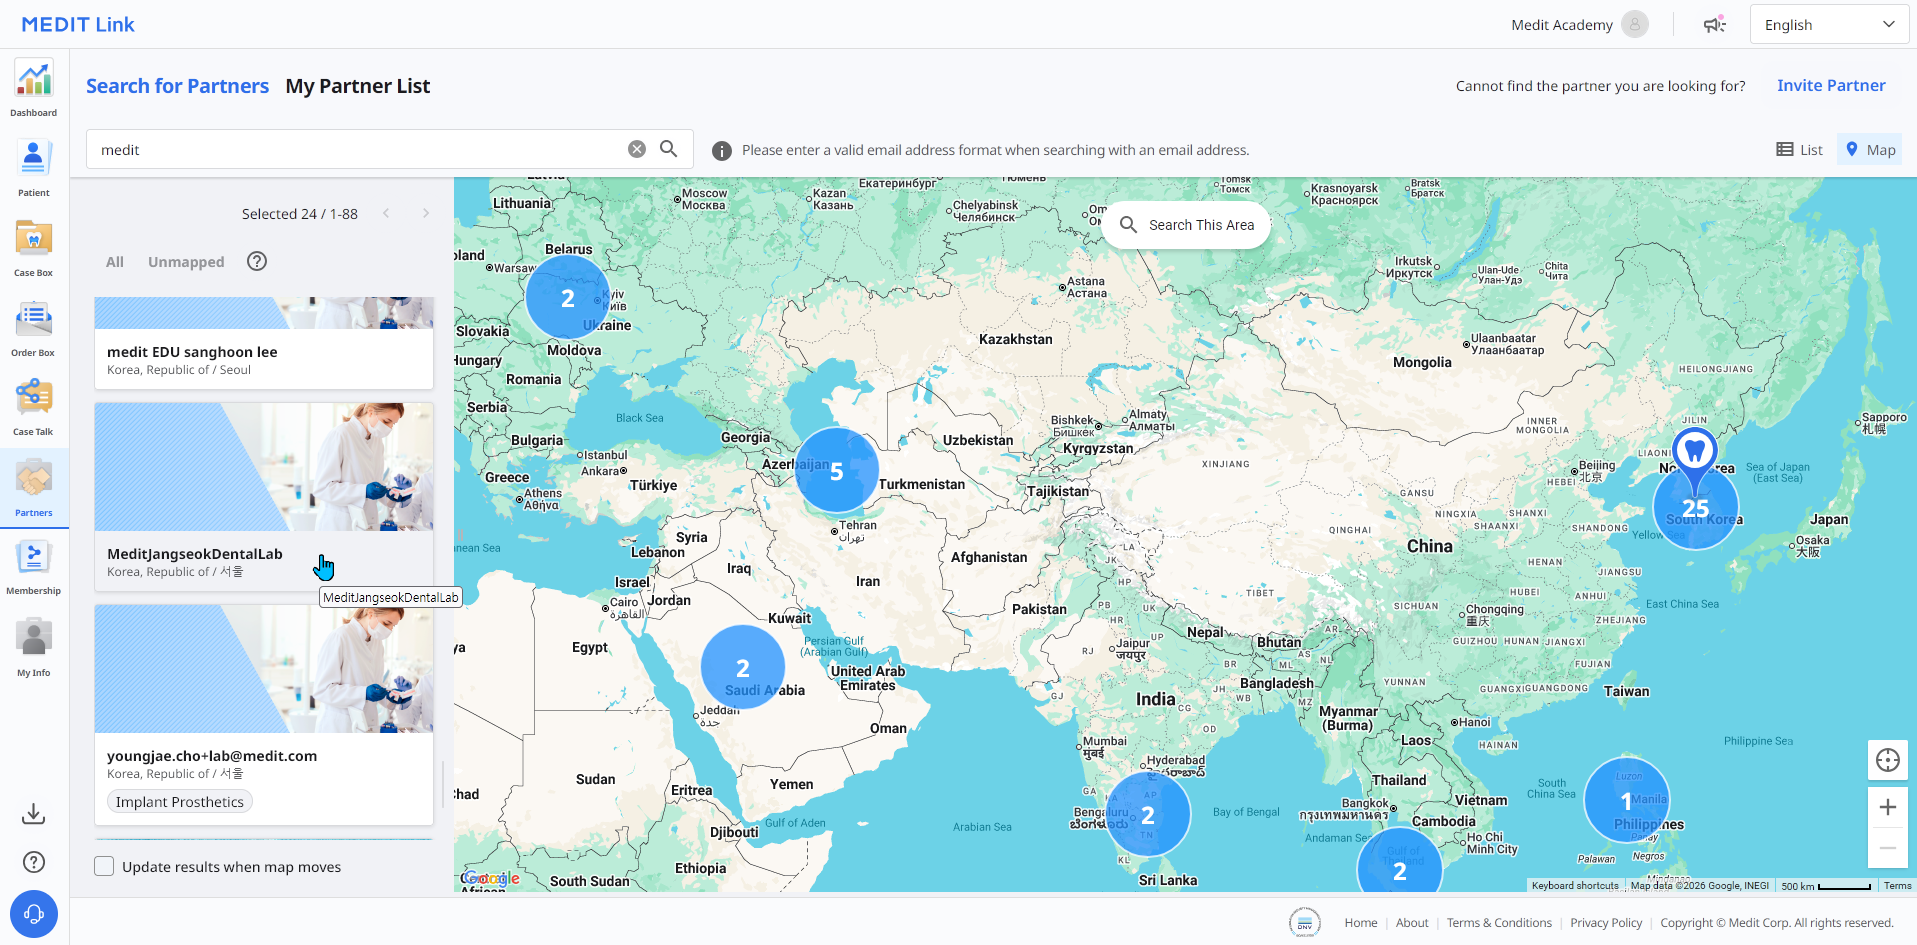
15-2. In the search bar, enter the target lab's Lab Name, Medit Link account (Email Address), Zip/Postal Code, or Lab Address to find and select the lab.
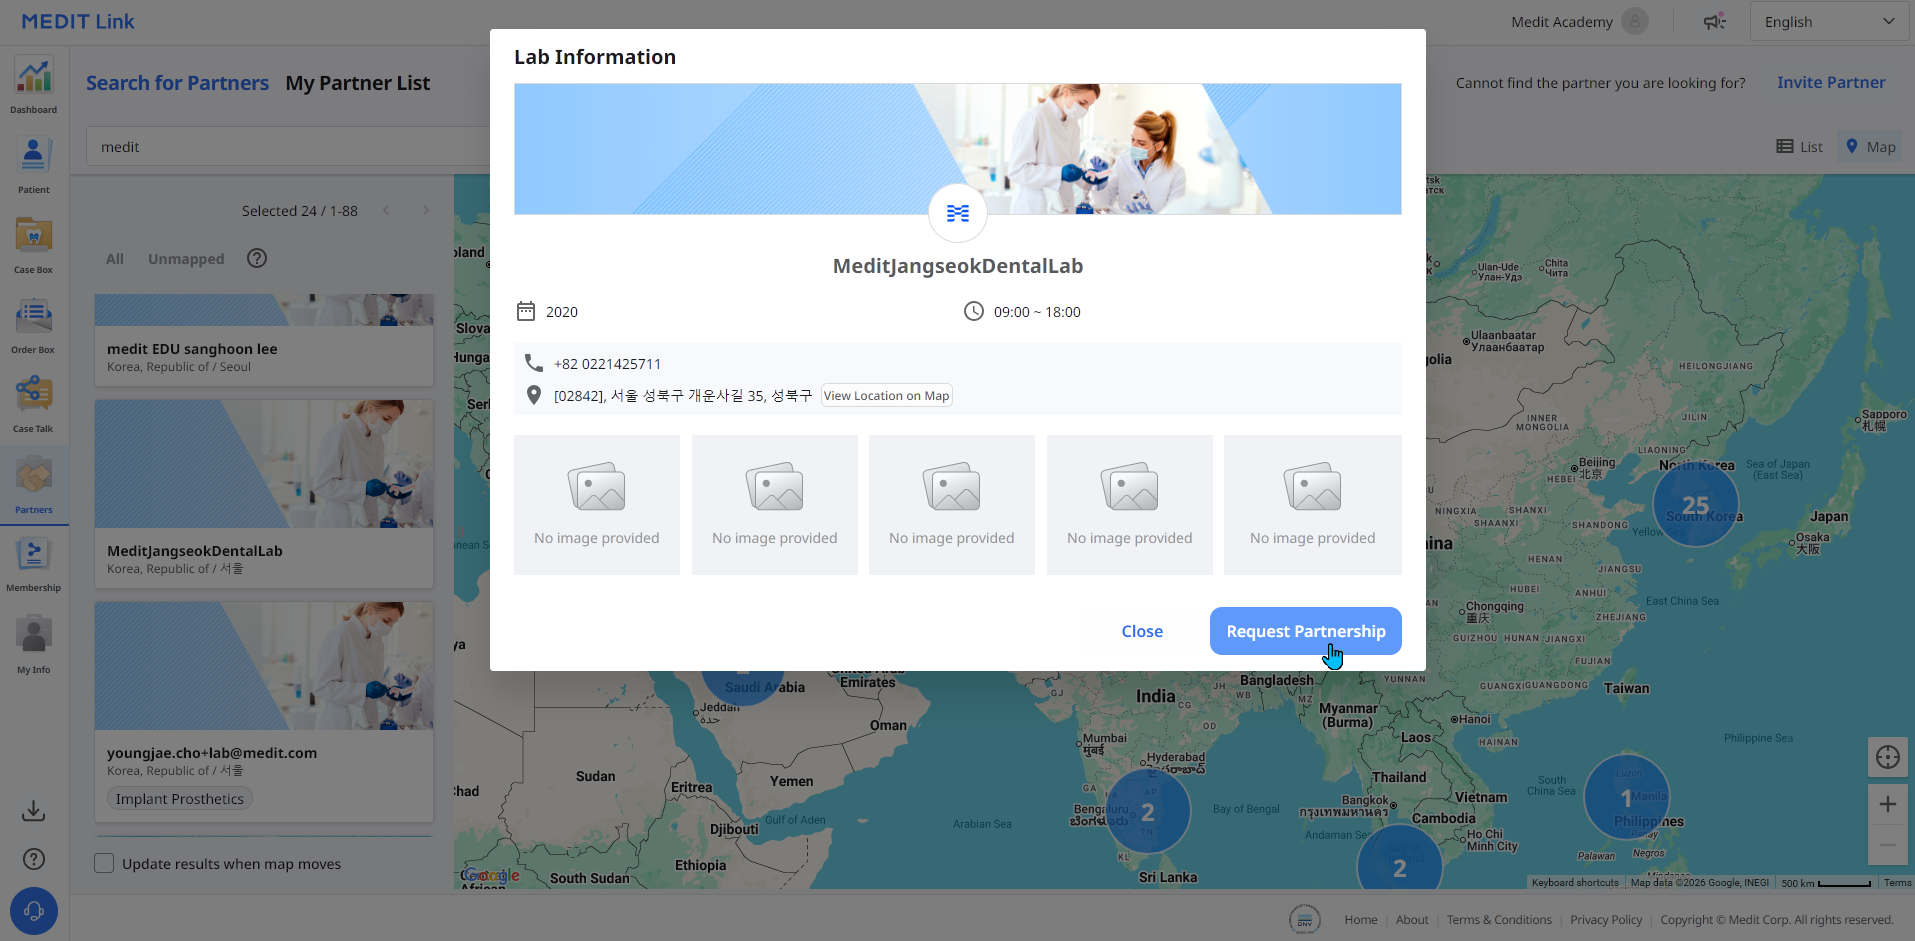
15-3. After reviewing the selected lab's Lab Information, click the "Request Partnership" button to send a partnership request to the lab. A partnership request email will be sent to the email address registered with the lab's Medit Link account.
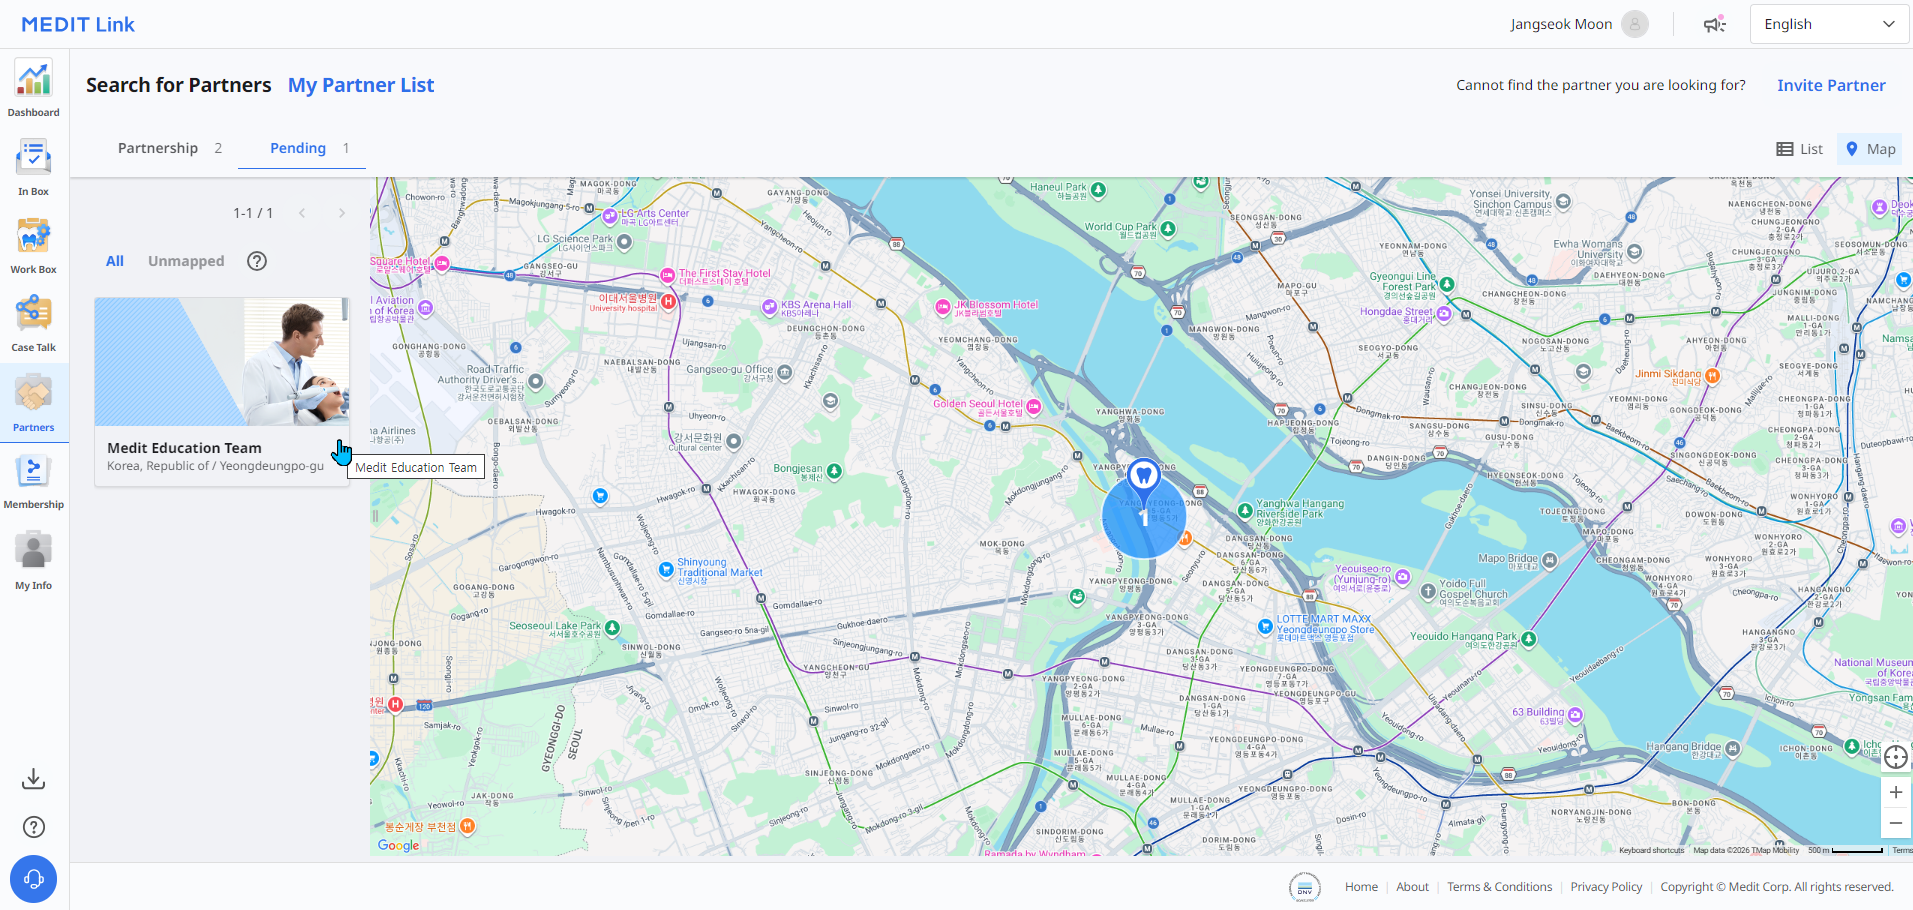
15-4. From the lab's Medit Link account, the lab can accept partnership requests from clinic accounts via Partners tab → My Partner List → Pending. Select the clinic account you wish to partner with.
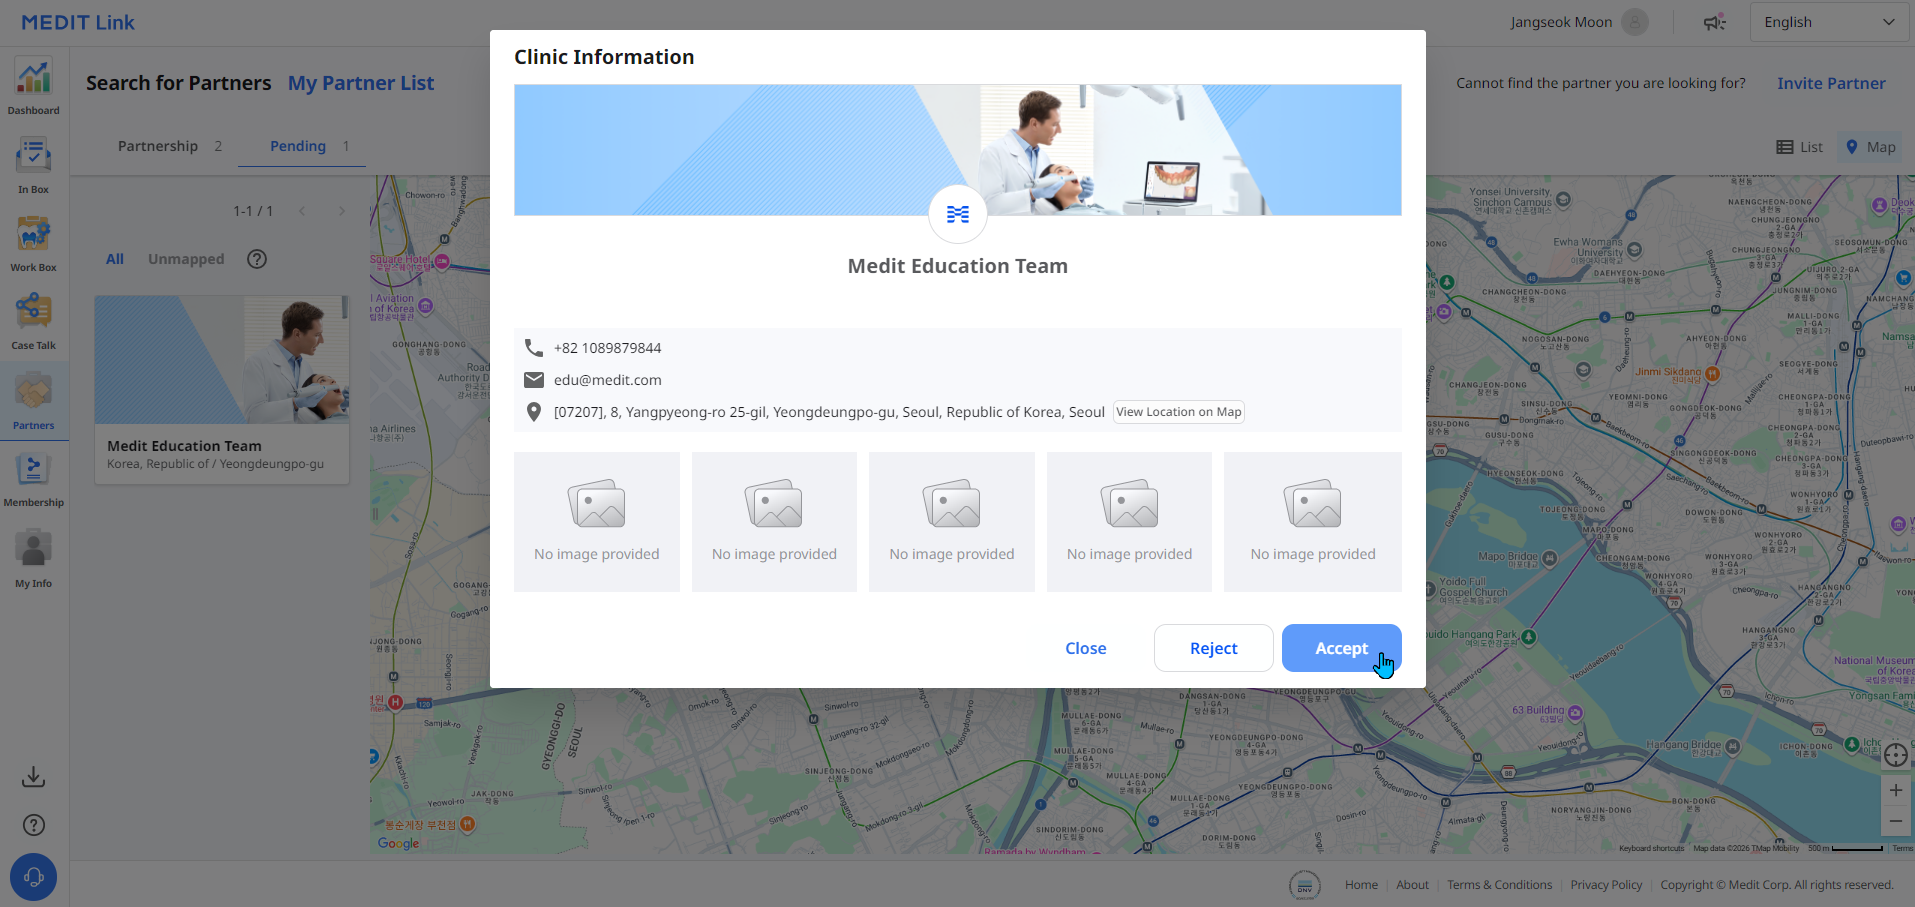
15-5. After reviewing the selected clinic's Clinic Information, click the "Accept" button to establish a partnership with the clinic. An acceptance notification email will be sent to the email address registered with the clinic's Medit Link account. You can also view your list of partners via Medit Link Website → Partners tab → My Partner List → Partnership.
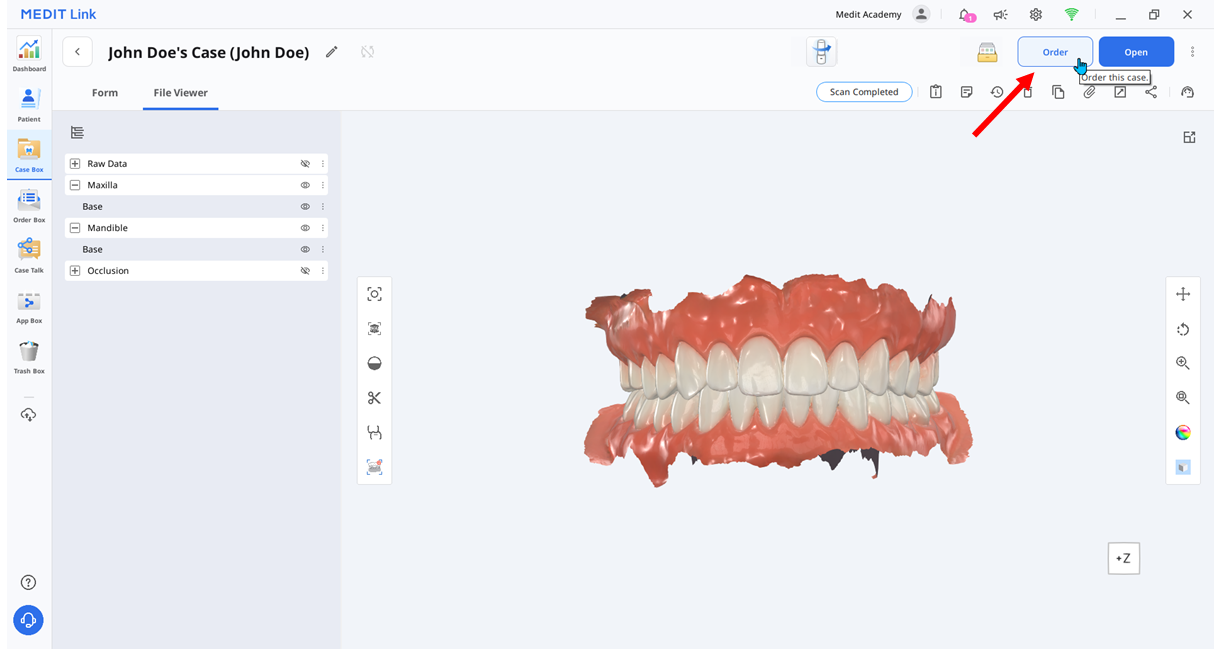
15-6. Check that the status of the case you wish to send to the lab is "Scan Completed." If the status is "Need Processing," click the status icon to complete Post-Processing. Then click the "Order" button at the top-right of the screen.
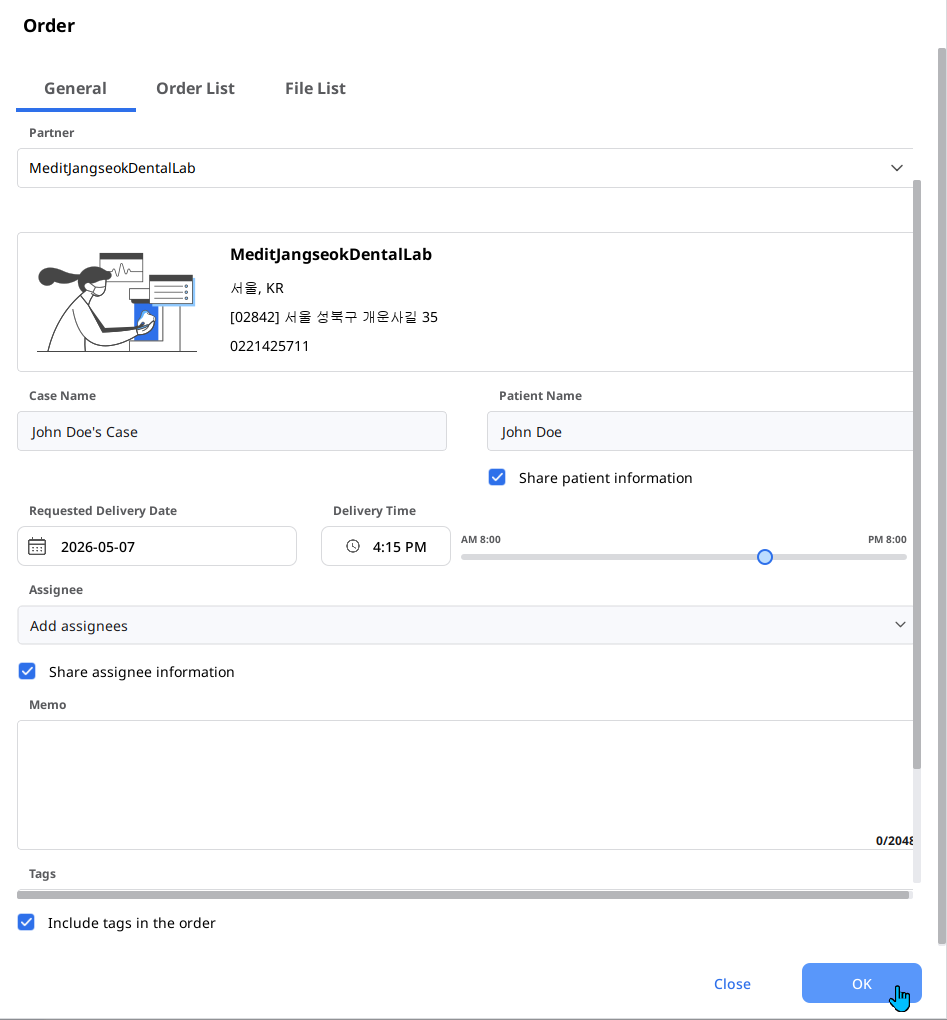
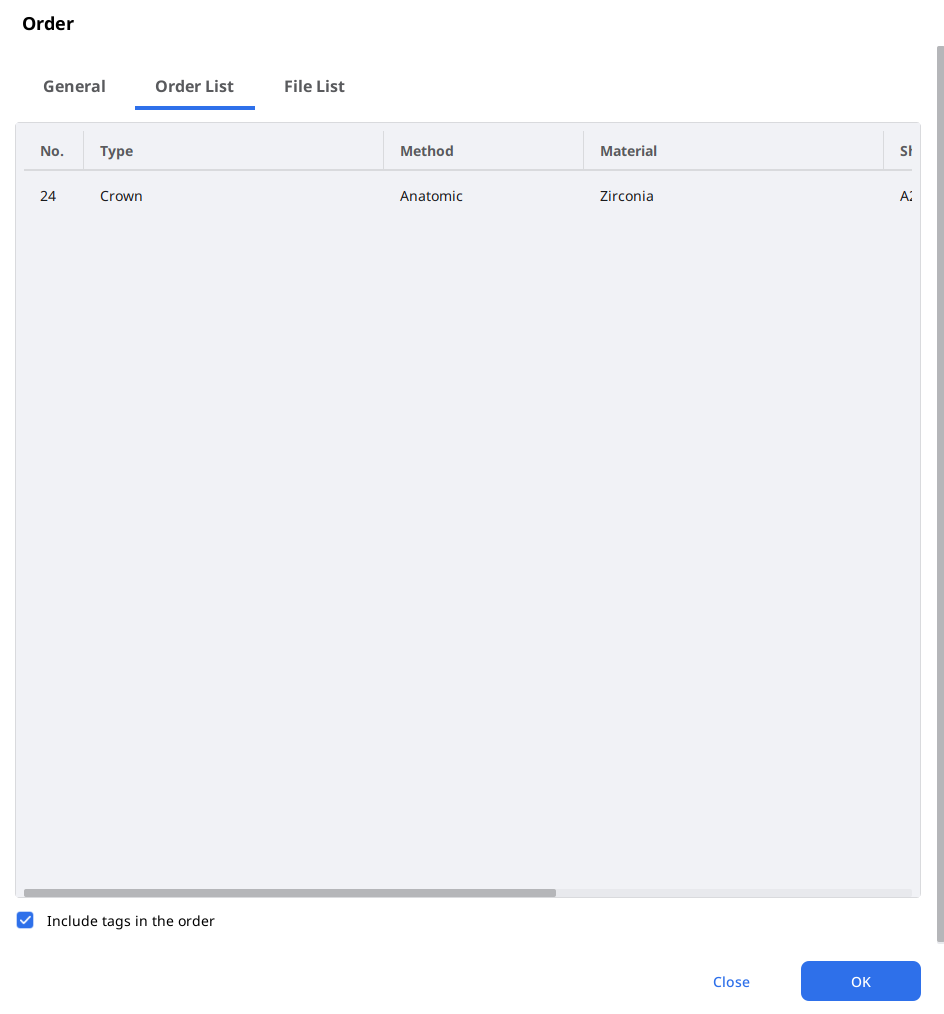
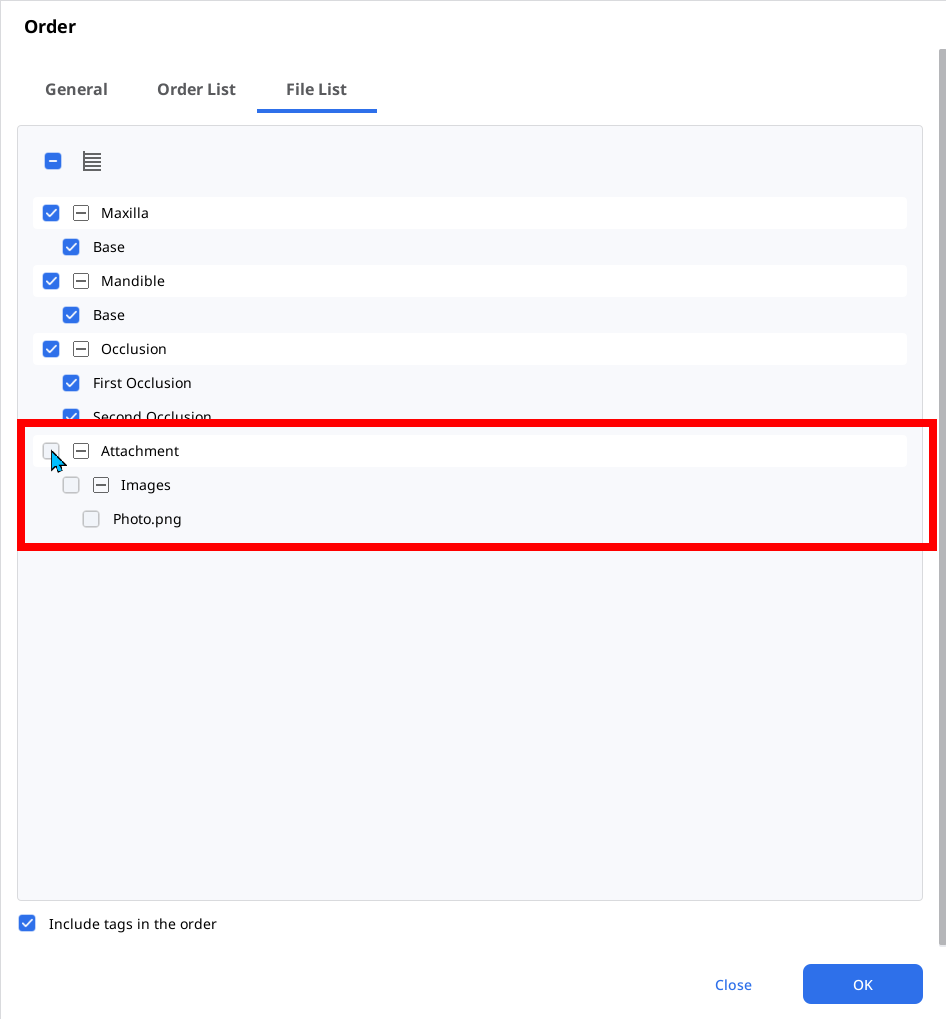
15-7. After verifying that the Order list details are correct, click the "OK" button at the bottom to send.
15-8. Once the transfer is complete, the case status will change to "Ordered."

16-1. Reusable Tip
Dilute a general neutral detergent at a 1:100 ratio and clean the entire tip with a brush, then rinse thoroughly with purified water. Remove moisture with a paper towel and allow the tip to air-dry completely at room temperature for at least 80 minutes.
Disinfect the tip using a disinfectant containing 15% or less Isopropyl Alcohol (IPA) for 1 minute, then ensure it is thoroughly dried at room temperature for at least 5 minutes.
Insert the reusable tip into a paper sterilization pouch and seal it, making sure that it is airtight, then sterilize it according to the autoclave's instructions for use. The tip can be re-sterilized up to 150 times, after which it must be disposed of.
The reusable tip must be sterilized before disposal. Dispose of it as you would any other clinical waste.
16-2. Handpiece
The optical window is generally not subject to cleaning. If contamination occurs, gently wipe it with a soft cloth (lint-free microfiber cloth). After cleaning, put the cover on to protect the optical window.
*The recommended cleaning solution is denatured alcohol (ethyl alcohol or ethanol) – typically 60–70% Alc/Vol. Moisten a soft cloth with the cleaning solution, wipe the handpiece surface thoroughly, and allow it to dry completely.
16-3. Other Components
*The recommended cleaning and disinfecting solution is denatured alcohol (ethyl alcohol or ethanol) – typically 60–70% Alc/Vol.
Pour the cleaning and disinfecting solution onto a soft, lint-free, and non-abrasive cloth.
Wipe the component surface with the cloth.
Dry the surface with a clean, dry, lint-free, and non-abrasive cloth.
For more detailed information, please visit the related article on the Medit Help Center.
Enroll in the Medit i900 Family Course to access more in-depth content with video lessons, summaries, and quizzes.

This course is for Medit i900 / i900 classic / i900 Mobility users.

Este curso es para usuarios de Medit i900 Family (i900 / i900 classic / i900 Mobility).

Este curso é para usuários do Medit i900 Family. Ele abrange desempacotamento do produto, configuração do scanner e utilização da interface sensível ao toque.

Cette formation est destinée aux utilisateurs du Medit i900 Family (i900 / i900 classic / i900 Mobility).

Dieser Kurs richtet sich an Medit i900 Family-Benutzer. (i900 / i900 classic / i900 Mobility).

Questo corso è rivolto agli utenti di Medit i900 Family.

В нем рассказывается о распаковке устройства, настройке сканера и использовании сенсорного интерфейса.

このコースは、Medit i900 Family(Medit i900/Medit i900 classic/Medit i900 Mobility)ユーザー向けです。 こちらでは、パッケージの開梱、スキャナー設定、タッチインターフェースの活用を取り上げます。

이 과정은 메디트 i900 Family (i900 / i900 classic / i900 Mobility) 구강 스캐너를 학습하는 유저용 코스입니다.

هذه الدورة لمستخدمي ylimaF 009i tideM.